


🚀 Elevate Your Creativity with Precision Printing!
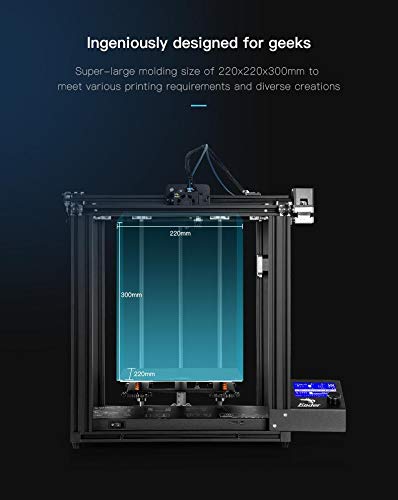
The Creality Official Ender 5 Pro 3D Printer is a high-performance machine designed for both beginners and seasoned makers. With a build volume of 220 x 220 x 300mm, it features a silent motherboard for quiet operation, a durable metal extruder for enhanced filament handling, and a modular design that simplifies assembly. The printer's dual Y-axis motors and robust structure ensure stability and precision, while the resume printing function protects your projects from power interruptions.
| Part number | 3IDEA-ENDR-5-PRO |
| Item Weight | 11.3 kg |
| Product Dimensions | 55.12 x 48.26 x 50.8 cm; 11.3 Kilograms |
| Item model number | Ender 5 Pro |
| Colour | Black |
| Material | Metal |
| Voltage | 230 Volts |
| Item Package Quantity | 1 |
| Batteries included? | No |
| Batteries Required? | No |
A**W
Perfect Inroduction to the world of 3D Printing
As a first-time buyer, I’d been looking into 3D printers for some months when the Ender 5 Pro was released priced at £350, which placed it right within my budget for my first 3D printer.I had eventually settled on the Ender-5 Pro, as I liked the full cubic structure (very stable), respectable build volume (220x220x300mm), and the added Pro features which include; silent main-board/stepper motor drivers, 350w power supply, metal filament extruder, and the upgraded Capricorn Bowden tube.I'm also not keen on printer's where the whole bed moves in the X-Y axis. The bed on this unit only moves in the Z-axis, which seem to be a no-brainer for good quality printing (reduced bed vibration and wear).The modular design means that the ability to upgrade parts is good. Something which is a 'must' for me, as I do like having the option to upgrade as I learn more.The printer was delivered within 48 hours and the packaging was very well and thoughtfully designed, to protect the contents in transit. Although not fully assembled, the quick reference instructions in the box are very clear and everything is included (including a decent reel of white PLA filament).The base and top frames (20x20 section) and the Z-axis come pre-assembled, with the 40x20 vertical aluminium sections then needing to be put together with these, to construct the printer’s cube form.During assembly, do take care to orient the upright sections correctly – fixing hole at the top, as shown in the supplied assembly guide.I took my time, being careful to ensure that everything was square before tightening up the bolt fixings – do NOT over-torque bolts, as I can see that a heavy-handed owner could easily strip the threads in the aluminium sections, if not careful. Fitting the Z-axis and bed was next, which was a very simple process.Do check that belt tensions are good on the X-Y, and that the tensioning 'L' brackets are secure. Mine were already good, out of the box.The electrical connectors are all neatly labelled, which made the final stages of assembly very easy. The hardest part is figuring out how you will route your cables up to the hot-end on the XY (ie; Easy – outside of the cube framing).It took me just under an hour to get it all together, but an experienced 3D printer owner may have it together in less than 20 minutes.Once completed, and with a final check that the X, Y and Z axis all moved smoothly, it was time to power up and go through the bed-levelling procedure.I have the magnetic/flexible build plate installed with mine.The manual is helpful here, directing you to home the nozzle, before disabling the stepper motors to allow you to move the hot-end around the bed by hand, during levelling.If you’re not sure, go check YouTube – there are some good videos out there on how to correctly level a manual bed, with a sheet of ordinary printer paper. You don't want the nozzle to do much more than make light contact/friction with the paper, placed between nozzle and bed. It will almost feel like the paper resonates/vibrates, as you move it back and forth under the nozzle.The levelling adjustment dials under the bed are all easily accessible and quite large in diameter, which is good for making fine adjustments.If reading the manual, a new player might think that just a single pass around each of the 4 corners, using a sheet of paper is sufficient.It just about never is, unfortunately.I made 4 or 5 passes of nozzle checks at each of the bed corners, before I made a complete pass without requiring any dial adjustments for the bed height. Check each corner, until you can complete a pass without requiring ANY adjustment of the bed levelling dials.You’re only directed by the manual to check bed clearances to the nozzle at each of the 4 corners, but I’d also recommend including a check at the centre of the bed, on your final pass. This will indicate if there is any warping present in the bed – no issue with mine out of the box, but it’s a sensible extra check to perform now and again, to verify that your bed is still true. Those heating and cooling cycles will eventually make their presence felt, I think.After using the printer for a couple of weeks, I would say that if you can avoid taking your magnetic mat off when removing your finished parts, then do so. It will save you some levelling check time on your next print (build plate/mat hasn't moved, so should remain level unless you've applied a lot of pressure removing your part).The magnetic mat can settle/sit slightly differently, when re-attached to the bed, so if you do have to remove it to get your print off the mat, then it is a good idea to check that the bed is level again before starting your next print job.For most, this will then be good enough to run your first print out. I downloaded the STL of the rear cover for the printer’s control box from Thingiverse and passed this through the provided Creality 123 Slicer software, to generate the G-Code.When firing up the Creality 123 Slicer for the first time, you’ll need to select your printer. This sets up the Draft, Normal and High quality print profiles for your printer, which should be fine to use for your first prints.This unit comes with a USB thumb drive which has a slot to take the supplied micro-SD card (this comes pre-loaded with a few model G-codes and the slicer software & manual). No need for separate adaptors to transport G-code between your computer and the printer.The SD card goes into the front of the printer, with its gold contacts facing UP. You use the printer’s menus to locate your G-Code and start the print process off.The first layers went down really well, and the conservative quality settings that I’d chosen in the slicer, meant that my first print job was going to take a while to complete (9 hrs+). I left it to run, checking in occasionally and my first print came out perfectly using the bundled white PLA filament (see images).During print operation, you really won’t hear much other than the noise of the cooling fans on the hot end. The steppers for the X-Y and Z are really very quiet in operation.Using the supplied PLA filament, 50% fan-speed seemed to work really well for me, and I had no issues with layer adhesion.I have printed several parts over the past couple of weeks and have had no failures at all so far. Really, it is a very impressive printer at this price.If I get into using softer filaments, I may want to look at a direct-drive upgrade for filament extrusion.Almost certainly, I will be getting the BL-Touch upgrade for automatic bed levelling in the near future, even though manual levelling is really quite simple.Both are very affordable upgrades, that are not too difficult to do.For me, this has been a perfect introduction to the world of home 3D printing and I’m enjoying the creative possibilities already.I am really pleased with how easy it was to setup and begin using, but offer a few words of caution to those new to 3D printing;Do your homework.There are lots of community forums, videos, guides and tutorials out there that will help to inform you on all of the things that can adversely affect your chances of print success.I saw one guy’s video, where he was almost tearing his hair out with first layer adhesion issues on an Ender, and it turned out to be due to a series of newbie errors on his part.TIPS:- Don’t store/use your printer in a cold room, like the garage – this will screw your layer adhesion up horribly and leads to print failure. If you have nowhere else for it, then get an enclosure and/or heat source to try and keep the ambient temp above 17-18C or so.- If you find yourself having to use a glue stick to improve first layer adhesion (apparently commonplace for glass bed users), clean the plate after. Build-up of adhesion product will eventually lead to print failures, as this reduces the gap between nozzle and bed.- Make sure your filament is clean and dryI would definitely recommend this printer to anyone looking for quality, solid FTM printer in this kind of price range, whether a beginner or seasoned 3D print creator.Thank-you Creality!
S**W
Great printer just be sure to buy good filament
This is my first 3D printer and I did a fair bit of research before choosing this printer so i was expecting all sorts of issues before I got any sort of decent print, and I wasn’t wrong, tried multiple prints from the sd card installed and all failed at some point, i went for the pro instead of the standard ender 5 as I knew I would end up put the upgraded parts on anyway so I cut to the chase, this is ironically what’s caused the failed prints.The printer comes with Capricorn tube as standard this has a small tolerance internal bore to better support the filament and produce better prints, however the diameter of filament supplied which the printer is all over the place and binds in the tube and causes the filament to jam and not extrude, so basically don’t use it!!!Once I’d figured that out I used some esun pla plus, and my god what a difference, without touching the settings in cura (4.4) it prints really well, the hardest part is just levelling the bed I recommend not using the outer most edges to level as on my machine these are actually high points and gave me a poor finish on my bottom layers, instead I levelled about an inch in from the edges and it’s much better I have however already ordered a glass bed to help with levelling.Last issue is with the board fan, it’s a bit noisy to the point I thought it had failed or is failing but it hasn’t it’s just noisy at max pelt, it’s a 40mm 24v fan and I will be replacing it with a better one for sure aside from that the printer is a lot quieter than I thought and can easily leave it running whilst I tv etc.Apart from the things I’ve mentioned I’m over the moon with this printer it’s sturdy, easy to assemble and I’m glad I brought it at a good price and service from this seller, I also recommend watching as many ender videos on utube as you can before you get the printer there is loads of great tips and info on it to help with your first print.
M**.
A very capable machine
I'm pleasantly surprised at how good the results from this FDM printer can be compared with my existing resin printer, especially at this price point. Results compare favourably with FDM printers at twice the price.A solidly constructed machine, quick and easy to assemble, it was up and running within an hour, no problems. Everything needed is included, down to tools and a spare extruder nozzle.Well pleased with my purchase.
D**E
Reliable And Solid 3D Printer
I have had the Ender 5 Pro for two years and I am extremely happy with it.I was very careful when I constructed my printer from the parts provided and it has been an excellent printer in return.I have printed many useful items. (Some free object files and some of my own design) The quality and utility of printed items has been top notch.A 3D printer is not a Star Trek Replicator and takes some time and skill to master (i always print PLA on a 220C bed with a 60C nozzle temp) but once you have it down you can use free slicers and toss them on your Ender 5 Pro with confidence. Great Printer!!!
K**S
Good
I have been using this for nearly a year now and there have been no problems so far, beside manual adjusting some screws for better prints but that is to expect.
G**I
Impossibile...
La prima recensione mi é stata rifiutata, forse un po troppo dura, ci riprovo.Se volete comprarla fatelo ma tenete in considerazione che:Venduta d spedita da amazon, e' arrivata nei tempi previsti ma col telaio preassemblato decentrato e il piatto concavo, comunque l'ho montata. Prima stampa un groviglio, mi sono impazzito per livellare il piatto fino ad arrivare a stampe quasi decenti. Nel frattempo ho chiesto supporto ad Amazon che mi ha consigliato di chiedere a creality ufficiale la quale non ha mai risposto alle molteplici richieste,mi sono iscritto a,6 gruppi, compreso creality ufficiale (che continua a non rispondere). Guardato centinaia di post e Video e non si riesce ad aggiornare il firmware, questo é necessario per settare la lingua, installare il sensore di filamento e altri settaggi per migliorare la stampa, in pratica a 3 settimane dall'acquisto è. Quasi inservibile. Tutti i gruppi consigliano di sostituire quasi tutto, dalla scheda all'alimentatore, rimarrebbe solo il telaio e il cavo di alimentazione. Fate voi. Vediamo se questa recensione passa come utilita'' per chi vuole acquistare.
R**F
Very easy to use and works great.
This is my first 3D printer but this thing works great right out of the box.After using it for a while, it has a couple of issues that should probably be updated by Creality.First the bed needs some stabilization. There are updates that can be printed and they work well but an injection molded support would be far superior. Next the fans are not the best. One of mine was out of balance and caused the carriage to vibrate. That was also easily fixed with a new better quality fan.That said, this thing works great. The bed is flat and the print surface is very easy to use. The included slicer is great and where Cure may be more flexible, for a beginner the included slicer can’t be beat.Assembly was simple and everything worked as it should.
J**.
Solid 3d printer and customer support
The printer arrived as advertised although UPS sent it on an endurance test by the looks of the outer box. The contents were well packed and no shipping damage could be found. The 3D printer assembled easily according to the instructions, cable connections were just as easy because all of the cables had connectors and labels along with diagrams / pictures in the instruction booklet.I did have a small issue, one of the molex 3-pin connectors was cracked and missing a portion of its outer casing. I contacted the vendor RICHOOSE, explained the situation, the next day I received an email stating that we don’t have any in the warehouse currently, You may purchase this and we will refund your costs. I found the switch on Amazon sent the vendor a picture of my order, I received an email the next day with a confirmation that I will be refunded the cost of the part.As for the printer I have printed 2 of the 3 test parts and they ran with no problems the quality of the finish was very good. I am happy with my purchase and a vendor who did put the customer first.
Trustpilot
1 day ago
2 weeks ago