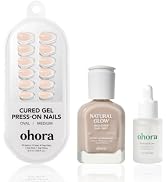
Desertcart purchases this item on your behalf and handles shipping, customs, and support to Philippines.
💅 Elevate your nail game—glossy, durable, and effortlessly chic!
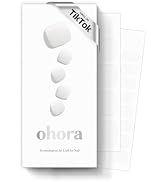
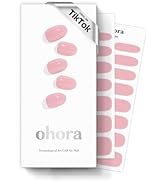
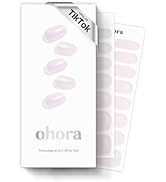
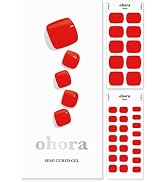
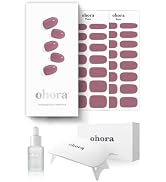
ohora Semi Cured Gel Nail Strips (N Onyx) offer a salon-quality manicure experience with 30 gel strips in 15 sizes, designed for a perfect fit on all nail shapes. These semi-cured gel wraps cure under any UV/LED lamp, delivering a waterproof, chip-resistant finish that lasts up to two weeks. The kit includes essential prep tools for easy application and removal, all while being vegan and cruelty-free—ideal for professionals seeking a stylish, long-lasting nail solution at home.


| ASIN | B084FWPQYG |
| Best Sellers Rank | #7,424 in Beauty & Personal Care ( See Top 100 in Beauty & Personal Care ) #20 in Nail Art Stickers & Decals |
| Brand | ohora |
| Brand Name | ohora |
| Color | N Onyx |
| Coverage | Full Well Tips |
| Customer Reviews | 4.1 out of 5 stars 3,588 Reviews |
| Finish Types | Glossy |
| Included Components | Nail File |
| Item Form | Pad |
| Item Shape | Irregular |
| Item Weight | 0.06 kg |
| Manufacturer | ohora |
| Manufacturer Part Number | NB-023 |
| Material | Gel |
| Material Type | Gel |
| Model Number | NB-023 |
| Number of Items | 30 |
| Number of Pieces | 30 |
| Pattern | Solid |
| Size | 15 different sizes |
| Special Features | Basic, Full color |
| Theme | beauty |
| Unit Count | 1 Fluid Ounces |
N**E
I'm a convert!
I've been through a million nail products, all the way back to silk wraps (Yes, I'm old.) I am finally absolutely delighted without reservations. This is my second time doing semi-cured. My shaping isn't going to win any awards, but they are so easy to do. They last 2+ weeks (I did one layer of Mefa gel topcoat when I applied them and then another a week later to freshen them up.), and most importantly, they don't damage my nails when I take them off! I was very dubious. I've trashed my nails with no chip and gel and dip powder and glue ons and sticker-ons. These somehow stay on well, but come off easy. It must be witchcraft. Whatever, they're my new favorite thing. I like that they can be stretched a little bit if a strip isn't quite wide enough or, like me, you have a crooked nail ("no honey, that your nail!" = truth) that needs a little extra on one corner. I also easily cut like half a millimeter from one side to fit my thumb perfectly. I give a lot of attention to the edges, pressing them down hard with the flat end of an orange stick, and then going back and rolling over the edges with a good amount of pressure on the side of the orange stick. Then I press/roll the orange stick from the cuticle to the free edge, overlapping passes, to smoosh and smooth it over the nail. This dulls the strip, but it doesn't matter because my top coat shines it up again. I can even cut these a tiny bit longer than my nail - not much, I wouldn't go as far as an extension - but it helps to even them out of it have a shorty or two. I used a glueless press-on to help shape it, putting it under the UV light for a few seconds and then rubbing the gel strip with the press on to get it in shape, then under the UV light again. (See my 3rd picture, it's hard to describe.) Then I did a layer of topcoat on the underside of my nail, sealing the free edge to the strip. (Remember to wipe any excess off your skin - the pointy end of the orange stick works well for this - or it will burn the blank out of you under the UV light!) Plus, there's enough in the package with the right sizes for me to do another set. So the price is only half, per set. I just save them in a black sleeve in an airtight zip top bag. I decided not to do accent or mixed nails - again, old - so I have a whole glitter set from this package waiting for me, and 5 more of this dark purple ombre I can cut or stretch if I need to replace any. They feel as strong and secure as gel nails, but they're almost as thin as no-chip over natural nails. I'm in love.
J**S
Great nail wraps, short learning curve, prep your nails for longer wear
I wanted to take a break from press-on nails/nail glue so I bought a few packs, Cream Moss (a beautiful dark olive green), Candy Blood (cool sparkly drippy style for Halloween) and Einspanner (patterned white/espresso combo). I read a few reviews for instructions and also purchased the Ohora UV curing light (which is plenty powerful for a such a small thing) and the gel top coat. I knew nothing about how to make these nails work, but figured the prep would be similar to press-ons. My first effort with the Einspanner style stunk: I lost three nails in less than 8 hours. Second efforts was infinitely better. Here’s what I learned: 1. Shape your bare nails and buff; 2. Put on high spf on your hands to protect from the UV light; 3. Use a nail dehydrator or acetone polish remover to dry out your nails: this is a crucial step imo. I used the alcohol pad that came in the box from that first set I tried and several nails popped off in less than a day; 4. Place the strips and press firmly into your nail with a tool that won’t put creases into the gel, and be sure to spend time on area around nail bed to reduce potential hair-snagging. Unfortunately, I put a couple of creases into the Candy Blood nails, but they weren’t too noticeable because of the sparkle; 5. Trim the strips down to your nail. I discovered you can allow for a tiny “lip” if the strip to go past your nail tips, but not much more than that or they might curl slightly up unnaturally after curing; 6. Cure nails twice as long: I hit the button twice, dunno if this actually helped but didn’t seem to hurt; 7. Filed cured strips into shape; 8. Applied Ohora top coat and cured again. Overall, when you prep correctly the strips are awesome. They allow your nails to grow in, and removal is pretty easy and undamaging. The Candy Blood nails lasted 12 days and I didn’t have any snagging. The green nails have lasted 8 days, but a few nails are snagging my hair, which probably means I should do a better job pressing down by the nail bed before curing. I prefer the solid green color to the brown patterned nails I tried first because they sort of looked like they were printed, not terribly so but maybe a little I’m looking forward to buying more of these and also trying other recommended brands!
K**R
Easy to apply and look fantastic.
Love this color! It is so flattering. The strips are easy to use and look so pretty. I will definitely use this brand again.
C**N
Great for beginner DIY'ers or for those that want a fast fresh new look
Let me start out by saying that I have wide nail beds, my nails break / chip easily, I have very flat nails with very little to no natural apex, my nails have a moderate c-curve, my preferred nail shape is squoval and that I am VERY OCD about my nails, a perfectionist. My nails are slightly wider on my right hand compared to my left hand by two (2) to three (3) millimeters. I typically do my own gel and dip powder nails. When I do gel nails I always use builder gel to provide the extra strength and protection that my nails need but also to build an apex. For these to fit I have to stretch these width wise as much as I can and two broke. After stretching these fit my left hand fine but this is not the case for my right hand leaving the free edges of my sidewalls uncovered (and by the same amount in which my right hand nail beds are wider by in relation to my left hand nail beds). Now this could be due to the fact that these are applied to my nails in which I built up using a builder gel to form a nice apex, overlay not extensions. Shaping the product couldn't be easier! I did use the included file but found myself switching to my 100, 180 and 240 grit files. Instead of using the provided wooden cuticle stick I prefer to use my plastic cuticle stick with a silicone edge on the angled side. In both cases while pushing the product to cover as much of my sidewalls as possible I noticed that the product does dent and leaves some marks from the tool used. Similar situation for trying to thin out the line at the cuticle edge as well. With that said imperfections are not even visible after curing the product. I don't have their curing lamp and use my curing lamp which cures absolutely everything inside of 60 seconds. But I cured these three (3) times just in case. These cured very, very well. These are very easy to use and I think these are great for anyone that either just doesn't want to fuss with the more involved traditional gel or dip powder nail processes or just wants to be finished faster with a new set. I pressed these down prior to curing VERY hard on my cuticle line leaving a very small gap and they still look like fake / false nails are on. Maybe I used them incorrectly? Perhaps I should have stretch them out along the cuticle line lengthwise? I don't know. Did I spend less time applying these than doing my own gel or dip powder nails? Absolutely. Did I achieve the polished / finished look I desired with this product? Yes, except for my cuticle lines and the slight gaps along my sidewalls in which the product is just too narrow for all of my nails on my right hand. Was the time I spent applying these worth it with the final look versus gel or dip powder nails? Yes and no due to cuticle lines and sidewalls. Should this product be updated to accommodate wider nail beds? Yes. Is this product easy to use? Yes. Would I recommend this product? Yes, provided that you don't have nails beds as wide as mine.
E**N
Best beauty invention in the past 30 years!
The fairly easy application, went on smooth and stayed put for more than 14 days. If you are new to any nail strips there is a bit of a learning curve but if you ever used nail wraps or strips, you will find this familiar and likely have the tools to make it easy. They are thick and have to be cut with scissors or clippers unlike the CS that I am so fond of. They are only single ended, so you can't get more than one nail per strip. BUT.... They made my nails strong and are a game changer in the world of gel polish! I did prep my nails by soaking in a hot bath, pushing cuticles back very well and washing my hands with dish soap, a very light buff and then following with alcohol wipe. I applied, cured and then topcoated and capped the ends with clear Gellish topcoat and they were basically bullet proof! I highly suggest a good rubber tip cuticle pusher to help in application and a maybe a squish light. When it comes to taking them off... (you have to choose to take them off-- not gonna happen on it's own) I had to buy the remover and go slow with a dental floss pick but once the seal was lifted and it soaked into to the glue the glue loosened it came off with zero damage and looked like a removed press-on nail. No peeling and no scraping and none of the dryness caused by soaking off other polish with foil and acetone. I'm VERY impressed. The only reason it is not five star is because of the design of the french manicure. It is one piece. the tip printed on to the base and while it may work amazing for most people, it did not quite work for me. I like having a layer to place the white part where your natural nail smile line falls. If you are like me and have very short nail beds it may show a gap where the white tip does not cover the whole free edge. Especially when it grows out. It looks like I had a fill in and they didn't move the smile line up. I solved the worst of it with strategically placed nail decals and it still looks exceptional but I will go with a solid color in the future.
S**N
How to extend past natural nail
I use these to extend my natural nail, and there are a few things you must do to make sure they stay on and the structure of the gel is not compromised. The steps I take are: 1. Wipe nails clean, and apply correct sticker size like normal. 2. Cut the gel a good bit away from the tip, you will be filing it down later so you need some wiggle room to get the shape right. Also use a curved scissors if you have one, if not, a small pair of scissors, a cuticle nipper, or a nail clipper works fine. 3. This step is optional, but I like it because it keeps the gel in the correct shape while curing; Press clear fake nails over the gel, in the shape you want, and cure the gel. 4. After curing, add a top coat of gel to the inside of the nail, apply a drop and use a toothpick to spread it around, on the back of the gel strip AND your natural nail if it is poking out at all. You want to avoid the polish pooling in your hyponychium (aka the skin in the area on the inside of the nail) This is to prevent the sticky side from gathering dust and dirt, and helps the strip stay on your nail. 5. Next is filing, you want to file after you put the coat on because otherwise the dust from filing will stick to the back of the strip. It is still relatively thin at this stage, so using the file that comes with the kit will work fine. File to your preferred shape. 6. I like to add little charms, little stickers and the like, and you can do that by adding a dab of gel to a charm (if it doesn't have a sticky area) and curing it to the nail. I like to seal everything afterwards a couple time too, so a few carefully applied top coats later everything is encased and protected. I use beetles gel top coat. I hope this helps! Ohora is definitely the best gel nail strip I have ever tried, I highly reccomend it. Every design is so beautiful and unique, they have a design for just about every occasion. I also reccomend getting some of their removal drops, as those make it so much easier to remove the nails once you want to. If you don't use any sort of removing drops, it WILL rip layers off of your nail, the adhesive is very strong.
C**T
Poor durability
Looked great for a couple of days and then popped right off with daily wear even with applying them properly.
M**L
Amazing!!
These nail strips have changed my life! I cure them then add a layer of clear gel polish on top and they last a minimum of 2 weeks! Love all the colors and how easy they are to peel and stick on! Just cut, cure, and file. Will use these all the time now!!
Z**A
Prodotto ok, consegna NO
Il prodotto sembra ok, poi vedremo . La consegna purtroppo scandalosa con poste italiane . Pacchetto buttato in terra fuori dall'ingresso e dichiarano -consegna effettuata alla reception- nessun rispetto !
R**A
Stupefacente
Bellissimi è la prima volta che li applico e il risultato è stupefacente
C**A
Bad quality
Terrible quality… I have been doing my nails with other brands for ages long time and my manicure has always lasted 2 weeks, I tried this ohara nails for the first time and lost my first nail after two days… also they feel very thin and fragile compared to other brands. i won't buy them again
V**Y
Do not buy
As a long time user of this type of product, I must say that these are especially terrible
M**M
غير مطابق للماركة المعروضة واللون
المرسل لا يمت بصلة للمعروض للماركة او اللون
Trustpilot
2 weeks ago
5 days ago