


Craft Your Imagination! 🎨
The Environmental Technology Castin'Craft EasyMold Silicone Putty is a versatile ½ lb kit designed for quick and easy mold-making. With a rapid 3-minute mold time and a 25-minute curing period, this food-safe, non-toxic silicone putty allows you to create detailed, reusable molds for various projects, including food crafts and resin casting.

T**M
Easy to use
I bought this to make chocolate mold from D&D dice and it worked very well however it does take trial and error. It is easy to combind and does not hurt my fingers like other products and as they combine the color changes so it is easy to see unmixed parts. The hardening process allows time to get thing molded and to add more structure to the exteriors also pulling it apart and reattaching it to different areas is extreamly easy. It is perfect for resues and washing it does not negativly effect the material although letting it dry before reuse is vital for good molds. This compound also has very few bubbles that form and most of them are on the exterior. If the object is moved after about 5 minutes then the mold may move but keep the shape of the moved area both old and new.
D**H
Great for Custom Earplugs
I got this to make custom ear plugs and earbud ear pieces, and I couldn't be happier.There is an abundance of information on the web about how to make custom-molded earpieces, and they pretty much all work (I'll reiterate the caution to be very careful of creating pressure in the ear canal while pressing the putty into your ear).What makes this a superior product for custom ear plugs:1. Food grade. That doesn't mean you can eat it, but rather that it is inert, and doesn't leech nasty stuff into what it's in contact with (like your ears).2. Sufficient working time. From the time you start mixing, you have 2-3 minutes to get it mixed and worked into place. That's plenty of time to work it into your ear and get it smoothed out with no rushing.3. Quick curing time. Once your plug is in place and curing, it takes about 10 minutes to go from a soft putty to a firm and durable plug. A few minutes after you put it in, you'll hear a lot of crackling and it feels like it's pulling away from your ear. When the crackling slows down, you can gently remove it (careful again of pressure in your ear canal as you withdraw it). That's all there is to it.4. Sufficient quantity to test and experiment, or to make multiple sets. A set of earplugs for me uses just over a half ounce (I measure quantities on a scale--4 grams of each part of the mix for a total of 8 grams per ear). If my math is right, it works out to about 14 sets of plugs per 8 oz kit. That's a bargain compared to the specialty kits (costing almost as much as this) that allow you to make only two molds for one set of earplugs.5. No need to use release agent. The silicone putty doesn't stick to your skin, so there's no need to lube up your ears. At least not for making earplugs.So far, the earplugs are comfortable, very effective, and very durable.Great product to make your own snazzy purple custom-molded ear plugs.
N**E
Greatest mold maker
I refinish furniture for a living. I use this to replace broken corners or moulding. Combined with bondo this makes life so much easier. Super easy to mix and form. It dries quickly so I can get things repaired and move on to the next step. It’s extremely accurate and it’s hard to tell what was broken off a piece once I finish. I’ve tried hot glue to make molds, but now I will never use anything else.
V**T
How cool is this
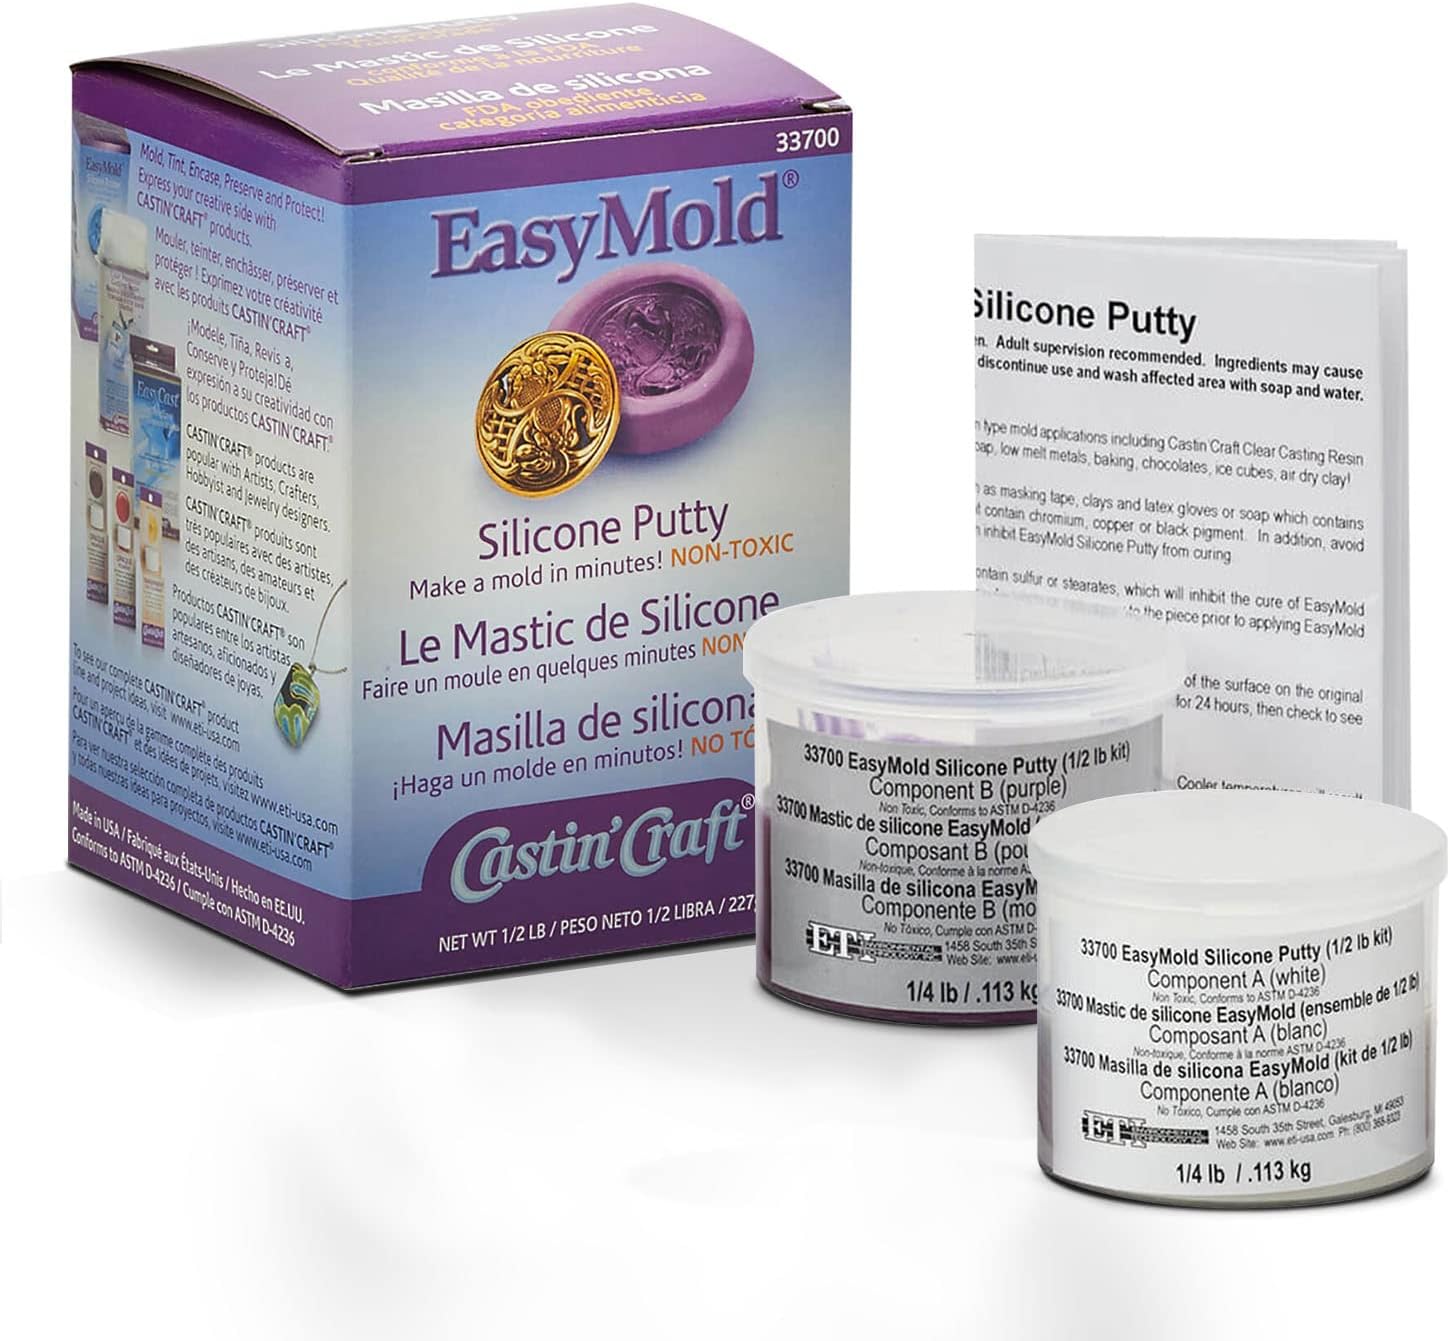
For a first time mold making experience, I'd say this went pretty well. I made a necklace out of polymer clay that I want to make again, so I ordered this Easy Mold. At first I was anxious about using it because of the very short window you have to blend before it starts to set: I found a couple of short informative videos on YouTube that shows exactly what to do.My problem is that I was using almost half the product, because my neck piece is fairly large, and I literally set a stop watch going to make sure I did not run out of time. Believe me, blending that much product quickly is not easy. As instructed in a video, I secured the bottom of my piece to a surface (I used parchment paper) with a bit of clay -- this is more important if using a liquid product to pour on, but I figured it wouldn't hurt. The first photo shows the outer side of my mold after I had pressed it onto and into my piece.I actually took some more product and kneeded it to reinforce the outer shell of the mold, for stability and balance - I was happy to find that it sticks to itself with no problem. Picture two shows the piece in the mold while it is setting - you can see the bits of green clay that I used to secure the piece to the parchment paper. THERE WERE some gaps around the edges - perhaps in my zeal pushing it into place, I distorted the mold material while it was setting. So before undoing the whole business, I (for a third time) blended a very tiny amount of putty to patch the gaps around the edges.Third picture shows the interior of the mold and the piece that I used to make it from. I am not sure at this point if all of the holes got properly filled in, but am in the process of freezing an ice casting to check. Will take a picture of that when it's frozen, next to the original model, and post it. A WORD about the 3-minute working time for blending the product - it may say on the box or in the instructions, I'm not sure, but it said on one of the videos that you have about 3 minutes at 70 degrees ... so I might have had about a half a minute longer to work my original big ball of the stuff because my A/C is out and it is about 90 degrees in my house today. I needed that extra time, let me tell you, and I still saw some little white swirls among the purple.I probably won't try doing such a large piece next time - OR, since it doesn't seem to have an issue with adhering to itself, perhaps I will work it in smaller batches, first making sure I have the open areas dealt with and then blending more for a second application and a third if necessary- which basically is what I did today, only not intentionally.The fourth photo, added a couple days later, shows the mold model (white) alongside the mold proof that I made by freezing water with a little bit of milk and pink coloring in it. I am VERY happy with the open bits in the piece - there is one rough edge that I coulda/shoulda patched if I'd noticed it, but I think it is minor and can probably be shaved smooth in a pinch. Eventually I will attempt another mold of this item, but do not have enough product left from this first purchase.
K**N
Love it.
I bought this to make molds of the clay cabochons I make. It does have a fast set up time, but it blends together easily and quickly so if you prepare your project before time, you shouldn't have any problems. I also love how you can bake clay items right inside the mold--which comes in handy making polymer clay cupcake bases or thin items like polymer clay dishes and frame settings. I have been using this product for a few months and would recommend it to anyone who wants to cast molds for small items.A couple of quick tips:- Have everything you want to mold set out in front of you and mold one at a time.- Set a stopwatch to ensure you haven't went over the set-up time.- Press your object in slowly and with even pressure to avoid air bubbles.
Trustpilot
1 week ago
2 weeks ago