


🚿 Elevate your shower game—stylish storage that sticks and lasts!
The Keebofly Shower Caddy Organizer is a 2-pack bamboo and stainless steel rack set featuring rustproof materials, powerful adhesive mounting supporting up to 31 lbs, and a self-draining design. Its compact, no-drill installation and removable hooks offer customizable, durable storage for bathroom or kitchen essentials, blending natural aesthetics with practical functionality.


| Specific Uses For Product | Showers |
| Material | Bamboo, Stainless Steel |
| Special Feature | Rust Resistant |
| Color | Black |
| Brand | Keebofly |
| Finish Type | Lacquered;Polished |
| Product Dimensions | 5.12"D x 11.5"W x 5"H |
| Shape | Rectangular |
| Customer Package Type | Standard Packaging |
| Number of Items | 2 |
| Manufacturer | Keebofly |
| Item Weight | 3 pounds |
| Finish | Lacquered;Polished |
| Installation Method | Wall Mount |
| Number Of Pieces | 2 |
| Maximum Weight Capacity | 31 Pounds |
| Special Features | Rust Resistant |
| Included Components | 5 adhesive pads;2 removable hooks;2 pack individual caddy basket |
| Batteries Included? | No |
| Batteries Required? | No |
P**L
Perfect for a plant shelf in the shower
I purchased these shower caddies to be used as a plant shelf for our shower so I could put orchids in the shower. The shelves work perfectly!I was very picky about the shelves I wanted - in their overall look and style, and in their function. After looking at, and trying, lots of other shower caddies, I selected this set.Things I like about the shelves:- I love the black metal frame and the bamboo bottom. The bamboo withstands water very well, and looks very nice in the shower. The black metal frames also hold up to the water very well - no rusting or discoloration after many months of use.- The overall look is very sleek and modern - just the look I was after.- The adhesive pads and hooks that the shelves hang on are REALLY nice! The adhesive sticks very well to our glass block wall, and I have no doubt it would stick well to ceramic tiles as well. I have no worries that the shelf is going to fall down - I trust these adhesive pads very much.- The size of the shelves is really perfect. Not too wide or too deep (from front to back). This allows me to put the orchids on the shelf, without having a shelf that sticks out so far as to get in the way when showering.While I'm using these shower caddy shelves for plants, they are very strong and I know they would hold several heavy bottles of shampoo, conditioner, body wash, etc. I wouldn't hesitate to put something heavy on these shelves - I know they would hold.I could also see the shelves being used in a bathtub to hold kids tub toys. You could even hang a mesh bag of tub toys from the shelf, for even more storage.The shelves did come with extra adhesive pads, so if I ever do decide to move the shelves or reposition them, I know I'll have another way to hang them.I'm very happy with these shelves and know that I'll continue to use them for a long time!
M**N
EXCELLENT! GO FOR THESE!! Search no more.
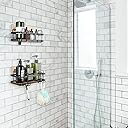
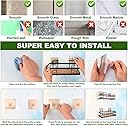
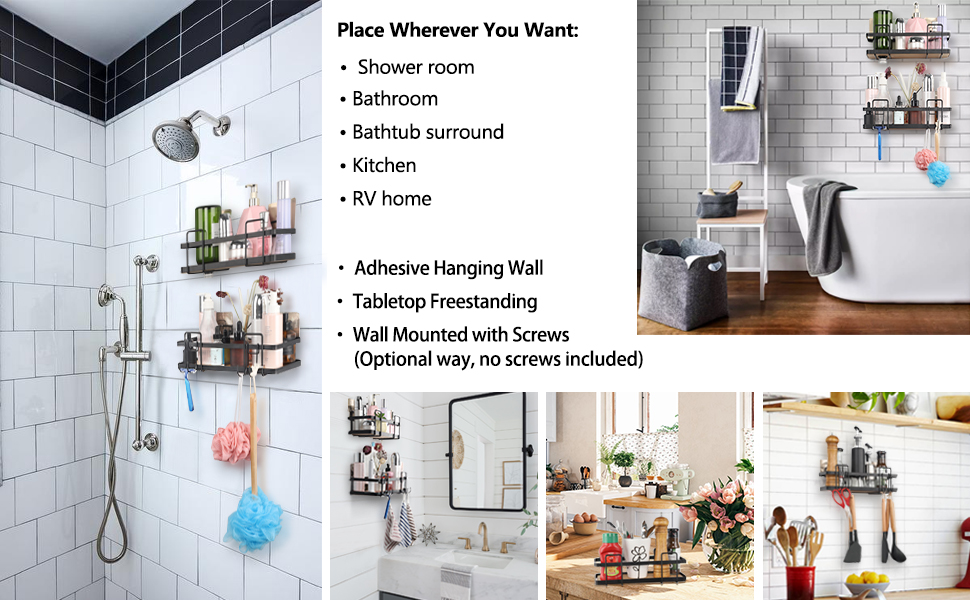
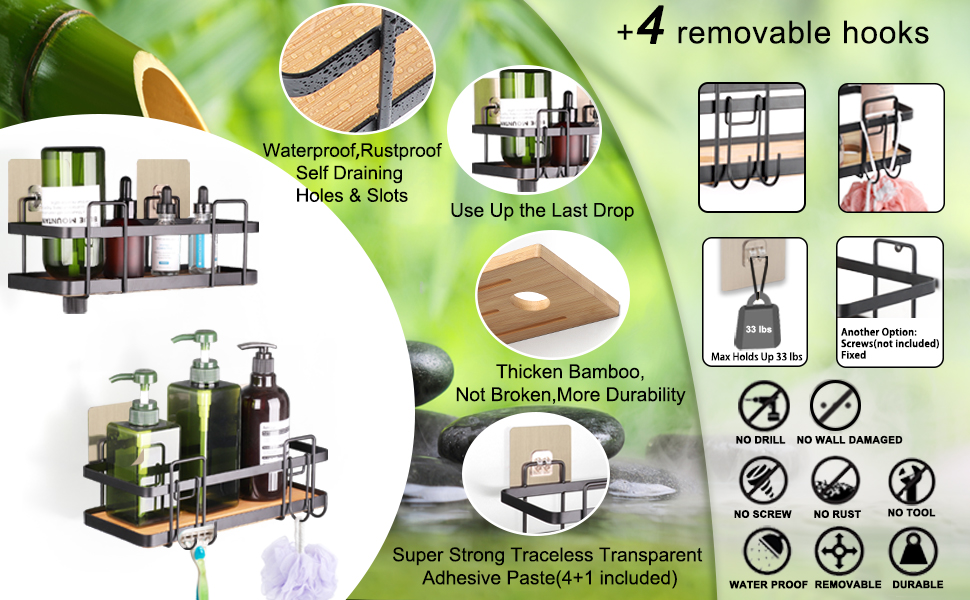
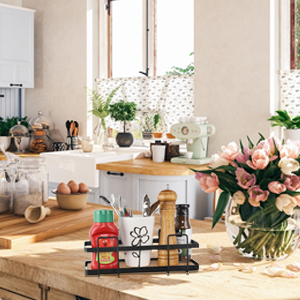
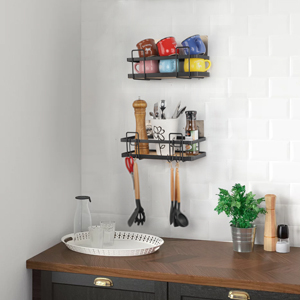
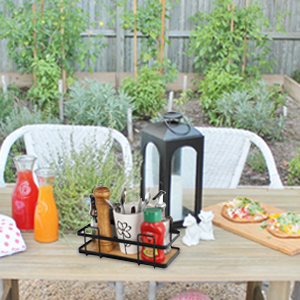
I searched products like these in stores that were such poor quality. After reading reviews I chose this company's. I followed someone's advise for install and have copied his instructions here because they were very helpful. I also used a small level since my "eye" left me with one lopsided. I corrected it. Also I received double the adhesive pads for which I was grateful to have because once you remove a pad, you can't use it again.The metal (bronze in my case) is quite substantial and bamboo base thick and not flimsy.INSTRUCTIOS:I had several false starts and am waiting on a response from customer service about getting some more adhesive squares, because I ruined several. They stick HARD, and will show creases if you have to pull them loose to reposition them. Additionally, I found that the plastic clips are prone to snapping off when you put the caddy in place if you're not very careful.However, I finally settled on what I think is a nearly foolproof way to set it up.First, *carefully* clip the caddy into the adhesive squares. Leave the protective film in place.Position the caddy where you think you want it to go. Check the alignment of tiles/grout, make sure it's centered if you want it to be, get a feel for how it looks. When you've found the perfect spot, use a pencil (or eyebrow pencil/eyeliner etc) to make small marks for your positioning.*Carefully* unclip the caddy from the hooks.Peel back about a half inch of the protective film and use a fingernail to crease it so it folds away from the sticky part. (Careful not to touch the adhesive.) Put the exposed adhesive into place (don't press!) and make sure it's lined up. Repeat with the other one.Hold the caddy up to make sure that the hooks are properly spaced, it's level, etc. Don't press it against the hooks; if you have to pull the adhesive pad loose to reposition, you don't want it to be firmly stuck.When you're sure everything's in place, NOW press the exposed adhesive into the wall. Then carefully reach under (or use tweezers) and finish peeling the protective film off. Now press the rest of the adhesive FIRMLY into the wall. Let it sit for a little bit to give the hold extra time to set.Position the caddy so the hooks are lined up, then TURN THE CADDY so the open part is facing the wall, and the bottom of the caddy is facing you. Put your thumb over the plastic hooks, and with the other hand, press the caddy into place with slow, even, steady pressure. Use just a little counterpressure with your thumb, and watch to make sure the pressure on the plastic hooks is even.The caddies look fantastic so far, and if I can get the other one mounted, I'll be happy. I probably won't update this for a few months to see how well they hold up to weight, humidity, etc, but I wanted to jot down the details of applying the adhesive so I don't ruin the next batch of adhesive pads, if I can get any.
Trustpilot
1 month ago
4 days ago