Desert Online General Trading LLC
Dubai, United Arab Emirates
Desert Online General Trading LLC
Dubai, United Arab Emirates


🔄 Upgrade Your Ride with Confidence!
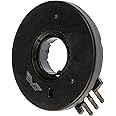
The Dorman 600-120 Transfer Case Motor Encoder Ring is a direct replacement part designed to restore the functionality of your vehicle's transfer case. Made from durable materials, it ensures reliable performance and longevity. Backed by over a century of automotive expertise, this encoder ring is engineered for a precise fit, making installation a breeze. Check compatibility easily by entering your vehicle's make, model, and trim level.


| Manufacturer | Dorman |
| Brand | Dorman |
| Model | 600-120 |
| Product Dimensions | 38.1 x 38.1 x 38.1 cm; 45.36 g |
| Item model number | 600-120 |
| Exterior | Ready To Paint If Needed |
| Manufacturer Part Number | 600-120 |
| OEM Part Number | 8.90E+07; TCA99; 88962315 |
| Item Weight | 45.4 g |
M**
works great
changed out the old one with this one. fit like a charm and works great so far. Only used my 4x4 a few times so far since i changed it but i have nothing bad to say about it.
R**A
Funciona perfectamente
El paquete llego a tiem lopo y bien protegido.funciona perfecto
T**T
Fixed my transfer case issues
Truck ('05 XL) started popping into Neutral while going down the road. Had to drive around in Auto-4 mode. The resistive tracks on the old sensor are basically worn through right where the brushes hit in 2WD. I figured the actuator motor was still good because it would bang the whole truck around trying to shift into 4L and there was almost no corrosion on it. After swapping the sensor, everything works fine and now it goes into 4L on the first try. Previously (going back a few years), I would have to try a few times, maybe move the truck a little, maybe have it slowly rolling before it would change range.The hardest part of the swap is getting the actuator splines aligned with the case shifter splines to get it back on. The official instructions say to start in N, but if you're swapping the sensor, chances are it isn't going to the right position anyway (duh!). I found the trick to be pointing the shaft notch straight down with channel locks and setting up the actuator the same way before re-assembling it. It doesn't matter if you change the shifter position while you have it apart (that's what this sensor is for!) - you just have to get it all back together.Oh, and don't worry about spilling fluid (i.e. smurf juice). The front driveshaft has a blind slip spline going into the output yoke, so no fluid can be lost. Likewise the actuator is purely external to the case. Tip: for a short term fix, you can drive without the actuator. Just unbolt and unplug. If the T-case is in the wrong mode, you can shift it with a pair of pliers or something. I think 2WD HI is full clockwise, but don't quote me on that. It's all the way in one direction or the other. Trying to shift between high and lo range should have more resistance than just going between 2HI and 4HI.
A**R
Dorman 600-120 Transfer Case Motor Encoder Ring
Encoder Ring seems to work fine!
J**S
2006 GMC Sierra 1500HD application
I just installed this in my truck and everything went very smoothly. If you are considering replacing just this encoder ring instead of the whole assembly here are a few notes (thanks to everyone who has posted on this topic already).Once the assembly is removed (see other comments on how to get the transfer case motor off the vehicle) it is a very simple matter to replace this ring. The additional time is less than 10 minutes. Here are some important tips:1- A tiny torx is required to remove six torx screws that sandwich this disk and three gear in between them. Lay the unit with the black stack sticking up on a clean flat work space.2- Remove six screws - 2 of 3 different lengths. The shortest just hold the halves together, the longer ones also hold the black stack thingy in place.3- Use a small screwdriver to pry the halves apart, and carefully lift the to half up past the black stack, roll it over and lay it side by side with the half that is still on the workbench. You will see additional torx screws on the black stack but just leave them alone.4- The bottom half is now open and exposing a large gear, a medium gear, and a small gear that is partially covered by the black stack. CAREFULLY remove any grease or debris from the gears facing you, and with a marker of some sort mark the touch points of the big gear and the one next to it.5- Note the three prongs and where they are plugged in. Note the relationship of the plug to the prongs and mark one end of the plug.6- Carefully lift the gear with the disk attached up off the bottom plate. The is probably a spacer/friction disk on the bottom of the gear. Don't lose it, and if it came out (it's about 1/2 in. in diameter) put it back in the bottom half where it obviously goes.7- Note that the shaft the disk goes around has an indentation. This is an alignment guide for putting the new disk in.8- With a screwdriver persuade the disk to come off the big gear you should be holding at this point.9- Snap the new disk back on where the old one just came off10- Plug the three prongs back in the same way the old one came out11- Slide the gear/disk assembly back down into place making sure your alignment marks are touching in the process - the relationship between the big gear and the middle gear should be exactly the same at this point(Note - I'm not certain this is REALLY all that critical, I am just assuming there is some relationship between the black stack thingy and the position of the big gear the the disk may need to be mindful of. This isn't difficult, it just requires some caution.)12 - clean up any gunk, then carefully slide the top half back onto the assembly and put the thing back together with the torx screws the way they came out.This is by far the easiest part of the whole operation. If you can get the drive shaft out of the way, unplug the stinking connector, and remove the three bolts holding the motor in place, this should be like falling off a log.Good luck.Final note - since I just completed this I don't have any idea how well this part will hold up. I will make a note to post followup items as time passes.Okay - so it's now September, 2017 and my truck is again showing an error message on my dash. I'm not impressed. It's been about 2 1/2 years, and probably less than 15,000 miles, and I'm thinking that this time I'll try just replacing the whole thing. I can't believe this keeps going out (I had a professional mechanic do it the first time so this is the third time in 60,000 miles that this part has failed). I guess it's just a crappy design. I'm glad some of you have found the notes above helpful. As I read them 30 months after I wrote them they seem a little hard to follow, but once you get inside it's all pretty simple. In any case good luck. I guess this is just part of owning a GM product.
Trustpilot
3 days ago
1 week ago