
DOWNLOAD THE APP


Customer Services
Copyright © 2025 Desertcart Holdings Limited
DOWNLOAD THE APP


🗝️ Upgrade your key game—because your Hyundai deserves a fresh shell!
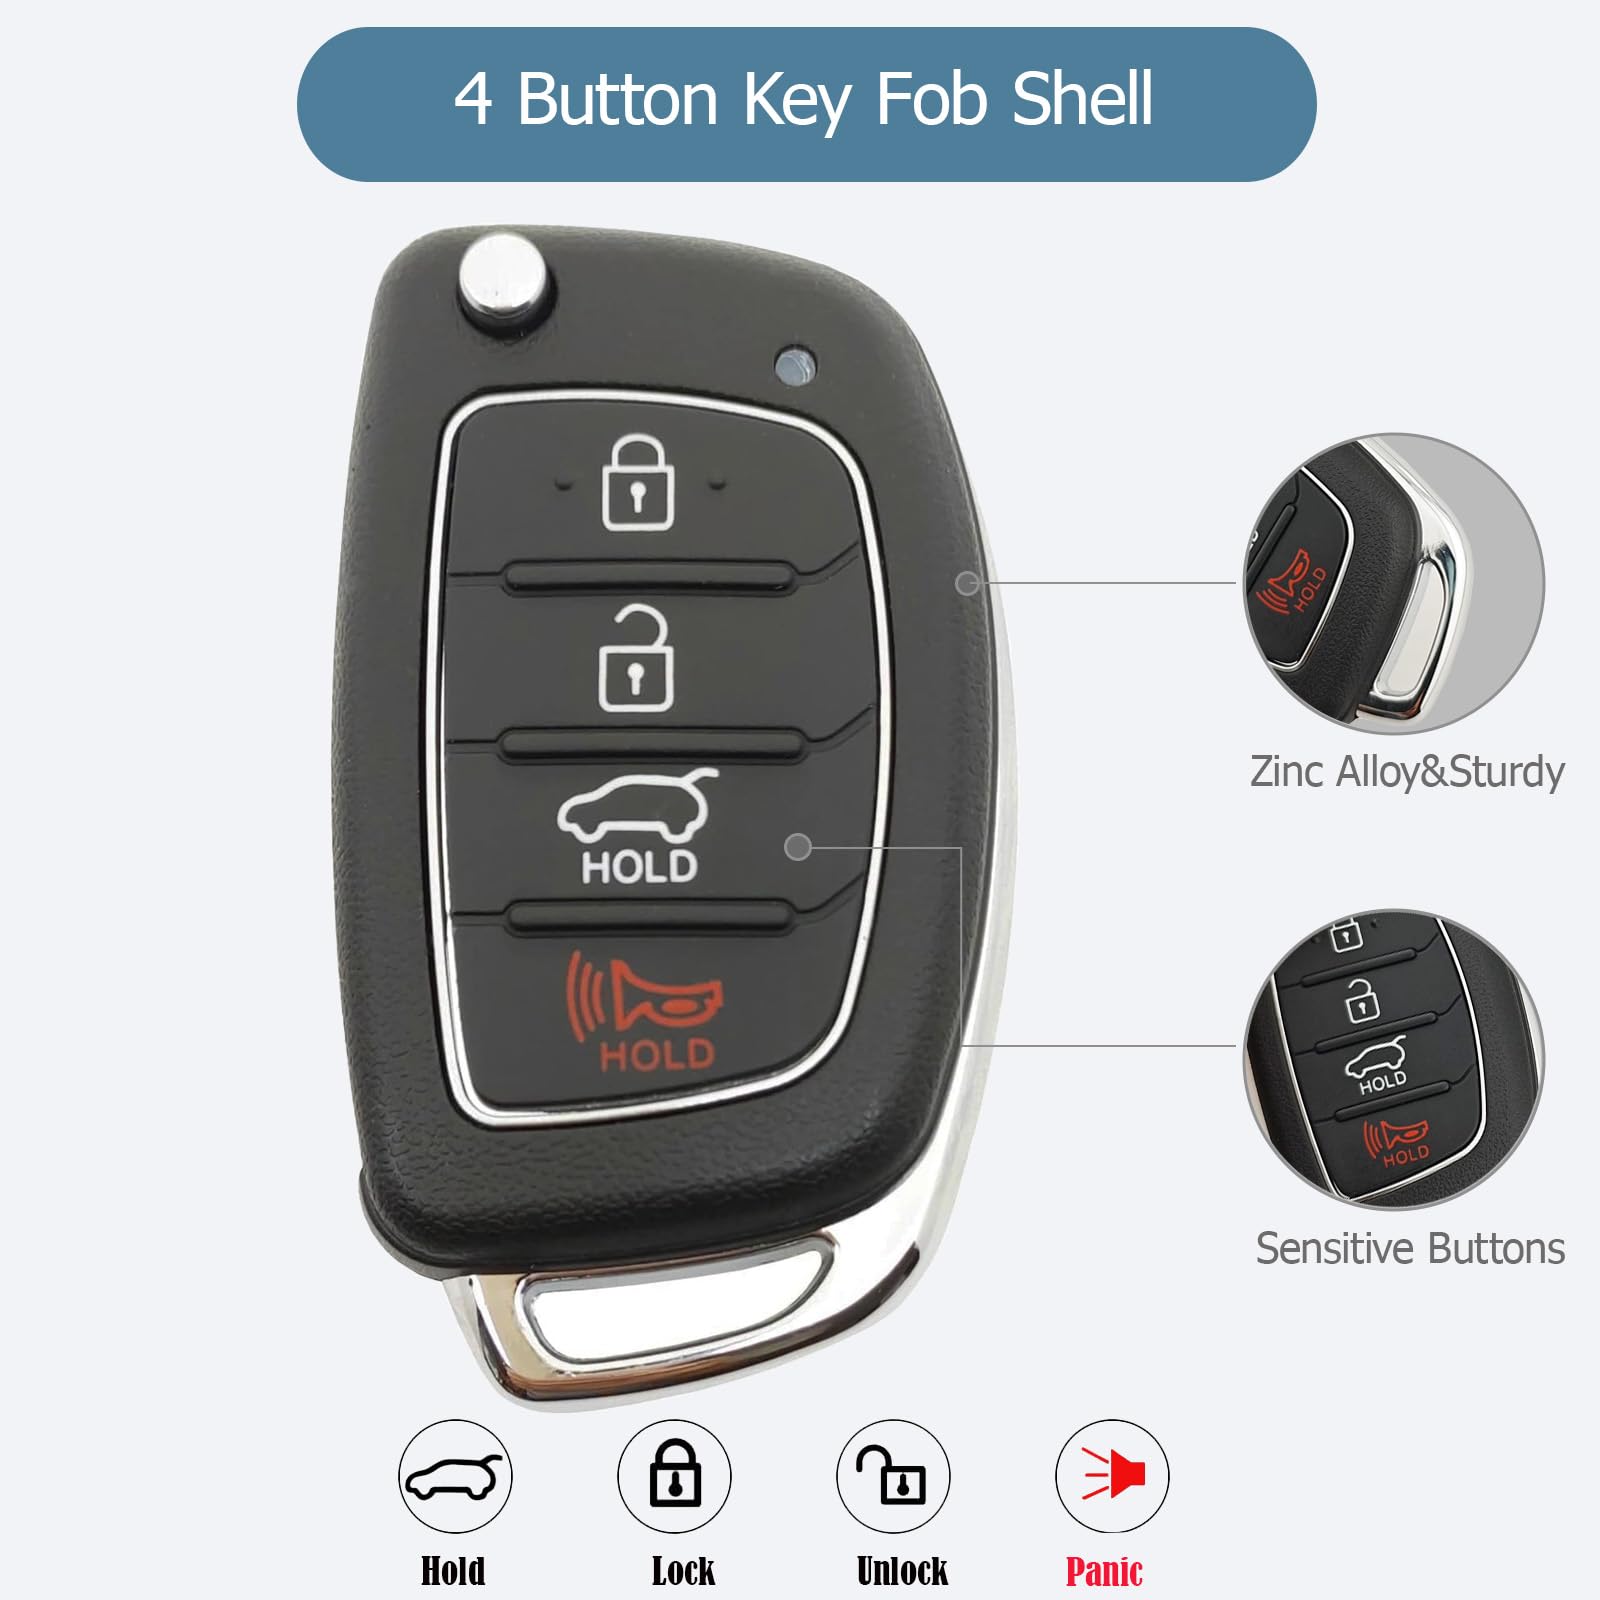
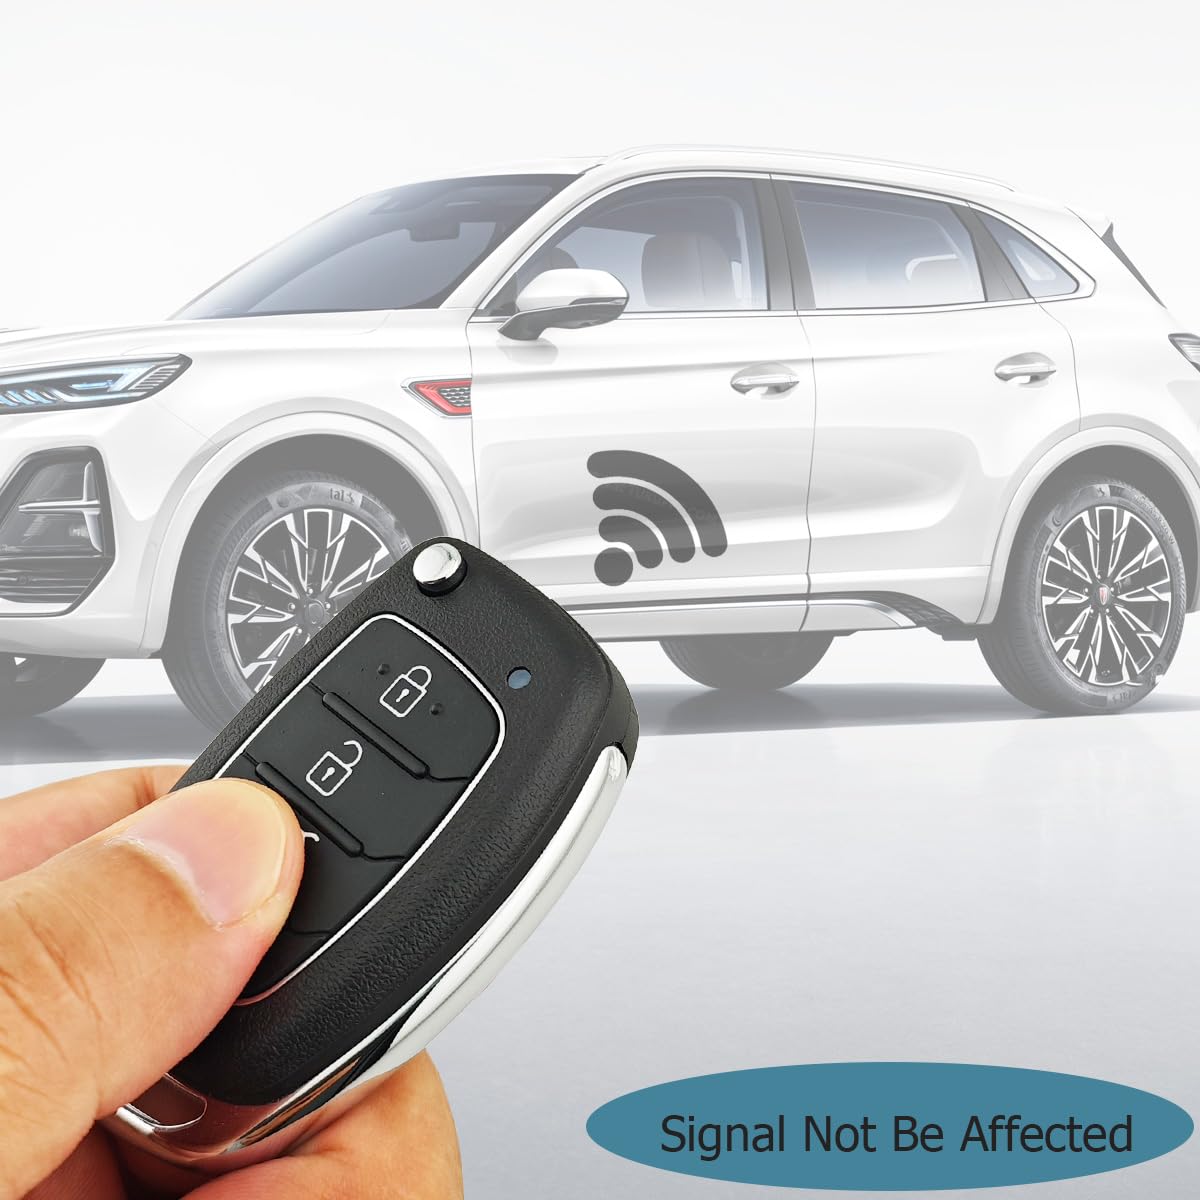
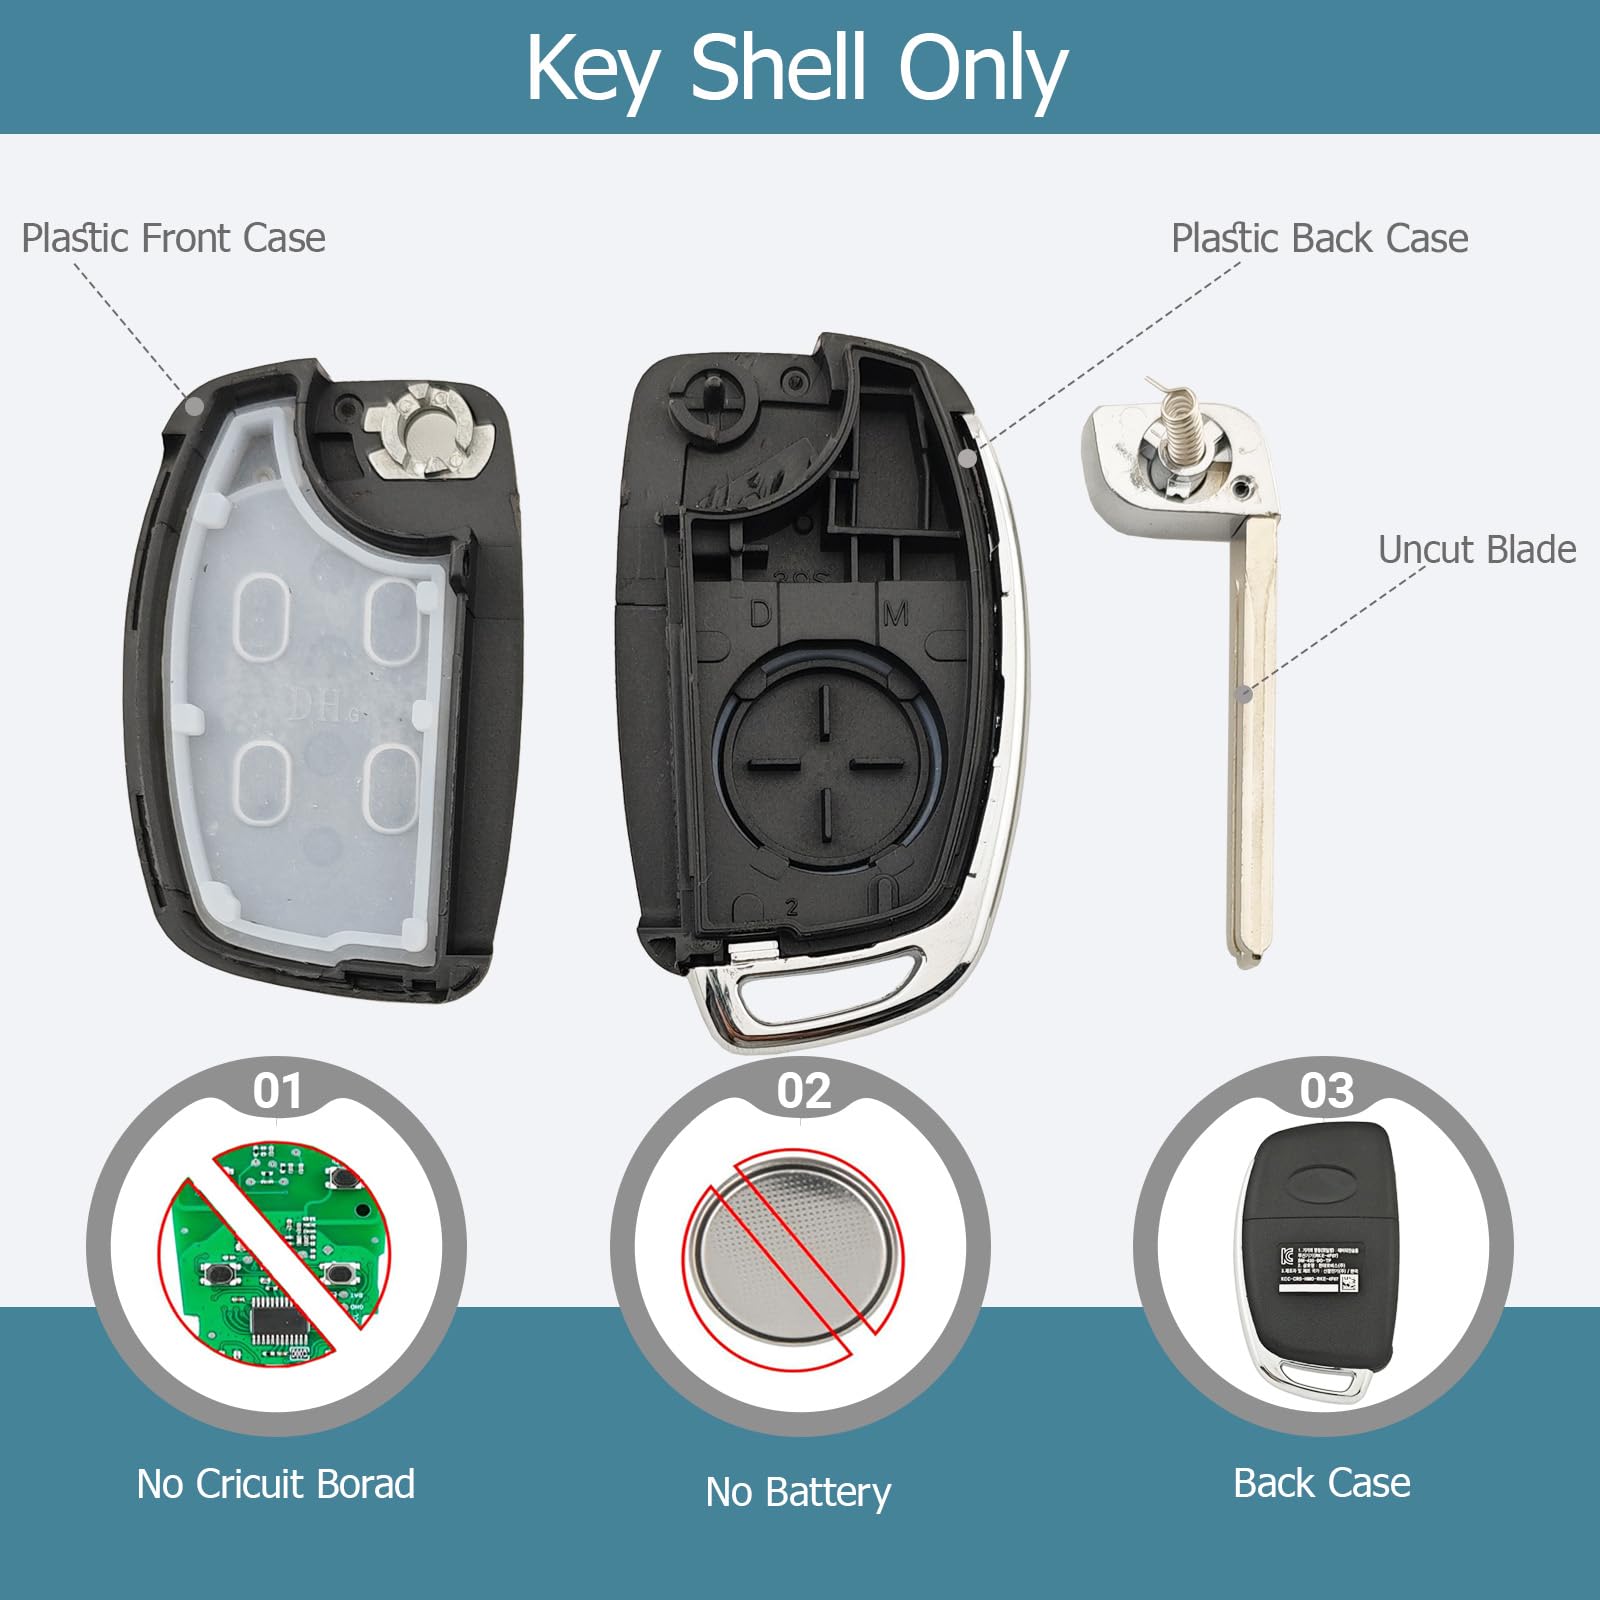
This Replacement Key Fob Case is a precision-engineered shell designed exclusively for Hyundai Sonata and Santa Fe flip keys. It requires no programming—just transfer your original key blade and circuit board into this durable, OEM-fit case featuring a secure screw closure. Ideal for replacing broken shells or creating an extra key, it revives your remote’s look and function without the cost of a full remote replacement.


| ASIN | B01LPRM0PO |
| Automotive Fit Type | Vehicle Specific Fit |
| Best Sellers Rank | #53,757 in Automotive ( See Top 100 in Automotive ) #974 in Key Shells |
| Customer Reviews | 4.2 4.2 out of 5 stars (2,272) |
| Date First Available | September 7, 2016 |
| Is Discontinued By Manufacturer | No |
| Item Weight | 1.76 ounces |
| Item model number | 13 |
| Manufacturer | Horande |
| Manufacturer Part Number | 4332963969 |
| Model Name | Hyundai Sonata, Hyundai Santa Fe |
| Number of Buttons | 4 |
| Package Dimensions | 4.72 x 2.91 x 0.71 inches |
A**R
Fix for Old Key Not Fitting New Fob
Add me to the list of people who had difficulty, but ultimately I "learned" on the first purchase of this product and will likely buy again because the price is great and the product should work well now that I've experimented with the first one. Here is what I found... After reading several reviews I figured people had issue with the old key not quite fitting the new fob just weren't doing something right. Stupid me. I took the old fob apart transferred the chip and the key to the new (my old fob didn't have a transponder? maybe they don't all have one?) and lo and behold the key would not flip out. Many have said that the old key is bigger than the new key, but that is not really the issue. More in a moment on what the issue actually is. Since I didn't want a remote that the key didn't flip out properly I finally decided to do what many others have done and just replace only the silicone button cover (the part that was worn out on the old fob) popping it off the new fob and putting it on the old fob. Contrary to what many have said, I found this process very difficult and frustrating. I did discover that what holds the silicone and trim ring in place is that on the inside of the silicone perimeter there is a very small ridge that engages with a very small ridge on the remote. If you choose to go this route you'll see what I mean. Knowing that this is how the silicone cover and trim ring are held in place re helpful, but I found it very tedious, and I wasn't even sure it would work. But after messing with it for a while I finally got it. So I thought I was good, however since I had reused the old fob, and initially had taken the guts out to try and transfer it to the new fob, I really had to pry the old fob apart, and I think it may have been glued at some point. But the point is that now the old fob didn't seem to snap together very tight. Sure enough I dropped the keys the first time I went to use it (I hardly every drop the keys) and the old fob fell broke back open on impact scattering the parts everywhere. So I knew if I was going to re-use the old fob I'd have to glue it again which I didn't want to do. SO, HERE IS THE DISCOVERY. I really wanted to use the new fob (which actually has a small screw to help secure the fob from being vulnerable to breaking apart) and so I went about trying to really figure out why the old key would not fit the new fob. What I discovered is that the little "hub" on the inside back of the new fob is just a little larger by a very tiny amount than that same hub on the old remote. In the pictures with this review the new fob is on the left and the old fob is on the right. It's very subtle, but in the pictures you may be able to see where I reduced the diameter on the new hub by a very small amount using a xacto knife. You can see on the left side of the new hub how it's slightly narrower than the rest of the hub. It's easy to check your progress and fit with the old key as you whittle the hub down, and it is very evident when you you get it just right and can tell that the old key will now operate smoothly. Put everything back together, and boom, done, it works perfectly! It's a shame to have to learn like that, BUT I will say that the new fob seems to be a great bargain, even if I buy another so that I can have a nice new fob that doesn't show the wear and tear of my learning process! So my personal recommendation is to slightly trim down that hub on the inside back of the new fob and have a nice new remote utilizing your old key rather than trying to replace just the button cover. Replacing just the button cover is feasible but frustrating, and the old fob was pretty beat up anyway. Making the old key work with the new fob, which is really pretty simple once you know the trick, is what we were all hoping for in the first place!
T**J
Works with your sonata fifteen
I thought I was gonna have to send it back.\nBut I worked with it some more, along with\nThe pads did I have words from the same company
U**N
Nice keys a few things to mention.
The key fob cases are nice. Sleightly lighter than OEM. 1st. The Oem Hyundai keys I had could not be opened the easy way. I used a dremel drill and carefully cut the case of the electronics I needed. Now being that said my cases were trashed so I didn't really care. 2nd. Once I got the electronic keypad insides out I transferred them. Nice fit overall very simple. The downside was the oem key I had from my other fob had a sleightly smaller hole for the spring switch. Now all you need is som patience if you run into this and some sand paper or a mini file and just smooth it out in a circular motion and the key fits like butter. Now if you have the time you can always use the key that come with the new case but you will need to get it cut. I personally don't have the time to go find someone and hope they don't jack the key up trying to cut it. Overall nice fob cases. Would buy again if needed. It would be super easy swap the next time.
E**.
It will work perfectly! Just needs a little elbow grease!
Read the second half of Andrew N Booher’s review - saved the day here! Otherwise I probably would’ve returned it as ill fitting. Everything now fits perfectly with my old key and circuit board. I’m going to try and explain the quirks as plainly as possible since it can be a little confusing. Circuit board - while It’s a pity there can’t be some barrier spacers for the circuit board to nestle in, the silhouette on the rubber pad to place it on is a pretty solid next best guide. As long as the circuit board is centered evenly from the edges of all sides of the key fob, all of the buttons should function perfectly once it’s all put together. The Key - As mentioned in Andrew‘s review and others, the socket hole for your existing key is just slightly narrower than the key it comes with, so you’re gonna need to find an exacto knife or a box cutter (with the blade retracted back a little bit for precision), to shave down the outer edge of the black circle thing the key joint rests on. If you set the blank key on the circle base, and then compare it to how your existing key sits, you will get a good feel for where you’re trying to get to how it should be sitting for the existing key. I found I only needed to trim about 3/4 of the outer edge of the plastic circle and left the highest rising part of the circle alone. Putting It Back Together - I maybe had an easier time with this than some of the reviewers, simply because I was standing at a high kitchen counter and had a better angle. I placed the circuitboard half of the fob on the counter with the key button hole towards me to the right side, and used both hands to hold the upper half with spring loaded key firmly in the closed position and pressed up against the top fob shell. I was able to lower the key button directly through the button hole as a guide and then quickly snap everything into place WITHOUT jostling the position of the circuit board. Honestly, with all the extra advice built-in to the review section for this product, I was able to turn what would’ve been a sweaty slog into a 20 minute changeover. Yes, it’s a little bit of extra work, and we all wish it fit from the get-go, but you just saved $300 to $400 for a tiny bit of your time and effort!
Trustpilot
1 day ago
2 weeks ago