


Elevate Your Outdoor Experience! 🌟
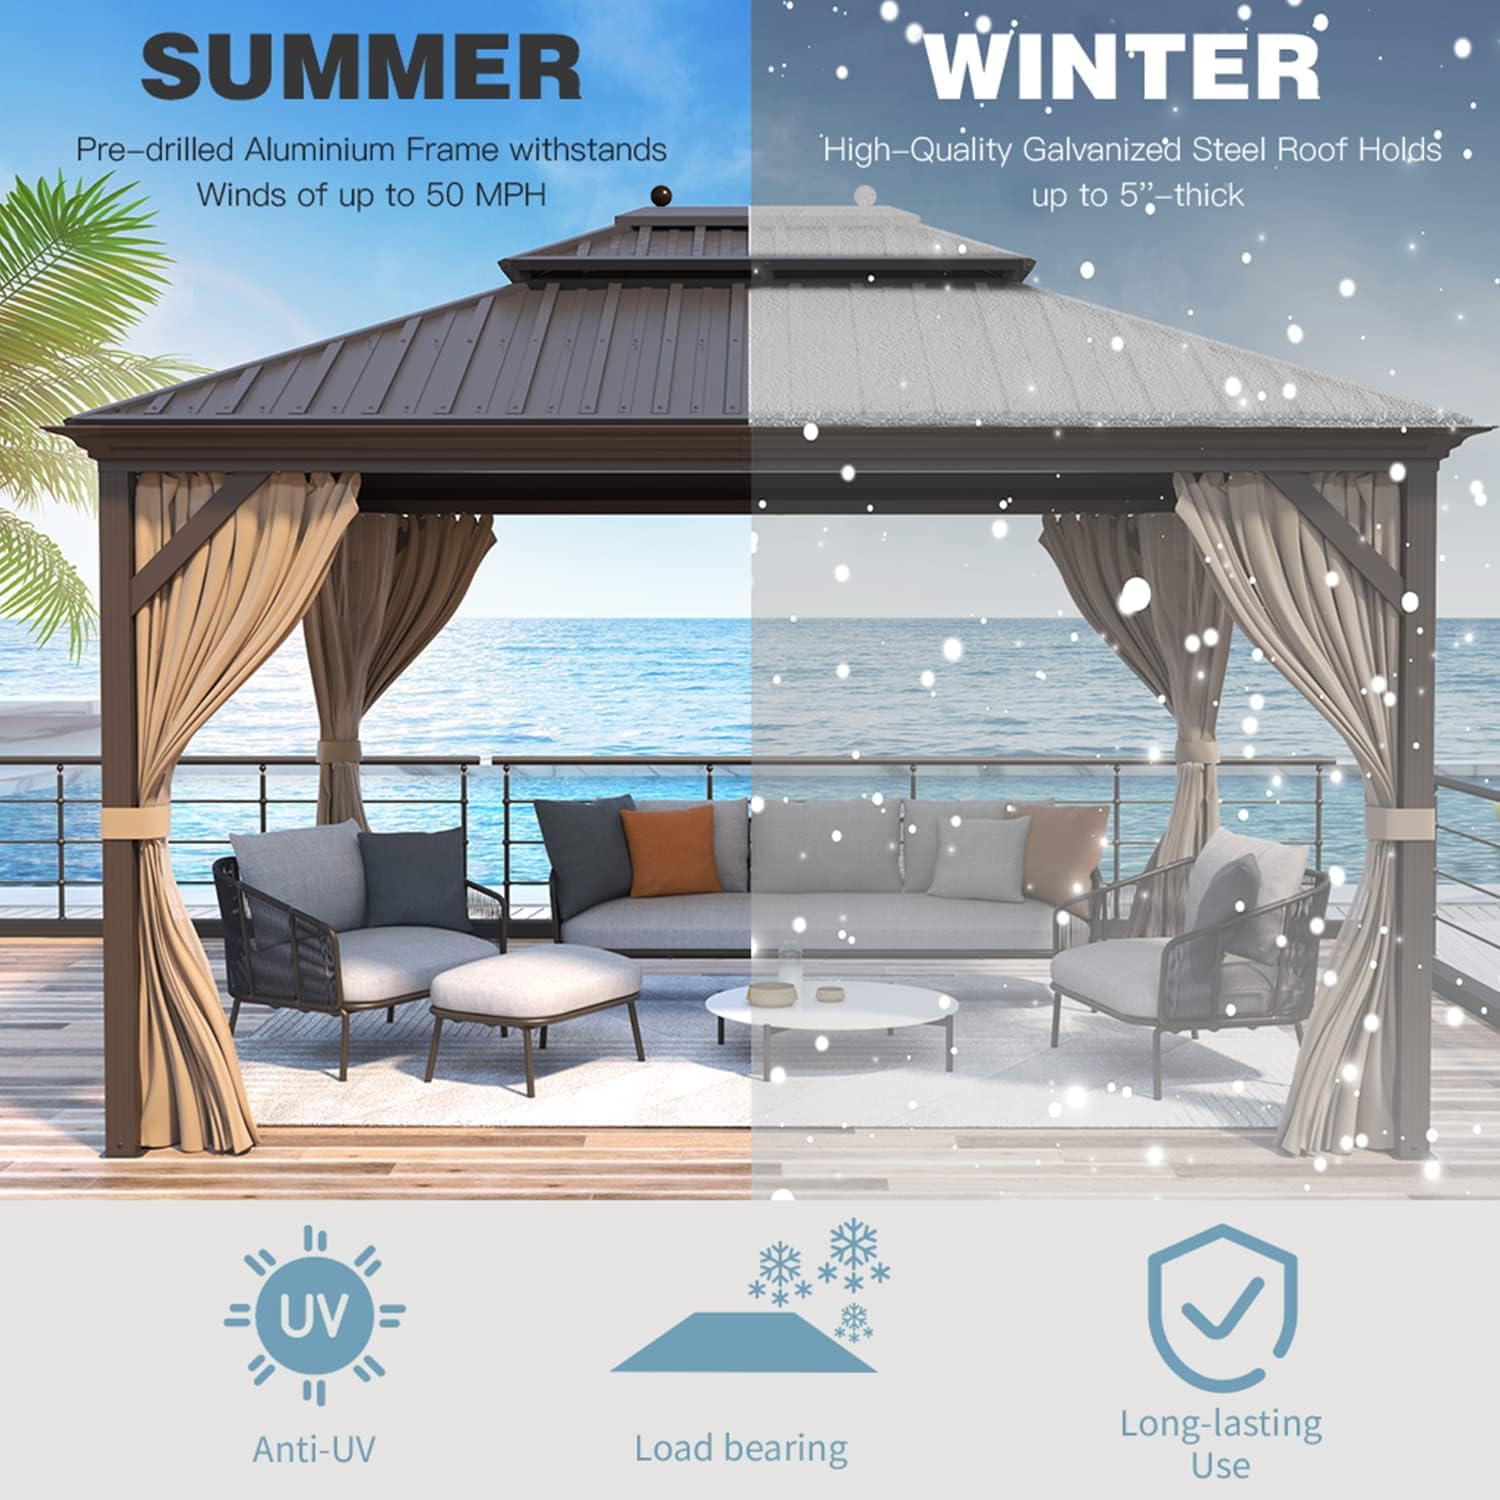
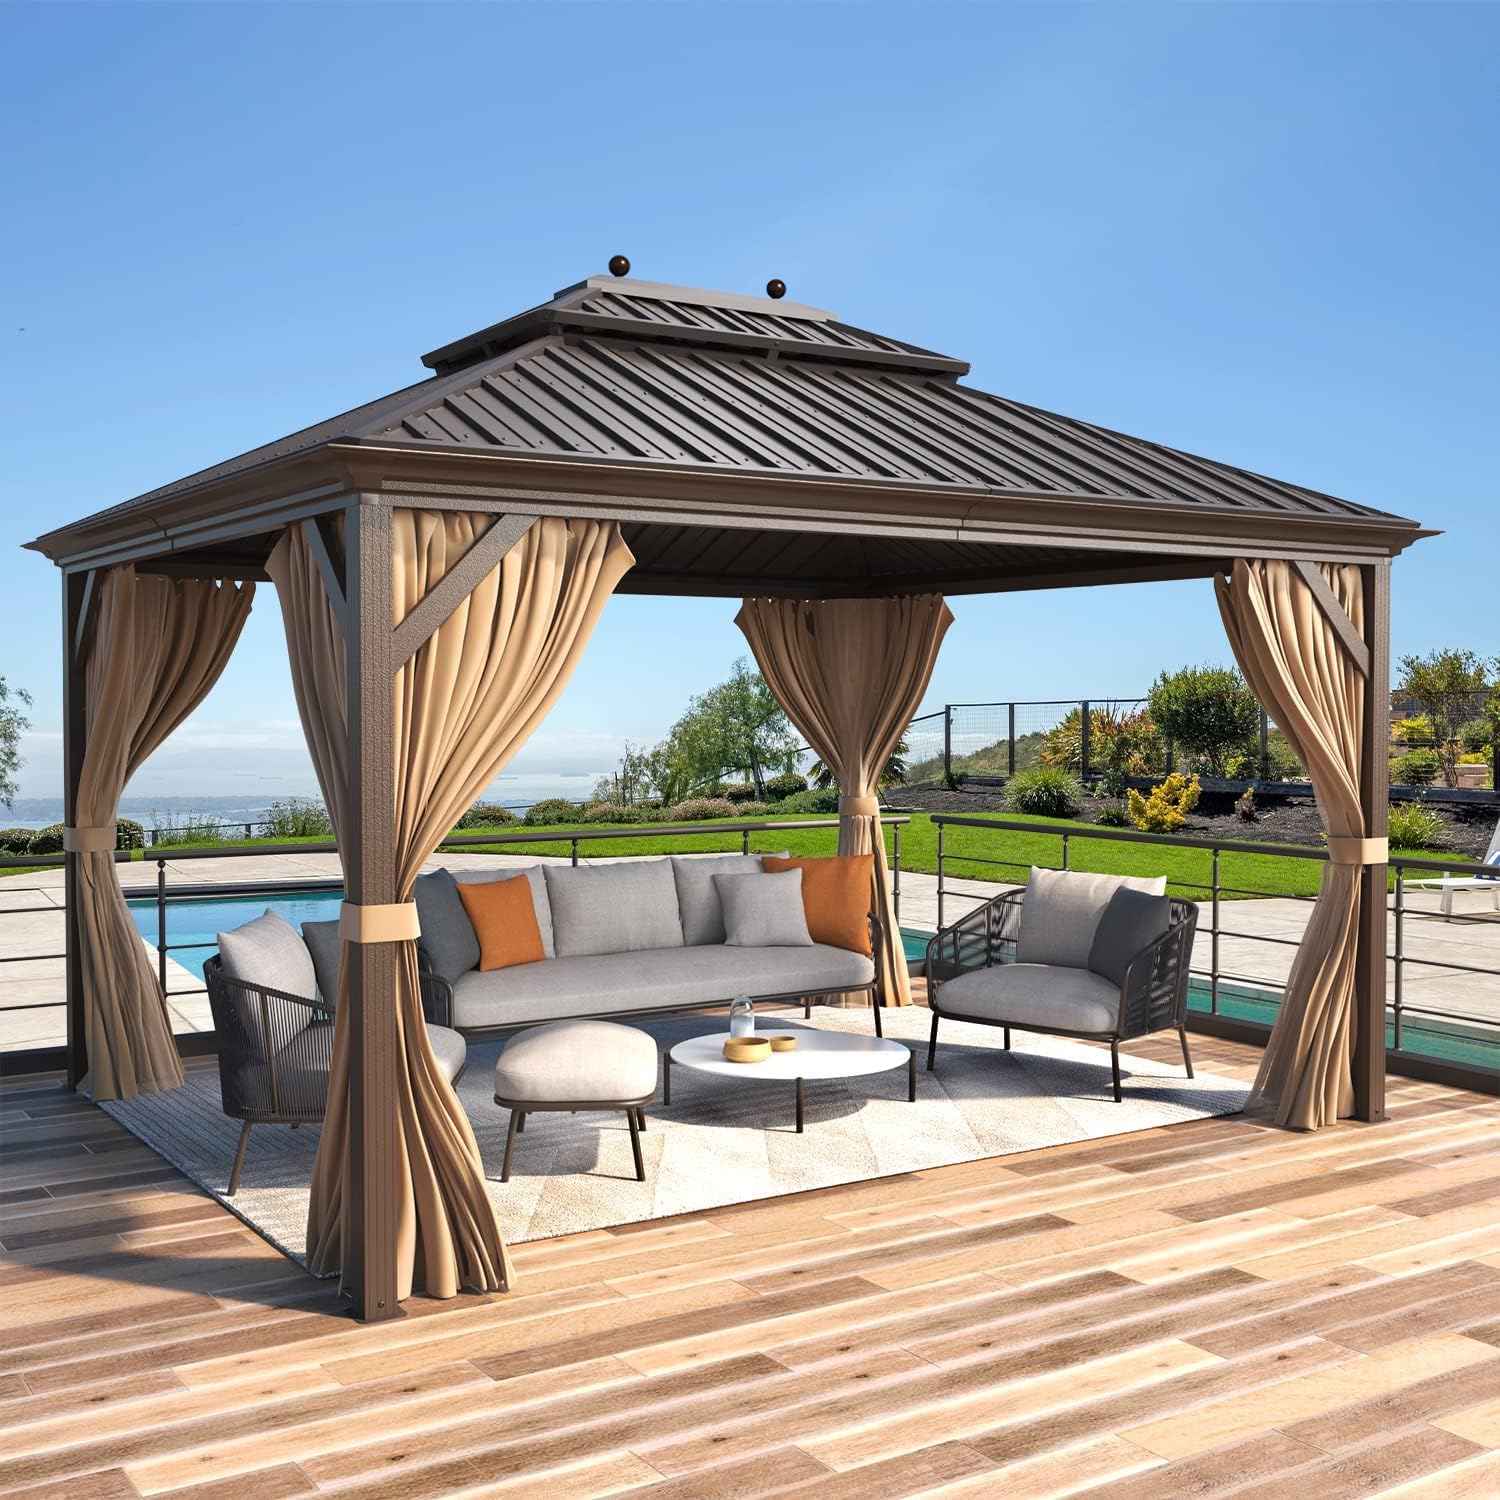
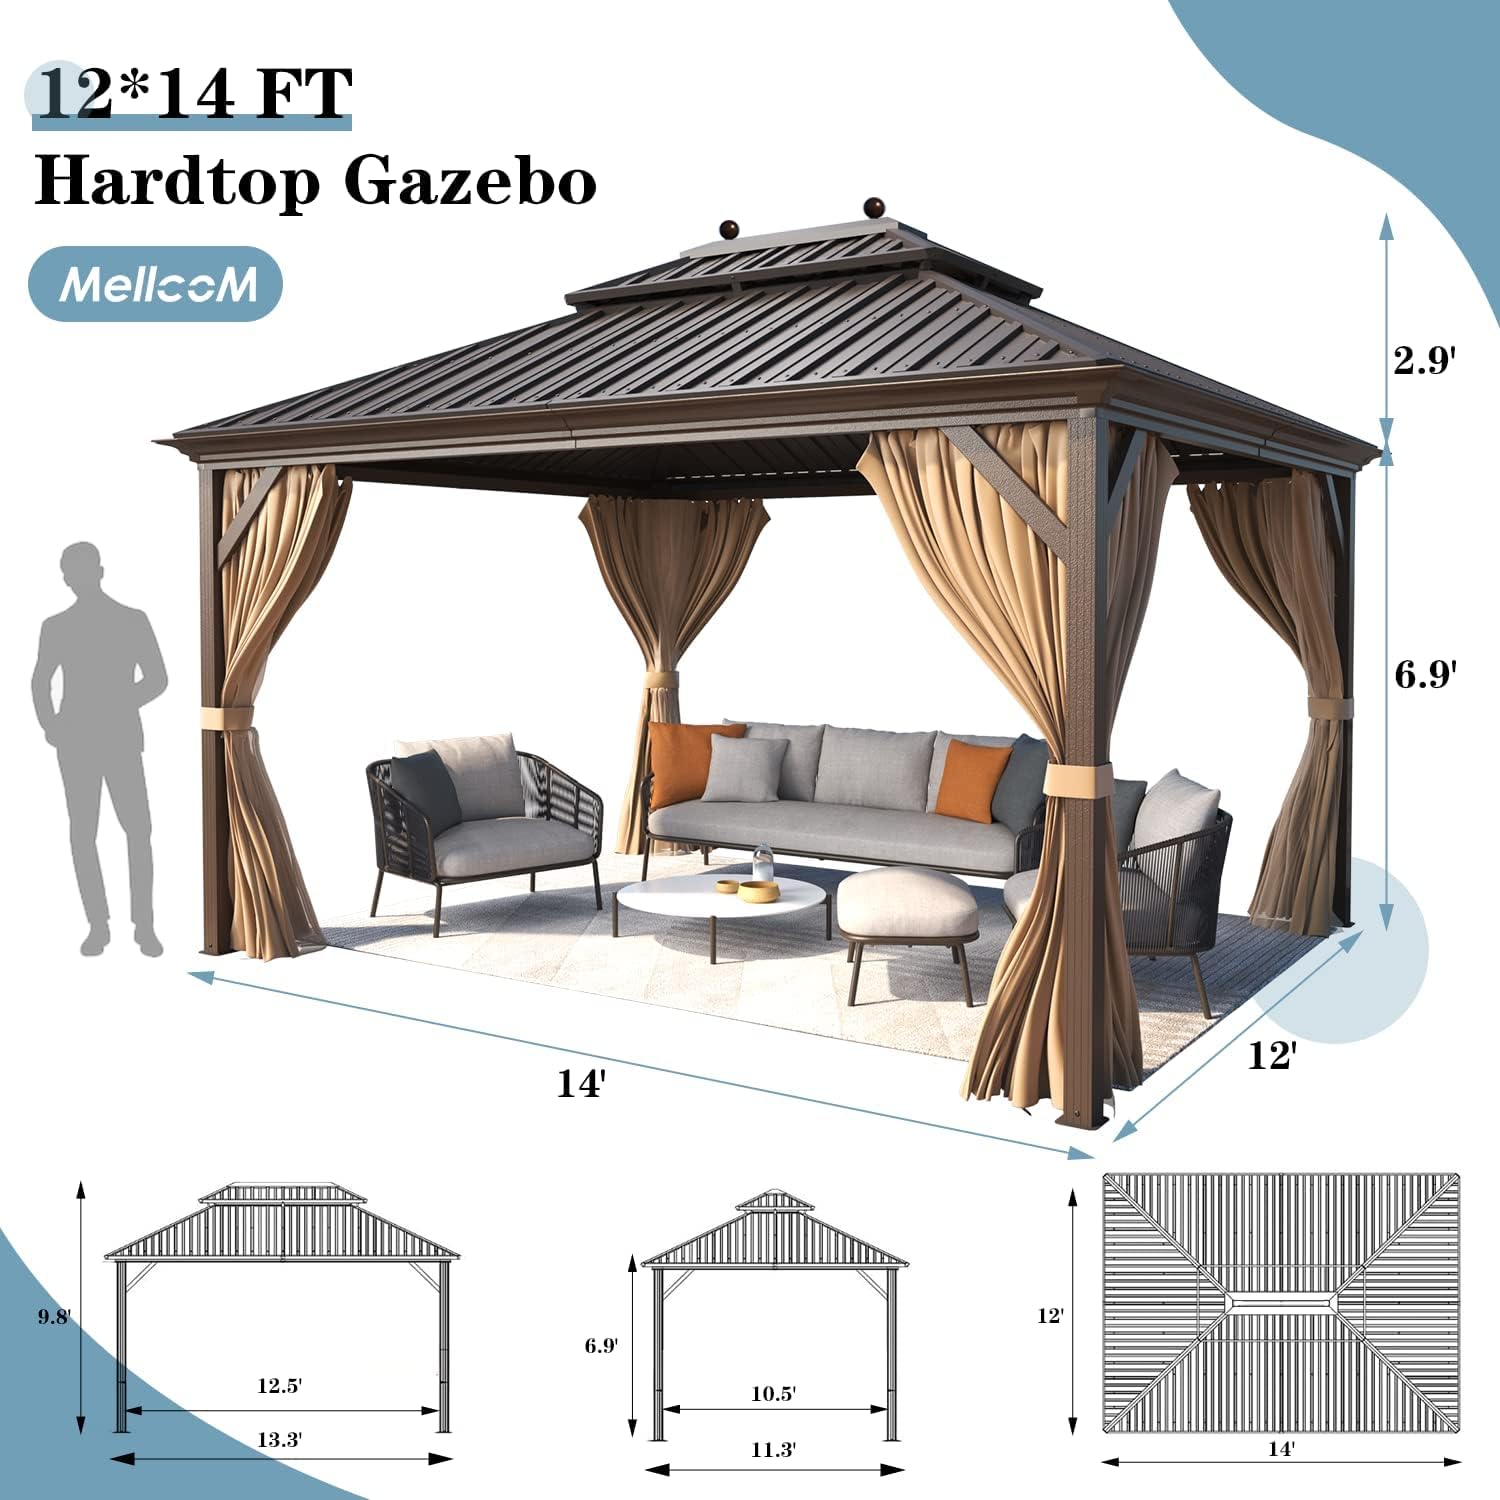
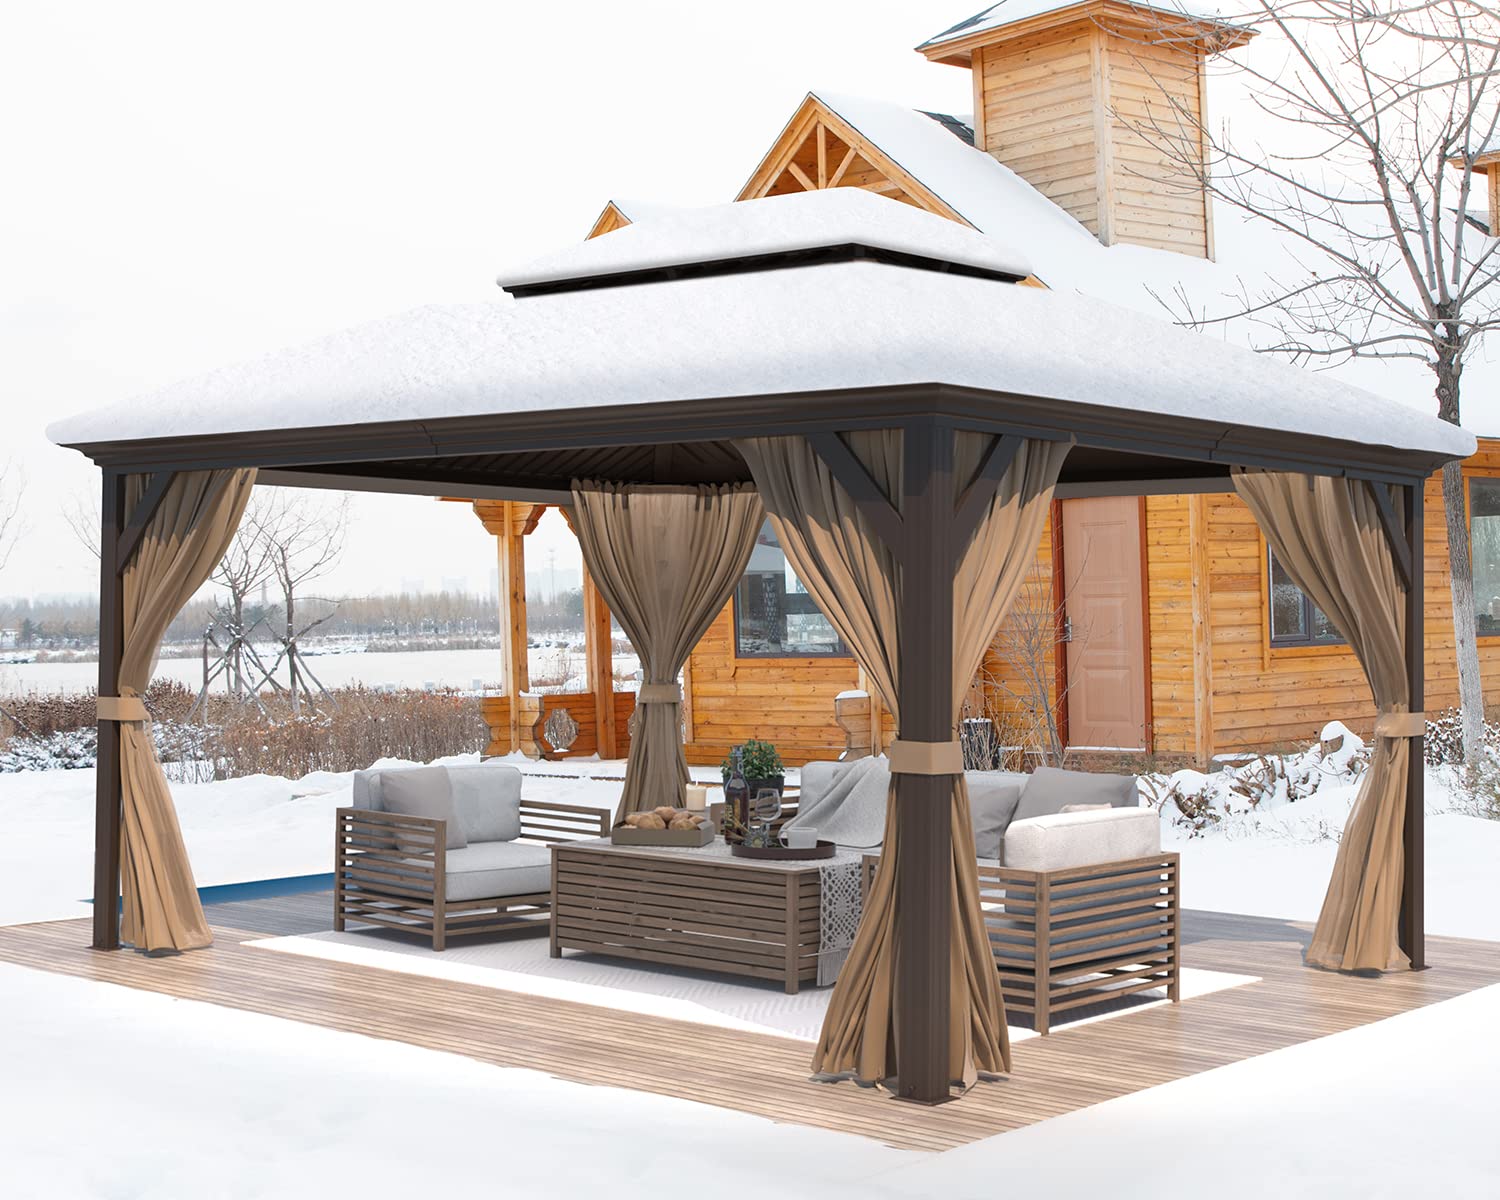
The MELLCOM 12' x 14' Hardtop Gazebo is a durable and stylish outdoor structure designed for patios, gardens, and lawns. Featuring a galvanized steel double roof for superior weather resistance, a rustproof aluminum frame, and fully enclosed curtains and netting, this gazebo offers both comfort and privacy. With ample space for furniture and easy assembly, it's the perfect addition to enhance your outdoor living area.
A**R
Excellent value with many features
This gazebo is awesome. The curtain and bug screen really finish it off and provide something that is not on all gazebos. 12 ft x 20 ft is awesome. Don’t mind the photo, backyard still under construction. But Gazebo will eventually house seating area and outdoor kitchen. Overall, it was fairly simple to put together. The frame was easy but the roof sheets were a bit of a pain. Defiantly a two man job. A little bit of patience and it will all come together. On one of the curtains, one of the eyelets from where the curtain hangs was missing the metal rivet. I contacted the seller, who responded immediately and mailed me out a replacement curtain. Once anchored down this thing is really solid. Very happy with the purchase and great customer service.
H**R
12' x 12' Hardtop Gazebo.....Ball breaker
Let's get one thing said right out of the gate....this IS a gorgeous gazebo. Very sturdy over all. The packaging was good and the way the manufacturer packaged the bolts and screws was truly genius! All the screws and bolts stayed in place in the packaging as you assemble it. You just take out what you need and the others stayed in their spots. So you don't have to worry about losing the bolts or screws after you open up the package. The manufacturer does give you a few spares. The whole gazebo is of good quality. Even the curtains feel like a good thick fabric. The gazebo looks GREAT when done....however.....You WILL need to pay attention to the instructions and LOOK AT every small detail, you MUST have a cordless drill, (have a hex head and a philips head) 2 10 foot ladders, MIN 2 people to assemble and about a solid day to do it. You will also need the the ability to invent new curse words, have enough strength to throw things across a yard, a 12 pack of beer for the end of the day and understand the person who engineered the roofing is a sadist.The roofing panels are a ball breaker! I highly suggest wearing gloves while handling the panels because the edges are sharp. Your shoulders and arms will feel like wet noodles after the first 2 hours of roof assembly. The panels for the roof just do not want to cooperate and it takes a lot of finessing to get them into place. If someone out there found an easier way to do the roofing....I implore you to share this magic with the rest of the DIY'ers out here. There are a maximum of 4 sentences in the whole instruction manual. It is all pictures. I could not find a video for the 12' x 12' Gazebo for further instructions or just to see the assembly method. My husband and I did manage to finish it and it will be a great spot for our summer fire nights. Beautiful gazebo all in all.
J**7
Nice Gazebo - Assembly tips
When the Gazebo is done, it is very sturdy and attractive. I haven't had it very long, but it is obvious that it won't leak if you assemble it correctly. Also, the assembly is easy - until you get to the point where you need to assemble the roof panels. I don't think I would have been able to assemble it without the advice I found in these reviews. However, it took me a long time to figure out what they were saying, so I wanted to try to explain it more clearly:The roof is divided into 10 sections and each section has an upper (smaller) piece and lower (larger) piece. There are a few things you need to know about assembling them that will take it from being almost-impossible to no-so-hard:1) At each end, the roof is divided into 4 triangular sections. It is important to assemble these sections before assembling the rectangular middle sections. The reason for this is that you need to install the smaller (top) triangle from ABOVE and you can't do that if there is already a roof above your head.2) Each section is held in place by sliding into a groove on either side. Trying to get the section to fit into both grooves at the same time is challenging. Also, counterintuitively, to install the triangle sections, you need to install the LOWER (larger) section first! You will need to have someone on the ground holding the bottom edge so it doesn't slide out. While they are holding the bottom edge, you then use a ladder to get access to that section of the roof from ABOVE with the smaller triangle. You then have the person on the ground slide the lower (larger) section of the roof down by about an inch to give you enough leeway to pop the smaller triangle in from above. However, if the ground person slides it down too much, it will pop out of the grooves/tracks and you will have to start over.3) It is also important to know that the lower (larger) and upper (smaller) section need to overlap by exactly 1 step (about 2 inches from what I recall). Once the smaller section is in, you try to slide it up as far as it will go. If you've done this correctly, then- the screw holes (visible from the top of the roof) will fall just after a step (where the plastic Y1 wedge is at it's thickest - see below) and- the length of the whole assembly at the bottom will be just right.4) Once both panels are in place, you pop in a plastic wedge (Y1) from the top. Also, where the two pieces of metal roofing overlap, you pop in a couple of clips (Y) from the bottom. Once you have inserted these three pieces of plastic, the roof will no longer slide out and the person on the ground can let go without the metal pieces falling out.5) You can now screw in the tiny screw (#7) from above (do this while you can still reach it!) and move on to the next panel. The screw screws into the plastic of the wedge Y1.6) Once you have installed the 8 triangular sections, it is time to install the two rectangular middle sections. The best way I found to do this was to slide the upper rectangular section into the groves from the ground (actually while standing on the first step of a step stool). When there is only about 2 inches of the panel sticking out / left to insert, hold the upper panel in place while overlapping the larger (bottom) panel (from underneath) with the smaller (top panel). Holding both panels where they overlap, carefully slide the overlapping section into the grooves. This is a little tricky and may require a few tries. Once the overlapping section is in the groove, you can keep sliding the lower section into place and it will push the smaller upper section above it to where it should be.7) Once the rectangular sections are inserted, then you will have to make minor adjustments to get the exact positioning of the panels. (The steps in the panels should line up with the steps in the triangular panels on either side.) When the panels are well-positioned, pop in the plastic clips (Y) from the bottom, and the panels will be secured in place.8) For the rectangular panels, popping in the plastic wedges (Y1) from the top is difficult. If you are 6'4", you may be able to reach from a ladder, but if you are 5'7", you will probably have to carefully/partially lay on the hot roof in order to reach the area where you need to pop in the plastic wedges (Y1) and screw in the tiny screws.Notes:- If you drop the roof pieces when trying to install them, you will likely dent them.- Don't use tape like another person suggested unless you want to try cleaning melted tape residue off a very hot roof (may vary by type of tape). Also, I didn't find the tape helpful.- The upper (smaller) panel of each section must be above (on top of) the (larger) panel below it, or the roof will leak.- Each of the metal roof panels has some screw holes in one or both edges. I didn't find these holes referenced anywhere in the instructions and I didn't find any use for them. They end up inside the grooves, so they shouldn't cause a leak.
V**E
We love the look and finished Gazebo!!
Directions are difficult to follow (all photos, no written instructions)! We learned by trial and error as we moved to another section. Took six days, three to fours each day.
B**H
Review after 1 year usage
I installed this gazebo in March 2023 and overall, the installation process was smooth, except for the roofing part, which proved to be a bit tricky. My suggestion would be to leave some wiggle room when fastening the roof frame to make it easier to push the roof pieces into place. Despite this minor hiccup, I'm extremely satisfied with the product's build quality after a year of use. It has withstood high winds of up to 60 mph and weathered snow on several occasions. To ensure extra stability, I secured the base to Trex with a wood board, which has prevented any damage during extreme weather conditions. Overall, I highly recommend this gazebo for its durability and resilience!
A**G
Beautiful
I bought this for my new deck. Very happy with it. It’s beautiful!
A**I
Very nice looking
The installation was hard, however they have clear manual instruction. But it's really worth it 👌
A**R
Top Quality, above the rest.
We purchased another Gazebo that came in 5 boxes but 2 of the boxes were from another size/model all together. After two weeks we were refunded BUT then we had to dispose of it. This model had superior finish, was package impeccably with no damage with nothing missing. Excellent purchase.
S**S
plaisir a assembler
faut etre patient :) pour l'assemblage
A**.
Very nice gazebo but needs better install instructions
Two of us installed this. It was all fine until we did the roof panels. Those little metal clips on the panels just keep falling off... THis needs to be improved. Better instructions would make this go much smoother.... instead of laying all the panels down with these little metal clips on and then having to go back and install the Y parts (the screwing in blocks) just to have to lift the roof panels again and have these metal clips fall off again! Just install the roof panels as you go the first time! And then screw it down into your base/deck material after its all done (unless you are sure you are 100 Square) because of if you are not, good luck with that! Hope it lasts!
Trustpilot
1 month ago
2 months ago