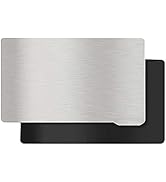
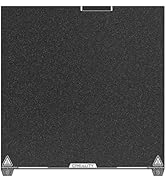
🖨️ Elevate Your 3D Printing Game!
The KOYOFEI 2PCS 3D Printer Platform is a flexible and magnetic steel plate designed specifically for the Elegoo Mars 3 3D printer. Measuring 150x95mm and featuring a robust stainless steel construction, this platform ensures excellent model adhesion and easy removal, making it an essential upgrade for any 3D printing enthusiast.
Manufacturer | KOYOFEI |
Part number | KYF-3D-111 |
Item Weight | 410 g |
Package Dimensions | 25 x 15.7 x 1 cm; 410 g |
Manufacturer reference | KYF-3D-111 |
Size | 150x95mm |
Colour | Silver |
Material | Steel |
Batteries included? | No |
Batteries Required? | No |
J**Z
Worked!
After reading a ton of reviews and tutorials I decided to give it a try, because scraping has been an absolutely nightmare for me. I use an Elegoo Mars 4.The set up was not easy (it's the understanding part which was hard), but still a lot easier than scraping.Basically 3 things;1, Insert a spacer for the Z sensor. It can be anything that's between 2.6-2.8mm thickness. I laser cut it out of a 2.7mm sheet.2, Relevel the build plate.3, Sand the steel plate surface.Then follow the instructions with the magnet and it's good to go.First print success!5 stars for now, but will update as soon as anything (adhesion, magnet, print) falls off.
M**K
👍👍
Fits well.
C**D
Prepare to have to modify your printer for this to fit...
So, first, the good:- The 3M adhesive appears to be genuine and provided you leave it 48hr in a vice, the magnetic base adheres to the build plate- The sizing is good for the Phrozen 8K Mini. Not absolutely perfect, but good enough that if fitted correctly, the removal tab won't foul the sidewall of the resin vat.- The strength of the magnet is just right. Nice and strong; it's early days for me using this, but between this strength and the relatively small build plate, I'm fairly confident it won't suffer the lateral movement mid-print that plagues similar solutions on larger printers.- The Spring Steel Flexible plate is good. Again, not perfect, but good. The edges are not sharp, there's no evidence of burrs/similar that need to be removed.Now, the reason why it's 2 stars:- The magnetic layer is *much* too thick. Even on an otherwise completely stock printer with no other modifications, this uses up *more* than 'all the available' vertical adjustment on the build head.Annoyingly (not this product's 'fault', but it made it even harder to diagnose), for me, the z-axis calibration with a single piece of paper still worked as usual after fitment of this Flex Build Plate.The bed sensor got triggered as usual.Then, you go to print for real with the resin tank in place and the bed sensor *doesn't* get triggered. Meaning the build plate continues to grind downward, potentially damaging your screen and/or burning out your printer's motor. Not good.The problem is that the Flex Plate it uses up every last micron of adjustment. Yet, the FET in the base of the resin tank is fractionally thicker than a single sheet of A4 paper. So, the paper test makes you think all is fine, but when the Resin tank is in and filled with resin, it is fractionally too thick.The 'Fix':Twenty minutes of *very* carefully filing the holes shown in the attached image, then studiously cleaning all swarf off with alcohol, then re-assembling everything, re-calibrate and it all works.Yet, it's a pretty bad 'fix'. Whilst it now at least works:- There's still no adjustment left. Temperature changes alone could easily move this outside tolerances.- Replacing the FET with a fractionally thicker replacement FET/nFET, or using slightly heavier resin and you'd be back to it not working.- Adding a screen protector (a sensible mod and common mod on the Mini 8K) would further decrease the available Z-axis space and compound the problem.Yes, you could *further* file out the holes in the diagram above even deeper to restore more adjustment to accommodate the above, but doing so would further weaken/destabilise the vertical arms where these holes are and at least theoretically, would decrease print quality.Another alternative fix I could potentially see (but have not yet tried) would be to modify the printer's bed sensor so that it is ~1-1.5mm higher and so kicks in sooner.Request to makers of the Flex Build Plate:- Use a ~1-1.5mm thinner magnet.- Even then, warn users in the instructions and item description wherever it is for sale, that if they have also used screen protectors, etc. they might need to perform the above fix.Request to makers of the Phrozen Mini 8K:On the one hand, once users are modifying your product, all bets are off and it's on them. On the other...Wherever there is adjustment in engineering, unless there is a clear tendency to travel in one direction (opening up, or closing up); you try to make it so the adjustment ships dead centre. All popular modifications to the Mini 8K, however, decrease z-axis space. IE we can identify that have a tendency for them to 'close up' as they are modified. So, design the space for the hole I'm proposing modifying above, to be sited so there is only 25% adjustment in the direction of 'opening up', but put the other 75% adjustment available in the direction of 'opening up' (existing hole sizes would probably be fine, if this was done).This way, after the common mods are done, there will still be some adjustment available in either direction.I hope that this helps someone else and saves someone else hours of head scratching, investigation and emptying/cleaning the resin vat unnecessarily! :-)----Update----Rating now downgraded to one star.After only 50 hours of use...I noticed a strange bulge in one of my prints. On closer inspection, the magnetic layer was coming away from the base plate. The adhesive failed. Resin had gotten in behind it. Peeling the flex plate off, the magnetic layer came away (see photo above).Yes, I followed all the instructions and left it in a large desk vice for 72 hours to 'set' before using it. Now trying again with the second adhesive magnetic sheet; this time, leaving it for a week, before using it. If the second one fails inside of six months, they're going back.
A**N
Does not work without a simple printable fix. [SONIC MINI 8K]
As noted in other reviews the sticky-back magnet is waaaay too thick. The height the Z height sensor triggers places the plate below the height of the screen and that is a problem.Thankfully I found a little 3d Printable "Spacer" on certain Cult websites - find one, glue it on and Wham - it works perfectly!The plate is pretty sturdy and I really like it over previous plex plates I've used.
D**E
Works great!
Fits the printer great! and never had an adhesion problem!I LOVE these flex plates! :D
R**S
Easy to use, clean and Mount
I bought this along with my Mars 3 (sadly they don’t do a Mars 3 sized build plate…yet) so I lost a little build area. I was pleased to see it had genuine 3M adhesive tape to hold it on! Might be teaching people to suck eggs but be sure to wipe the original build plate with IPA before mounting! Also the extra thickness of the magnet base will probably require a small spacer for Z homing, thingiverse probably has one for your machine.
J**0
Bought for my husband
As the title says I got this for my husband, he bought a Saturn 8k on a really good deal and the first thing I did was order this, my husband is not the most patient person and I had visions of him breaking every print trying to get them off the plate. So it was mostly to avoid living with a grump because he broke stuff. He loves it except for occasionally nipping his fingers when putting the plate back on because the magnet is so powerful
J**F
Adhesive failed
It was fine, for a while, flex plate worked, and gave a good surface finish. No more scraping.BUT. over time the adhesive breaks down, and once it starts its peels away. it went from loose in 1 corner, to more than half hanging off in just 4 prints.as I took it off, I noticed the glue used comes of very easily with IPA. Not sensible as that what we all use t clean the prints. I think it lasted for a while when I was using water washable, and only printing infrequently.Was happy with it. but now it's just bin worthy unless I find a better glue myself.
M**.
Lo mejor
Tenía problemas en retirar las impresiones, pero con esta placa el retirarlas es mucho más fácil, estoy fascinado con el material
C**R
Love this plate
I was having problems with my plate so I ordered this flex plate and it was the best thing I could have done. My prints were finally sticking and printing the correct way… great purchase
M**E
Requires modification. Don't just install it as is!
This plate works great. Makes the handling of prints so much easier. But please, realize that you must modify the bracket of the Mage pro to accommodate the extra height. This is simple to do. Just elongate the 4 adjustable bed leveling screw slots to make them longer in-order to accommodate the extra depth of the new plate. You can also move the sensor, but I choose to mid the plate instead. Just look for info online.
L**)
Updated as of 09-11-22_Home and Setting Your Z is Crucial
Determined the issue was with properly setting my home and also setting my Z offset. Also, taking sandpaper to the build plate helped the prints stick to it. As a novice printer, I'm learning as I go. Utilizing the cones of calibration tool helped tremendously. I have a Saturn S, and I had to adjust/tweak my settings to get optimal builds and reduce failures. My adjusted settings are as follows:- Base bottom layer count was 5 layers, changed to 4 layers- Base bottom exposure was 30 seconds, changed to 20 seconds- Base Exposure time was 2.5 seconds, changed to 3.0 seconds.**One key note regarding calibration: When homing my build plate, I now use my vat and I level/home/Z offset my build plate to my vat. I add resin to my vat so that it's about 1/4th full, loosen the build plate bolts, and then home it with the resin in the vat. This is alleviating the prints sticking to the FEP.The cones of calibration takes an hour to print but uses minimal resin and will save time (in the long run) alleviating the headaches/frustrations of getting failed prints.Hope this helps, and remember, with 3D printing, slow is smooth, smooth is fast. Fast and bad is 'bad' and is a waste of money, time, and resin. All the best.------------------------------------------------------------------Executed 6 prints. All failed. Tried googling/youtub'ing walk throughs, setting adjustments, etc. with each failure to accommodate the magnetic build plate in hopes of a successful print. All prints failed. Every print stuck to the FEP. Additionally, to make sure it wasn't due to the FEP, I replaced the FEP. Prints still went to the FEP and would not take on the magnetic build plate. I will be returning these. Save your money. These are a dud. Hope this helps someone and all of the best.
I**A
tutto ok
tutto ok buone è comode la stampa si stacca facilmente senza rovinare nulla
Trustpilot
4 days ago
1 day ago