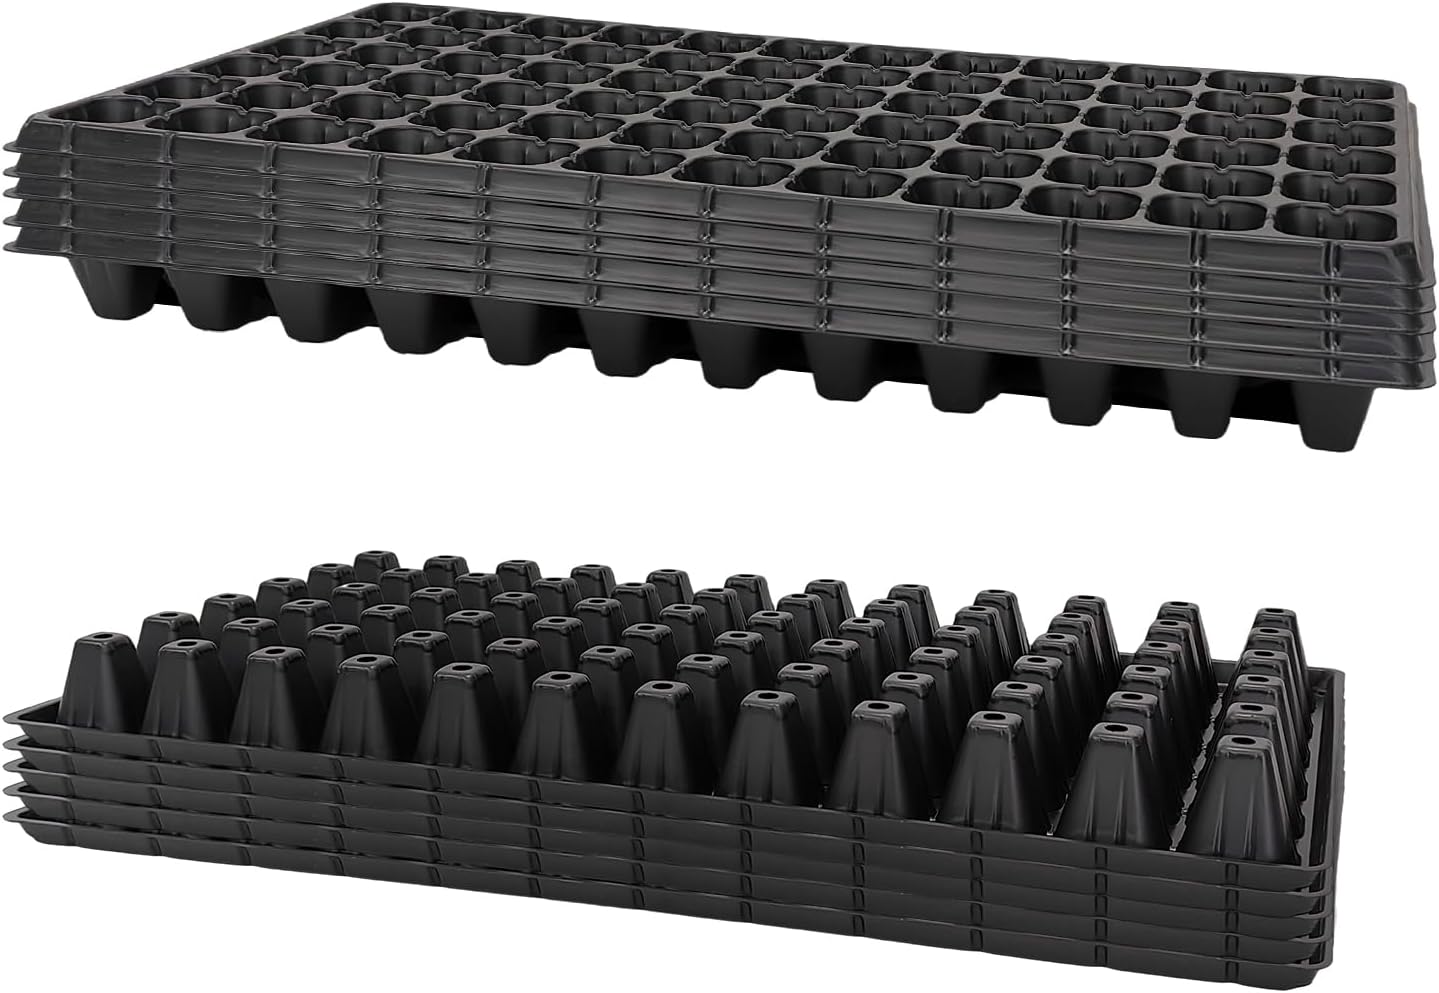
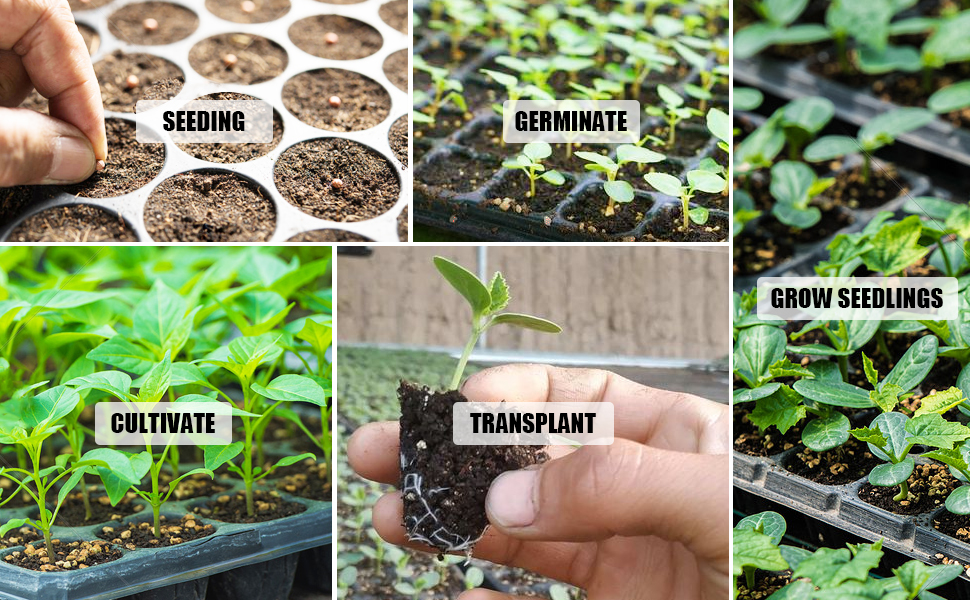
This review details the progression from seeds to seedlings to the ready-to-plant-outdoors stage, with a balanced focus on quality and cost. This setup was used in the Piedmont region of North Carolina. I purchased these deep, seed starter trays specifically for raising Butterfly Milkweed (Asclepias tuberosa) seedlings, a species that develops a taproot very early in its life cycle. Standard shallow seed trays were not sufficient for what I wanted to accomplish, especially since my goal was to raise seedlings to the hardened-off, outdoor-ready stage before transplanting. The additional depth of these trays proved extremely useful during the seedling phase. The deeper cells allowed for substantially more vertical root development than standard shallow trays while still fitting into standard 1020 propagation systems. In my setup, these trays were used as part of a larger multi-stage indoor propagation workflow that included controlled PPFD lighting, bottom watering, airflow management, staged humidity reduction, and eventual outdoor hardening-off. The remainder of this review documents the full propagation workflow and explains how these trays fit into the overall system. This review details the progression from seeds to seedlings to the ready-to-plant-outdoors stage, with a balanced focus on quality and cost. Stage 1: Germination # Infrastructure - 1. 6-Tier Rack (https://www.amazon.com/dp/B0CHVFVX7L) - Variable Speed Rack Fan (https://www.amazon.com/dp/B09PVQBHB5) - Timers for devices not having built-in timers (https://www.amazon.com/dp/B073DGGHD7) - Power Strip (https://www.amazon.com/dp/B08P5LRY37) # Growing Equipment - Dome with Integrated Germination Grow Lights (https://www.amazon.com/dp/B0G39FXMCY) - Dimmable Grow Light Strips with Timer, sufficient for 4 rack levels (https://www.amazon.com/dp/B0B28P7L2G) - VBR-100 PAR Meter for measuring light (https://www.amazon.com/dp/B0B11H31DH) - Bamboo Skewers to raise dome (https://www.amazon.com/dp/B07MY89RGF) - Seed Starter Tray for Butterfly Milkweed, Asclepias tuberosa (https://www.amazon.com/dp/B0DQ7RL9B5) Build the rack with the lowest level at a total height of 12 inches. All other levels are 16 inches in total height. The lowest level and the area above the top shelf are reserved for storage. Install fans, timers, and power strips as needed. The growing equipment configuration is surprisingly useful during the very initial phase of seed germination, until 50-75% of the seeds in a 1020 tray have germinated and cotyledons are visible above the soil. At that point, this grow light should be removed. During this stage, newly germinated seedlings generally benefited from light levels in the 50-100 PPFD range, as measured with a PAR meter such as the VBR-100, which I found both adequate and inexpensive. Attach variable-speed fans at each level and set them to the lowest speed. At 50% germination, use skewers to raise the dome by approximately 1 inch to increase airflow and reduce excessive humidity buildup. The skewer length should be 4 inches plus the depth of your seed starter tray. In my case, I'm raising Butterfly Milkweed seedlings that require a deeper seed tray. The one above is 4.33 inches deep and worked extremely well for the taproot's early growth phase in this plant. If you use standard trays, choose the skewer size accordingly. At 75% germination, remove the dome with integrated grow lights. Continue at this stage until the seedlings begin to develop true leaves. At that point, Stage 1 is complete. Stage 2: Seedlings - Farmlite Grow Light Bars, 2 lights each per rack level (https://www.amazon.com/dp/B0F8HD22HP) I now start using one additional grow light set for each level in my multi-level rack. These lights, used in combination with the dimmable grow lights from Stage 1, were sufficient to fully cover a 1020 tray with near-uniform light for the remainder of the indoor growing phase. The Farmlite grow light bars are continuously dimmable, which is extremely useful. With the 2-light set installed on either side of the dimmable grow light, you can provide sufficient light for seedlings before hardening off and outdoor planting. During Stage 2, seedlings with true leaves generally benefited from light levels in approximately the 200-400 PPFD range measured at canopy height. Lower values produced slower, weaker growth, while substantially higher values appeared to increase the risk of light stress and excessive drying in seed trays. The combination of the dimmable center grow light and the Farmlite side bars allowed near-uniform PPFD distribution across the entire 1020 tray. Stage 3: Hardening Off The hardening-off phase is extremely important and should not be skipped. Indoor-grown seedlings, even under strong grow lights, are not yet adapted to direct sunlight, wind turbulence, outdoor humidity fluctuations, or rapid temperature changes. In my case, hardening off began once seedlings had developed multiple true leaves and at least two nodes. More developed seedlings tolerated the process better. Begin by placing seedlings outdoors in bright shade only for approximately 2-4 hours. Avoid direct afternoon sun initially, especially during warm weather above 85F. Even sun-loving plants such as Butterfly Milkweed can experience rapid leaf scorch if moved directly from grow lights into full sun. Increase direct sun exposure gradually over approximately 7-10 days. In my case, because the morning sun is partially blocked by surrounding trees and structures, direct sun exposure began around 11 AM and was therefore more intense than early morning sunlight. I initially limited direct exposure to approximately 30 minutes and gradually increased the duration each day based on the plant's response. The low-speed fans used during indoor growing significantly improved stem strength prior to outdoor transition. This reduced stem collapse and allowed seedlings to adapt more quickly to natural wind movement. During hardening off: - Continue bottom watering as needed. - Avoid overwatering during extended rainy periods. - Rotate trays daily to prevent leaning toward sunlight. - Expect some temporary wilting during early outdoor exposure, especially during warmer afternoons. A successful hardening-off process results in: - Darker foliage. - Thicker stems. - Reduced transplant shock. - Improved outdoor survival. Stage 4: Outdoor Planting Butterfly Milkweed (Asclepias tuberosa) prefers lean, well-drained soils and should not be heavily fertilized after transplanting. In my case, seedlings were planted into previously cultivated vegetable garden soil that already contained significant organic matter from prior compost additions. I intentionally avoided adding additional compost or fertilizer at planting time. Spacing matters significantly. While closer spacing can improve weed suppression and visual density, adequate airflow remains important in humid climates. I found that approximately 18-inch spacing provides a good balance among plant density, airflow, maintenance access, and long-term plant structure. Temporary low fencing around newly planted areas is highly recommended if dogs or wildlife have access to the planting area. Newly transplanted seedlings are vulnerable to trampling during the first several weeks of establishment. One important lesson from this process is that Butterfly Milkweed benefits from restraint. Excess fertilizer, overly wet soil, and insufficient light tend to produce weaker plants. Strong light, moderate airflow, careful watering, and gradual outdoor acclimation produced compact seedlings with strong root systems and excellent transplant readiness. Additional Notes - Bottom watering worked extremely well throughout the process and reduced surface disturbance of the soil. - I used a dilute liquid fertilizer only after multiple true leaves had formed and only at approximately one-quarter of the manufacturer’s recommended concentration. - Overfeeding seedlings is easy and often counterproductive. - A low-fertility seed starting mix consisting primarily of peat moss, coconut coir, vermiculite, and perlite worked very well. - Deep trays are especially important for Butterfly Milkweed because this species develops a taproot early in its life cycle. - One of the most useful tools in this setup was the PAR meter. Many grow lights marketed for seedlings produce substantially more light than newly germinating seeds require. - Measuring actual PPFD values helped prevent excessive light stress during early germination while still providing sufficient intensity during later stages of growth.