
Elevate Your Outdoor Experience! 🌟
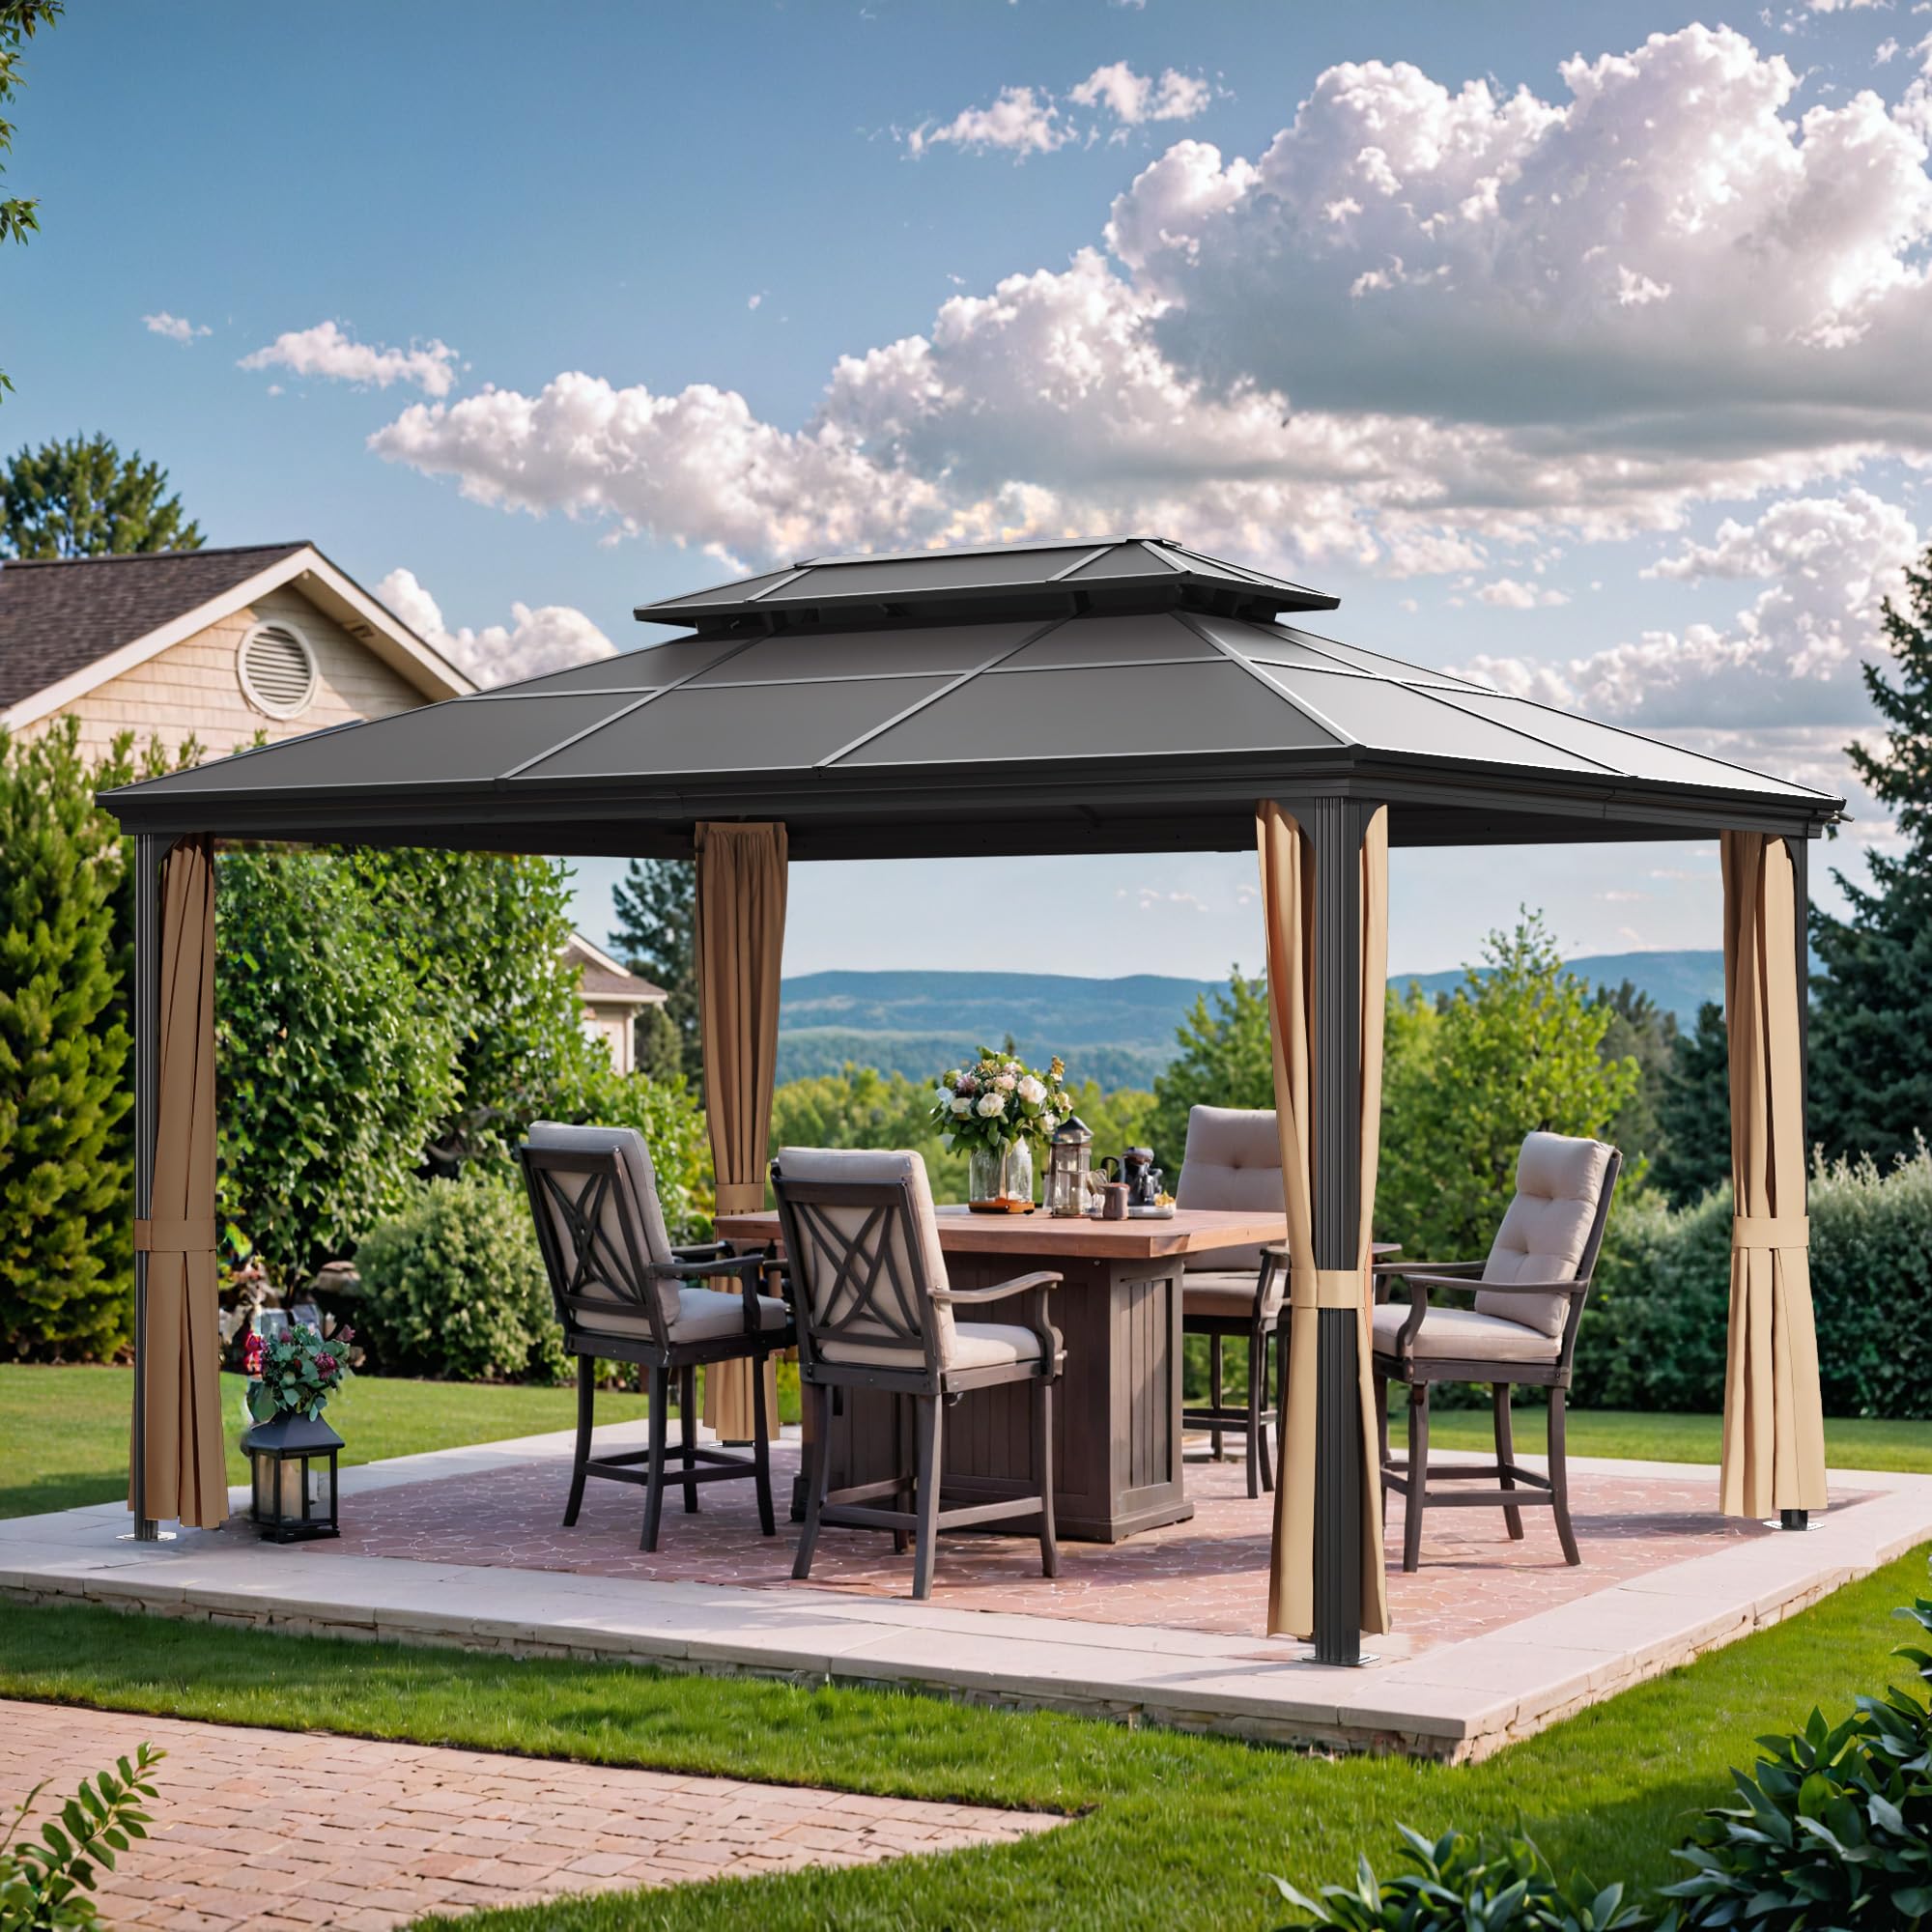
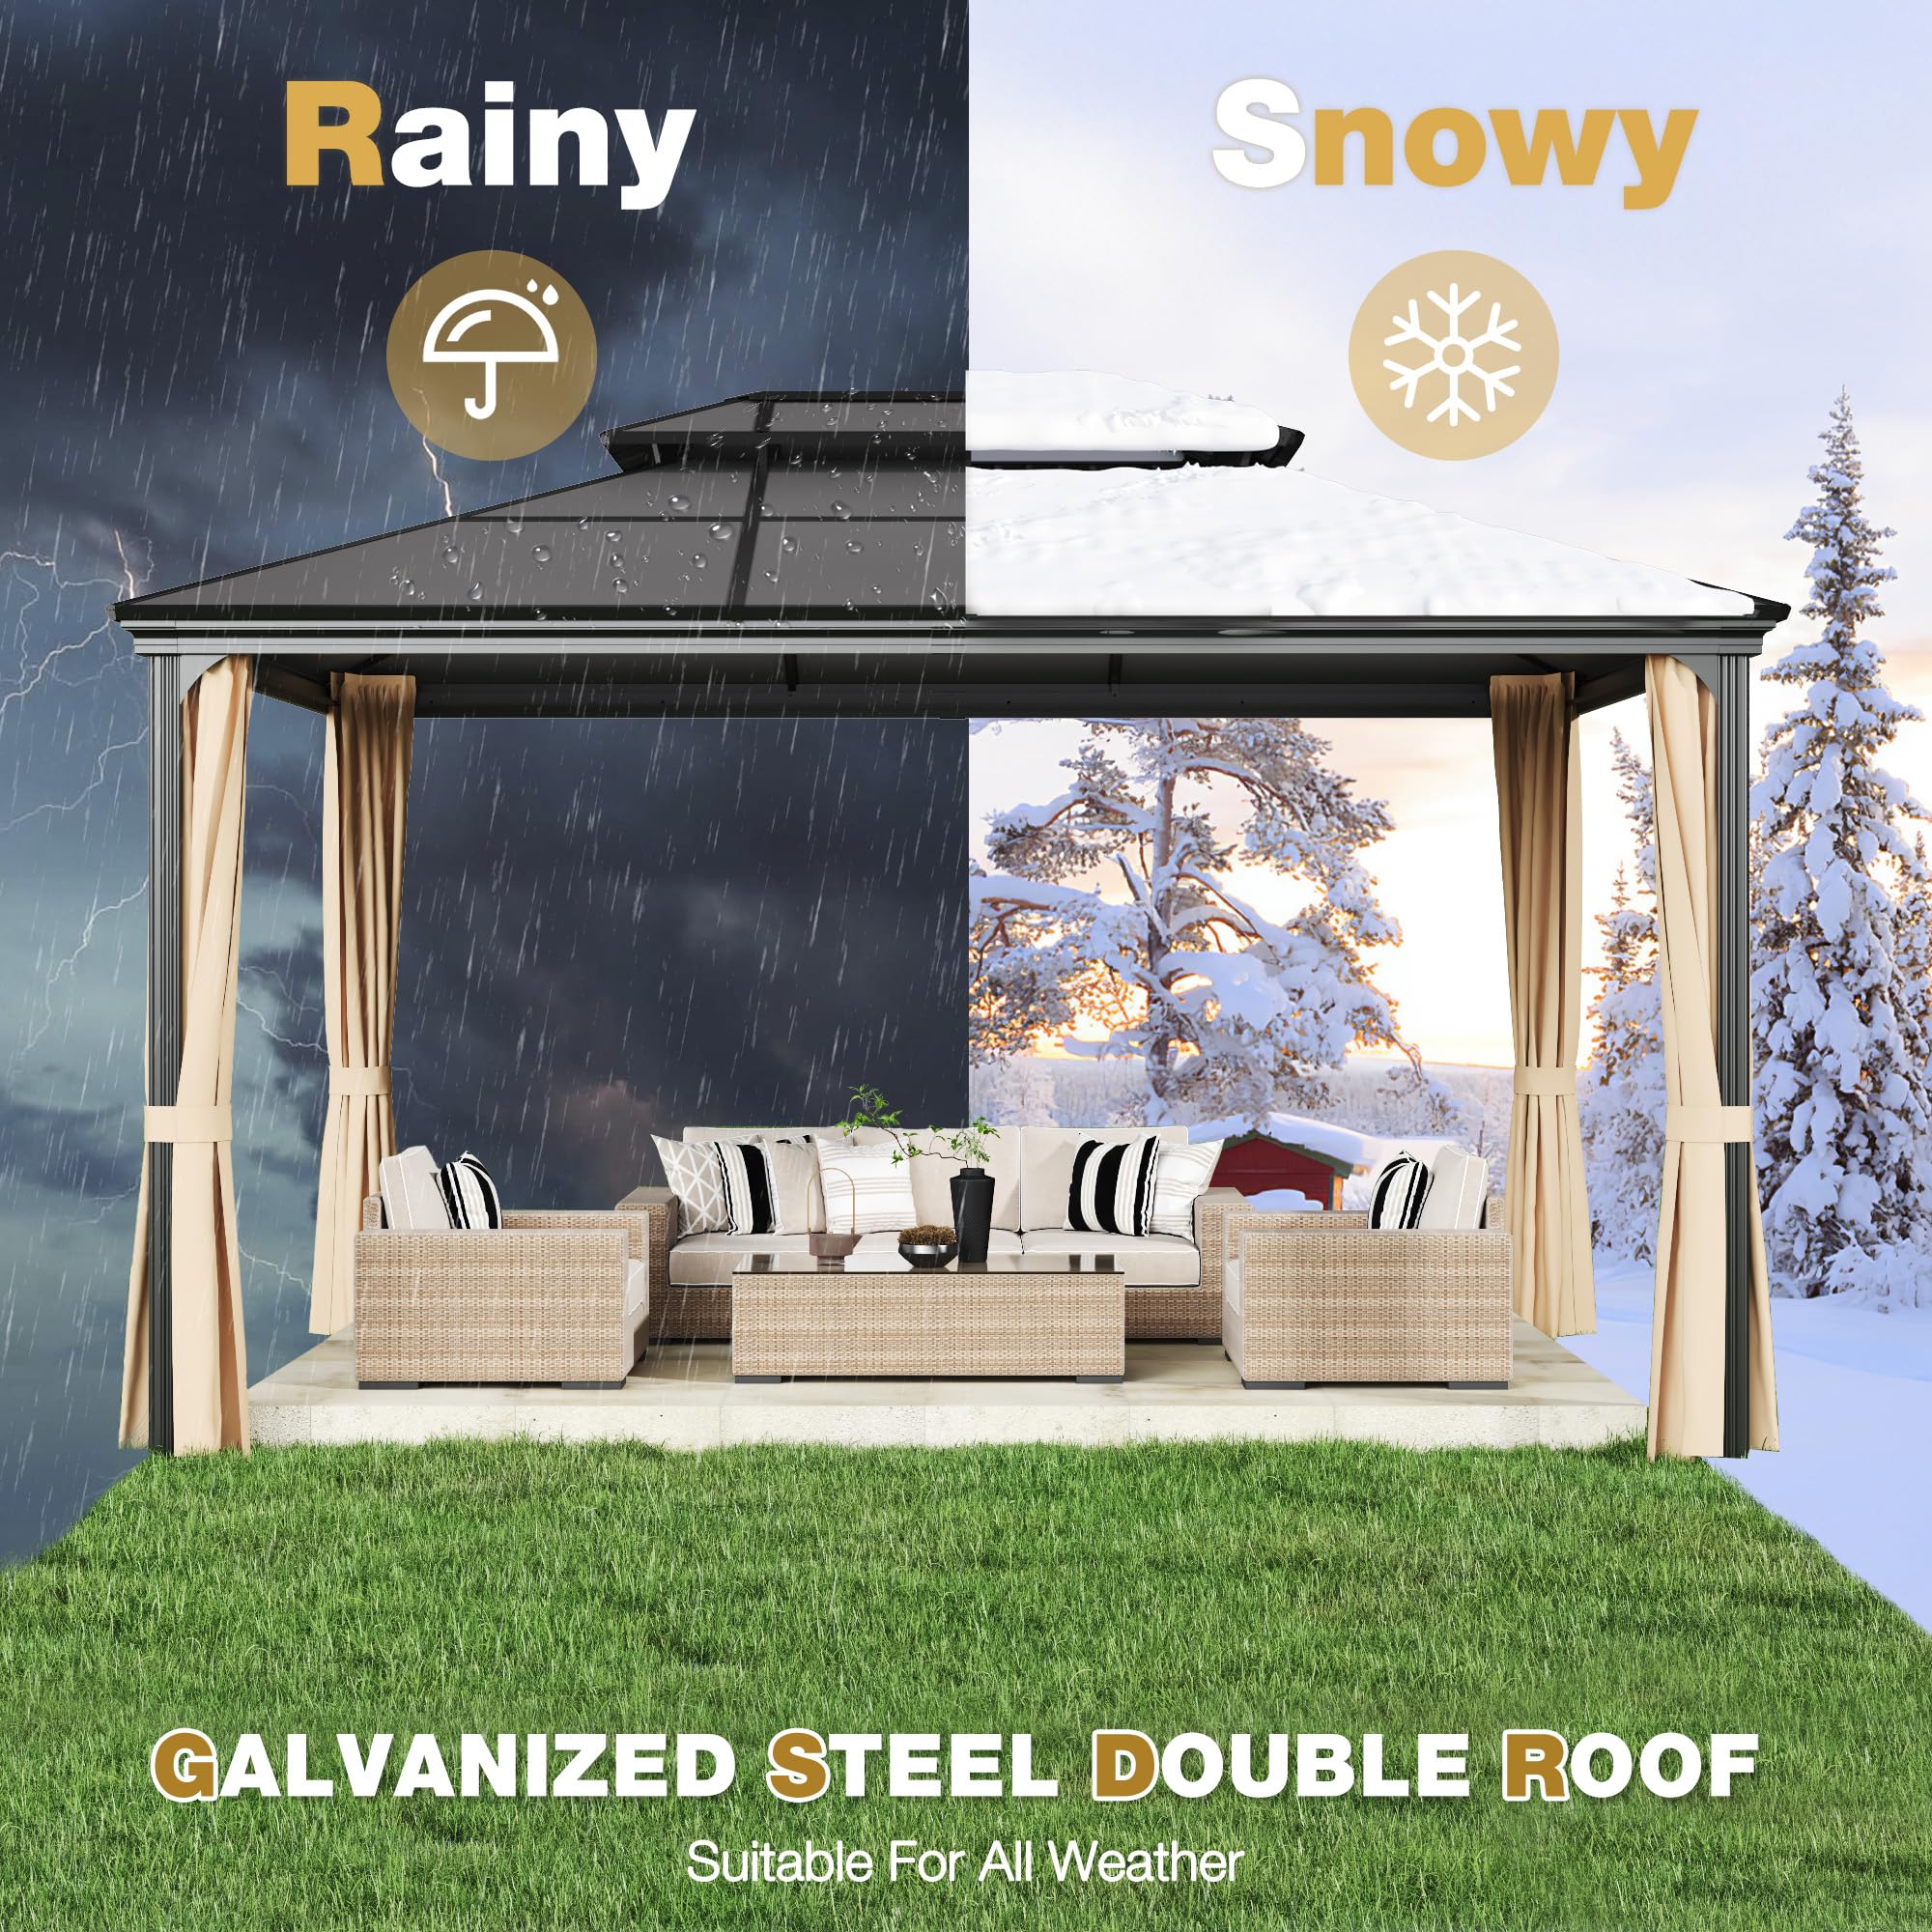
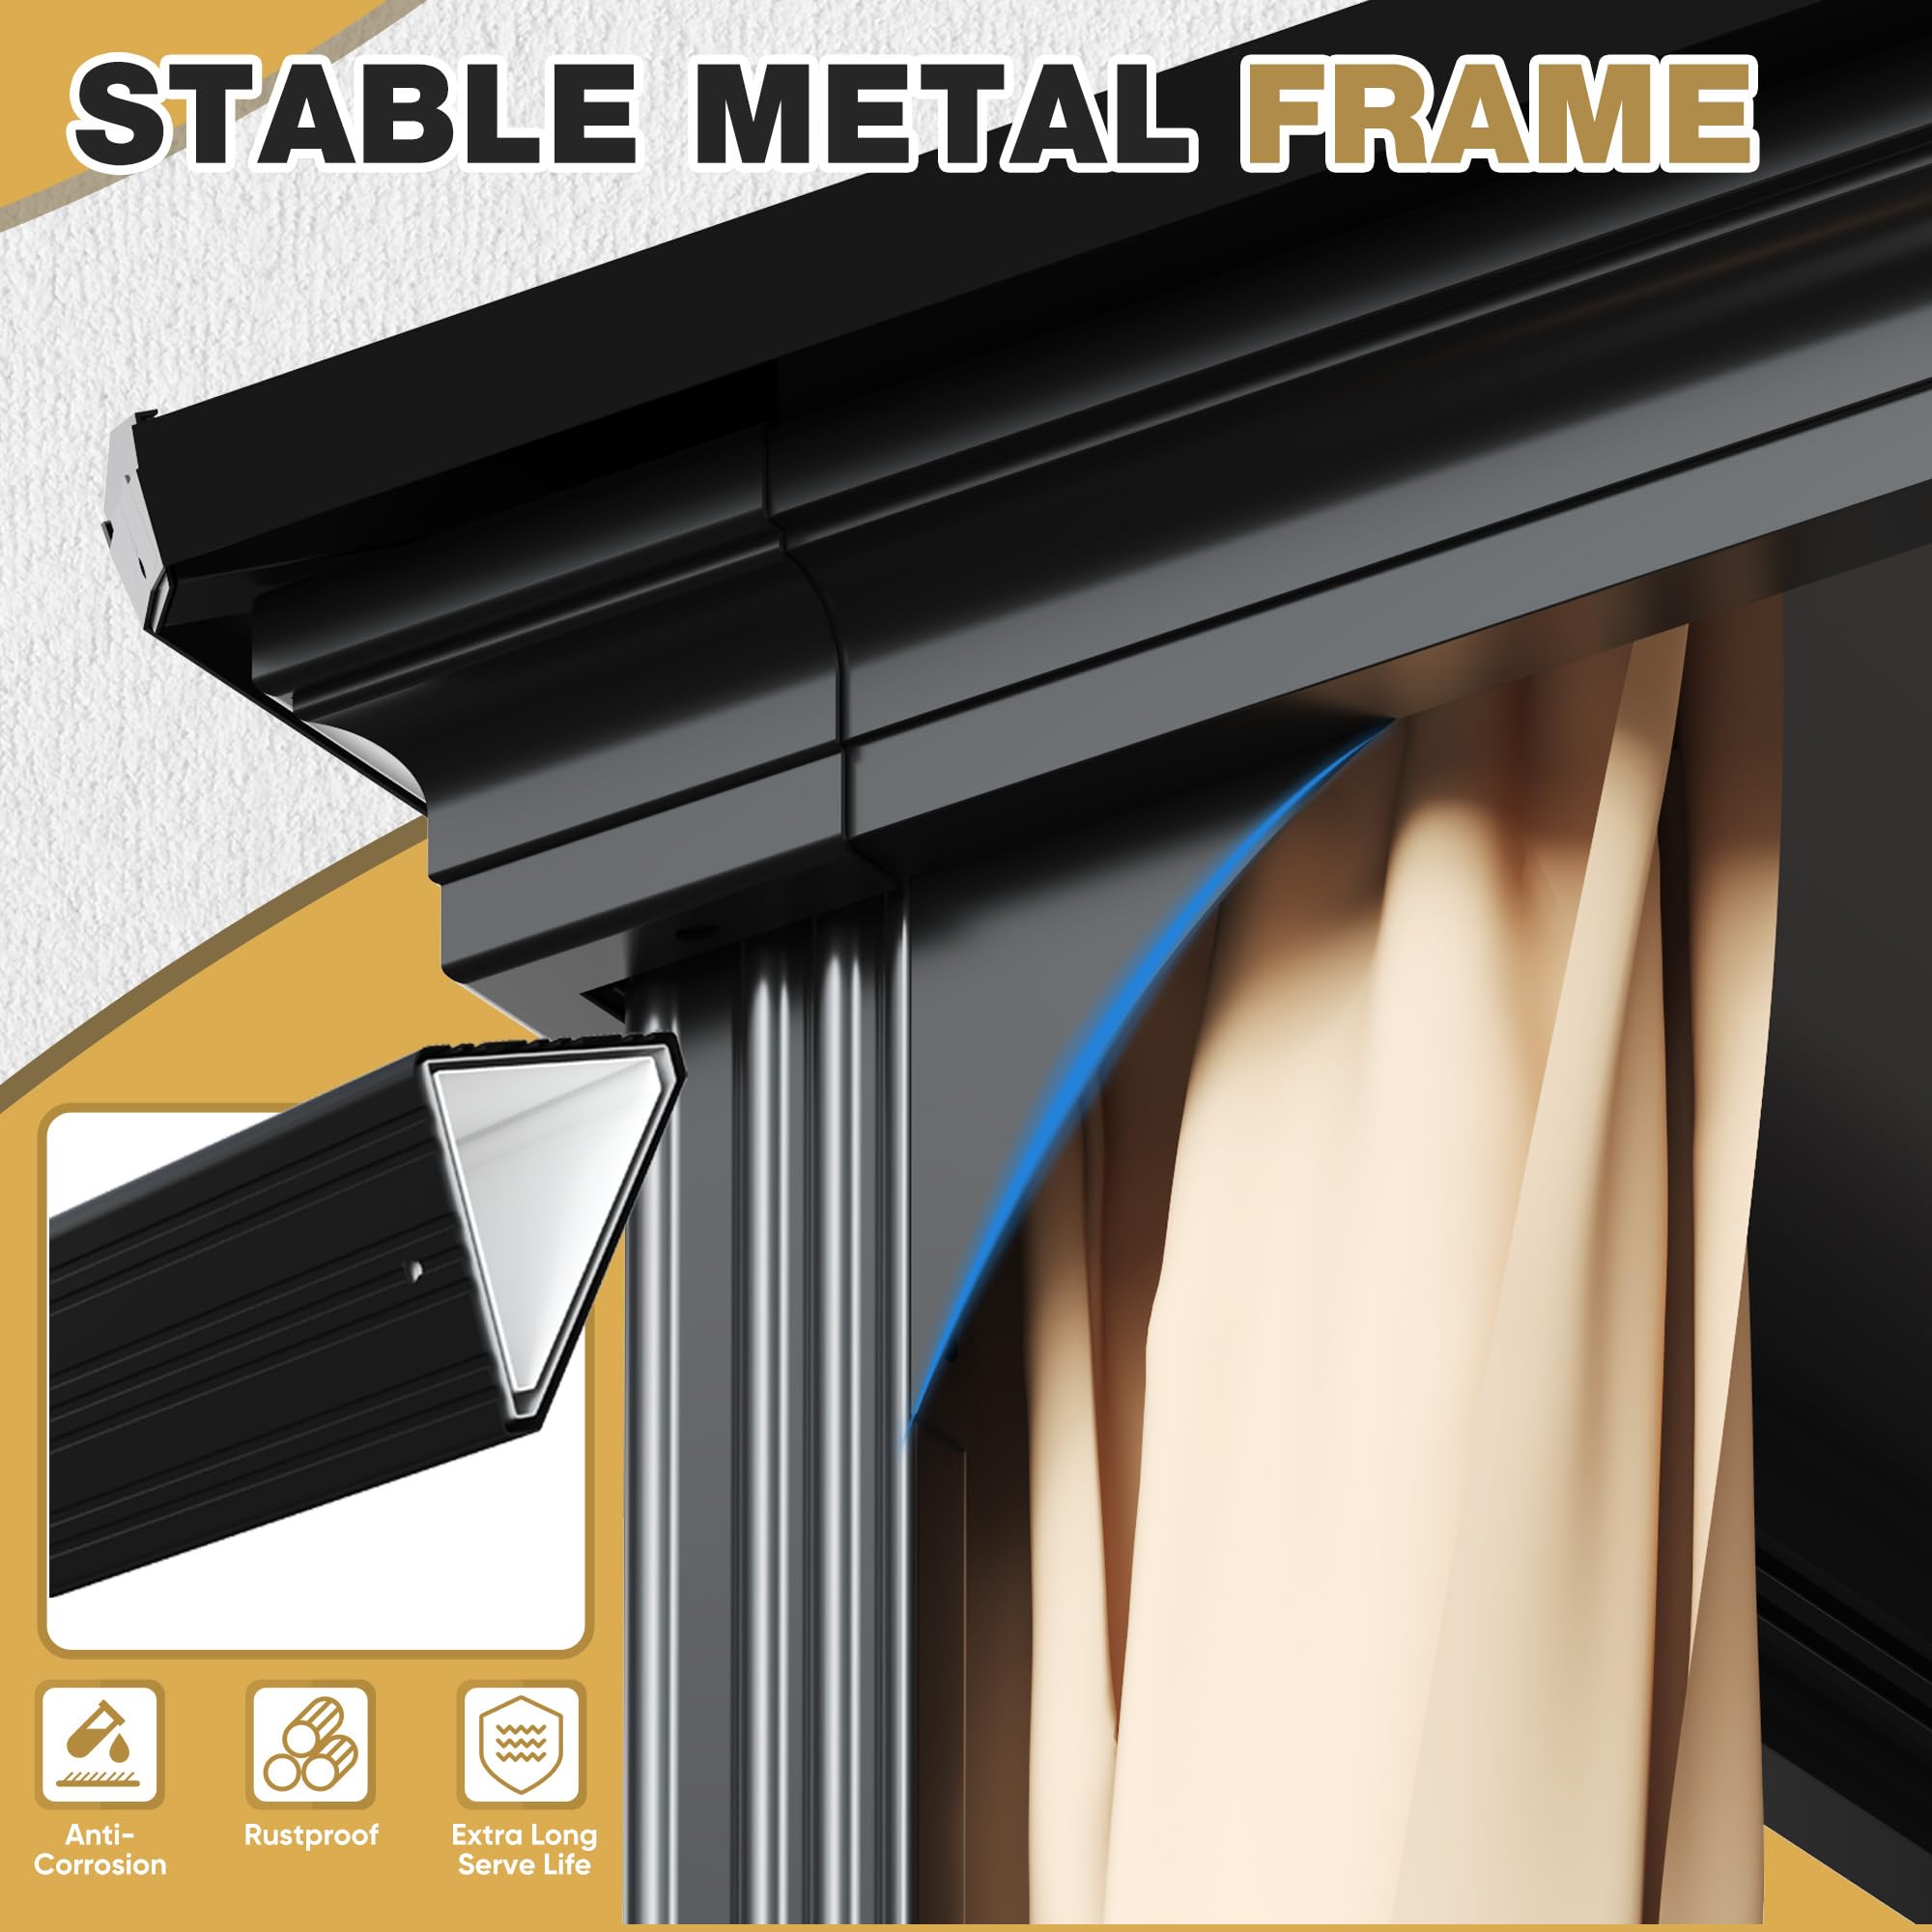
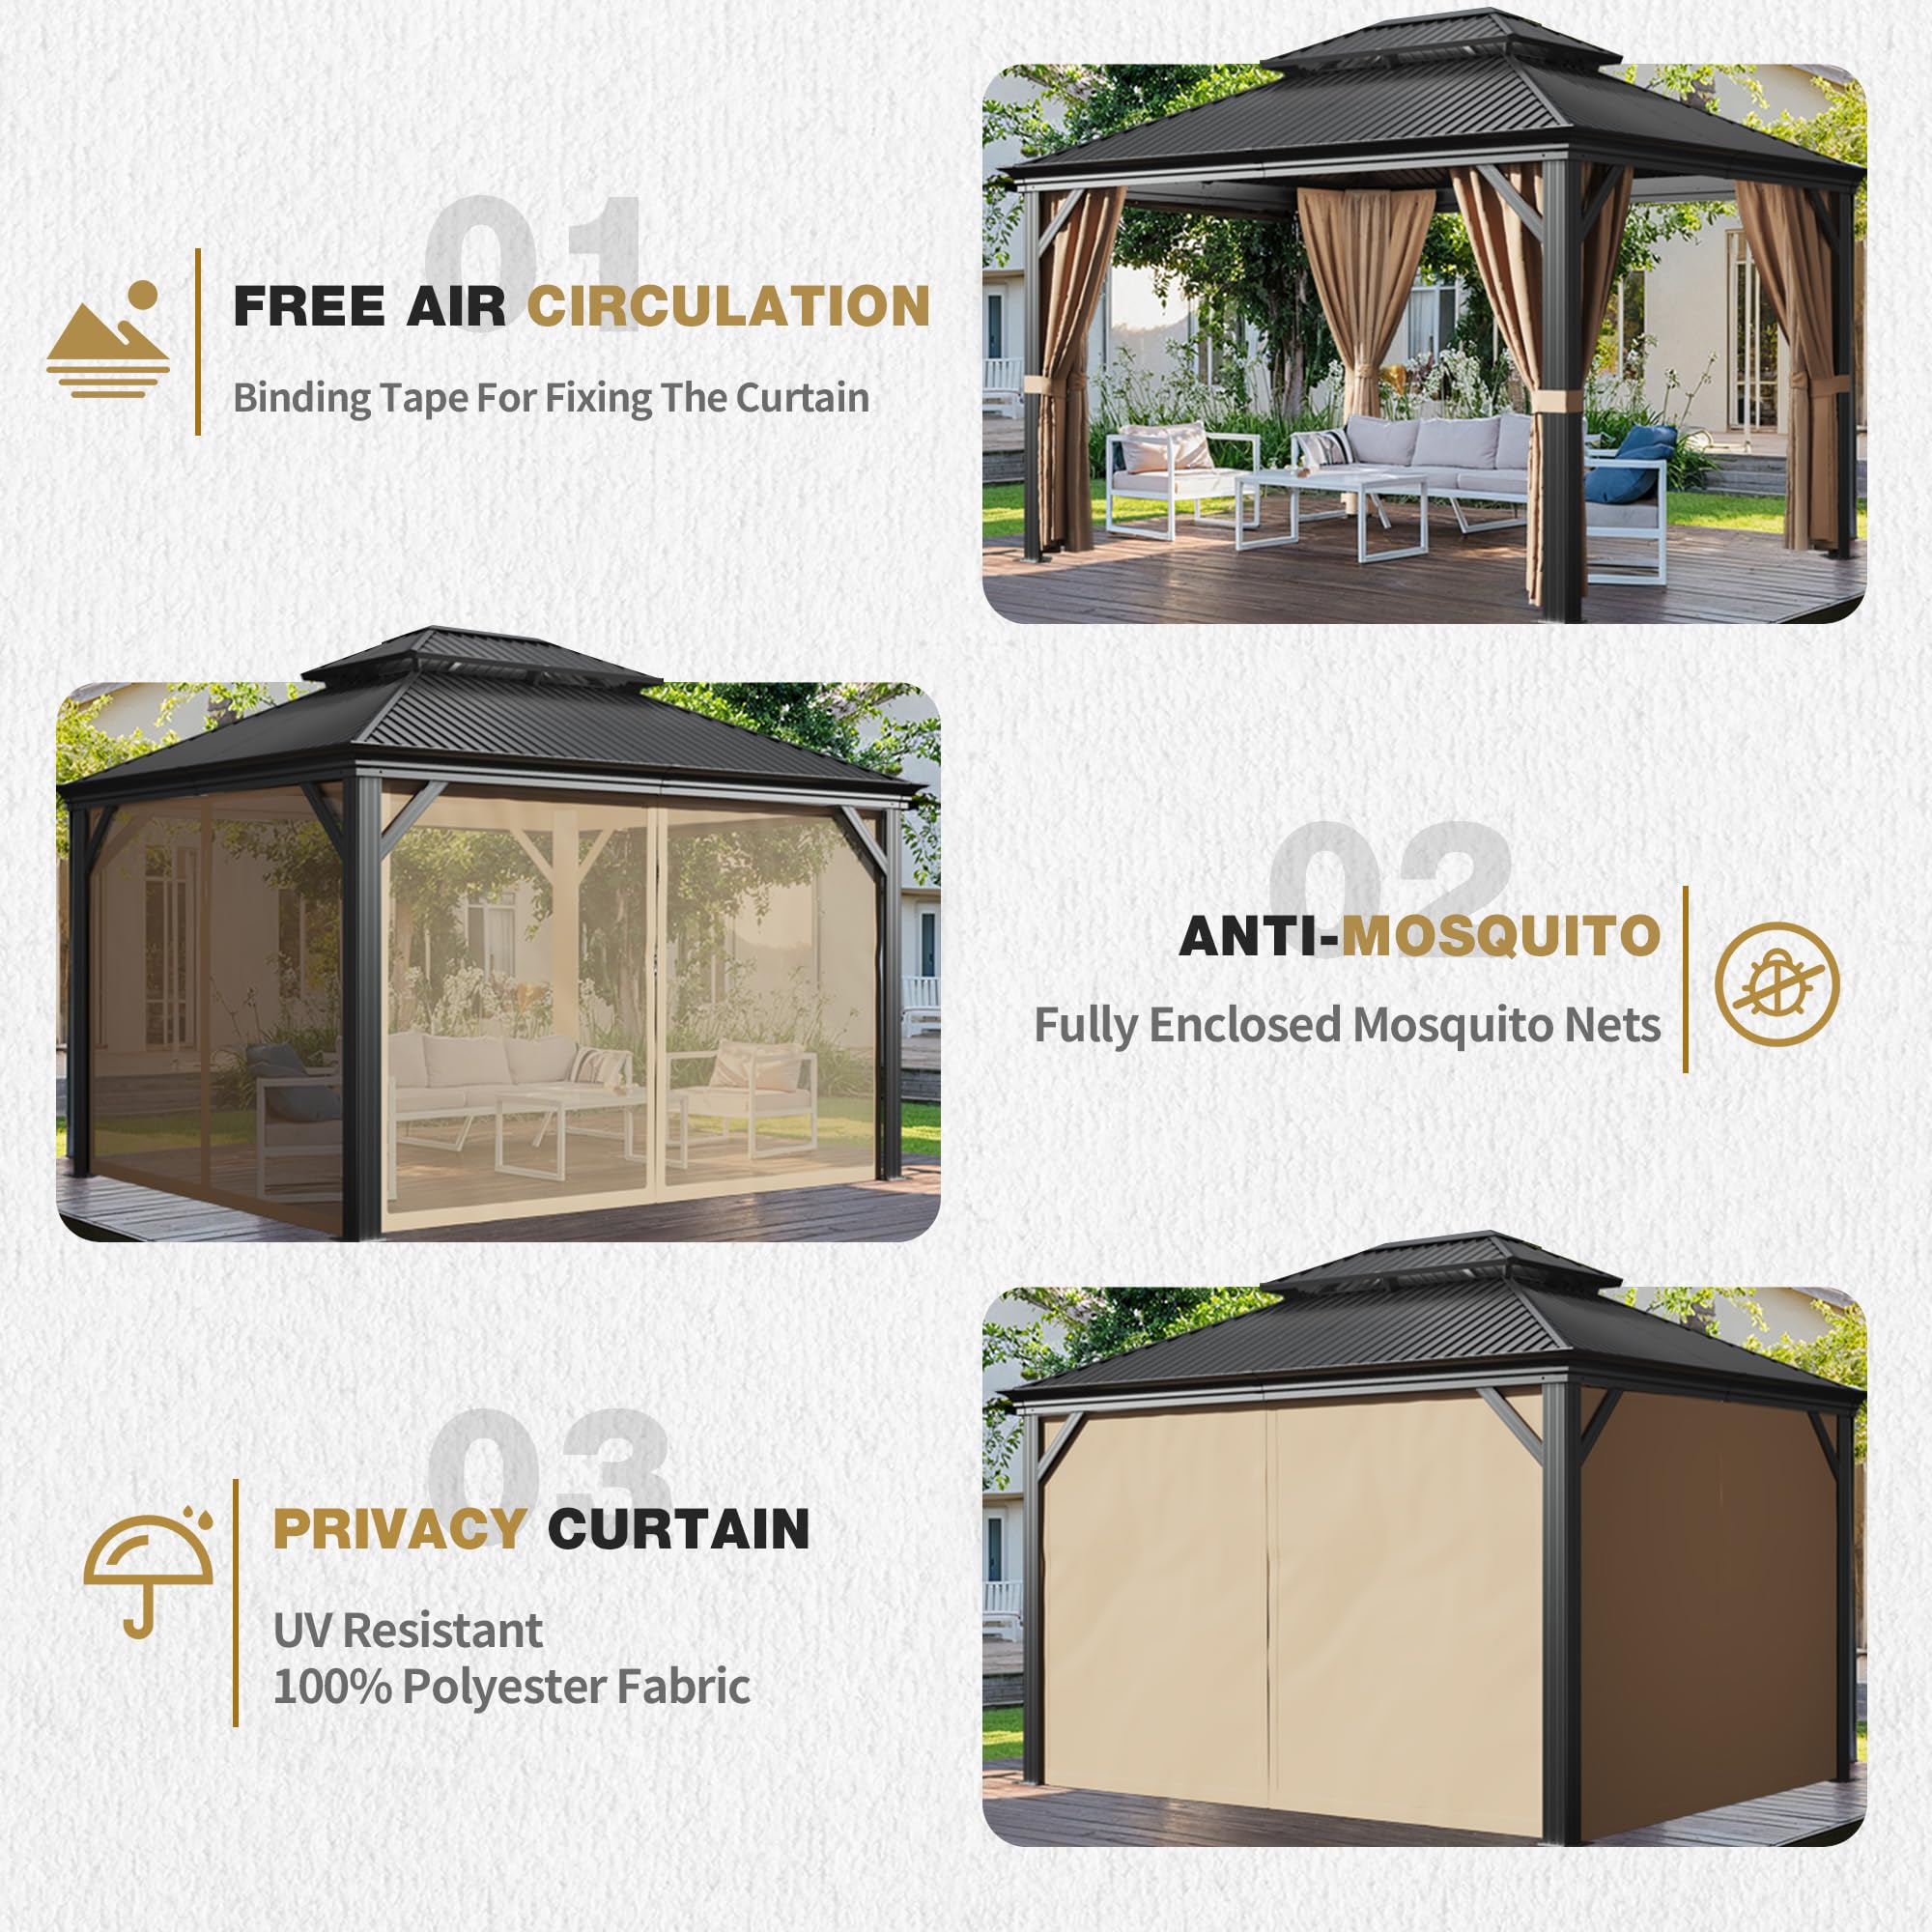
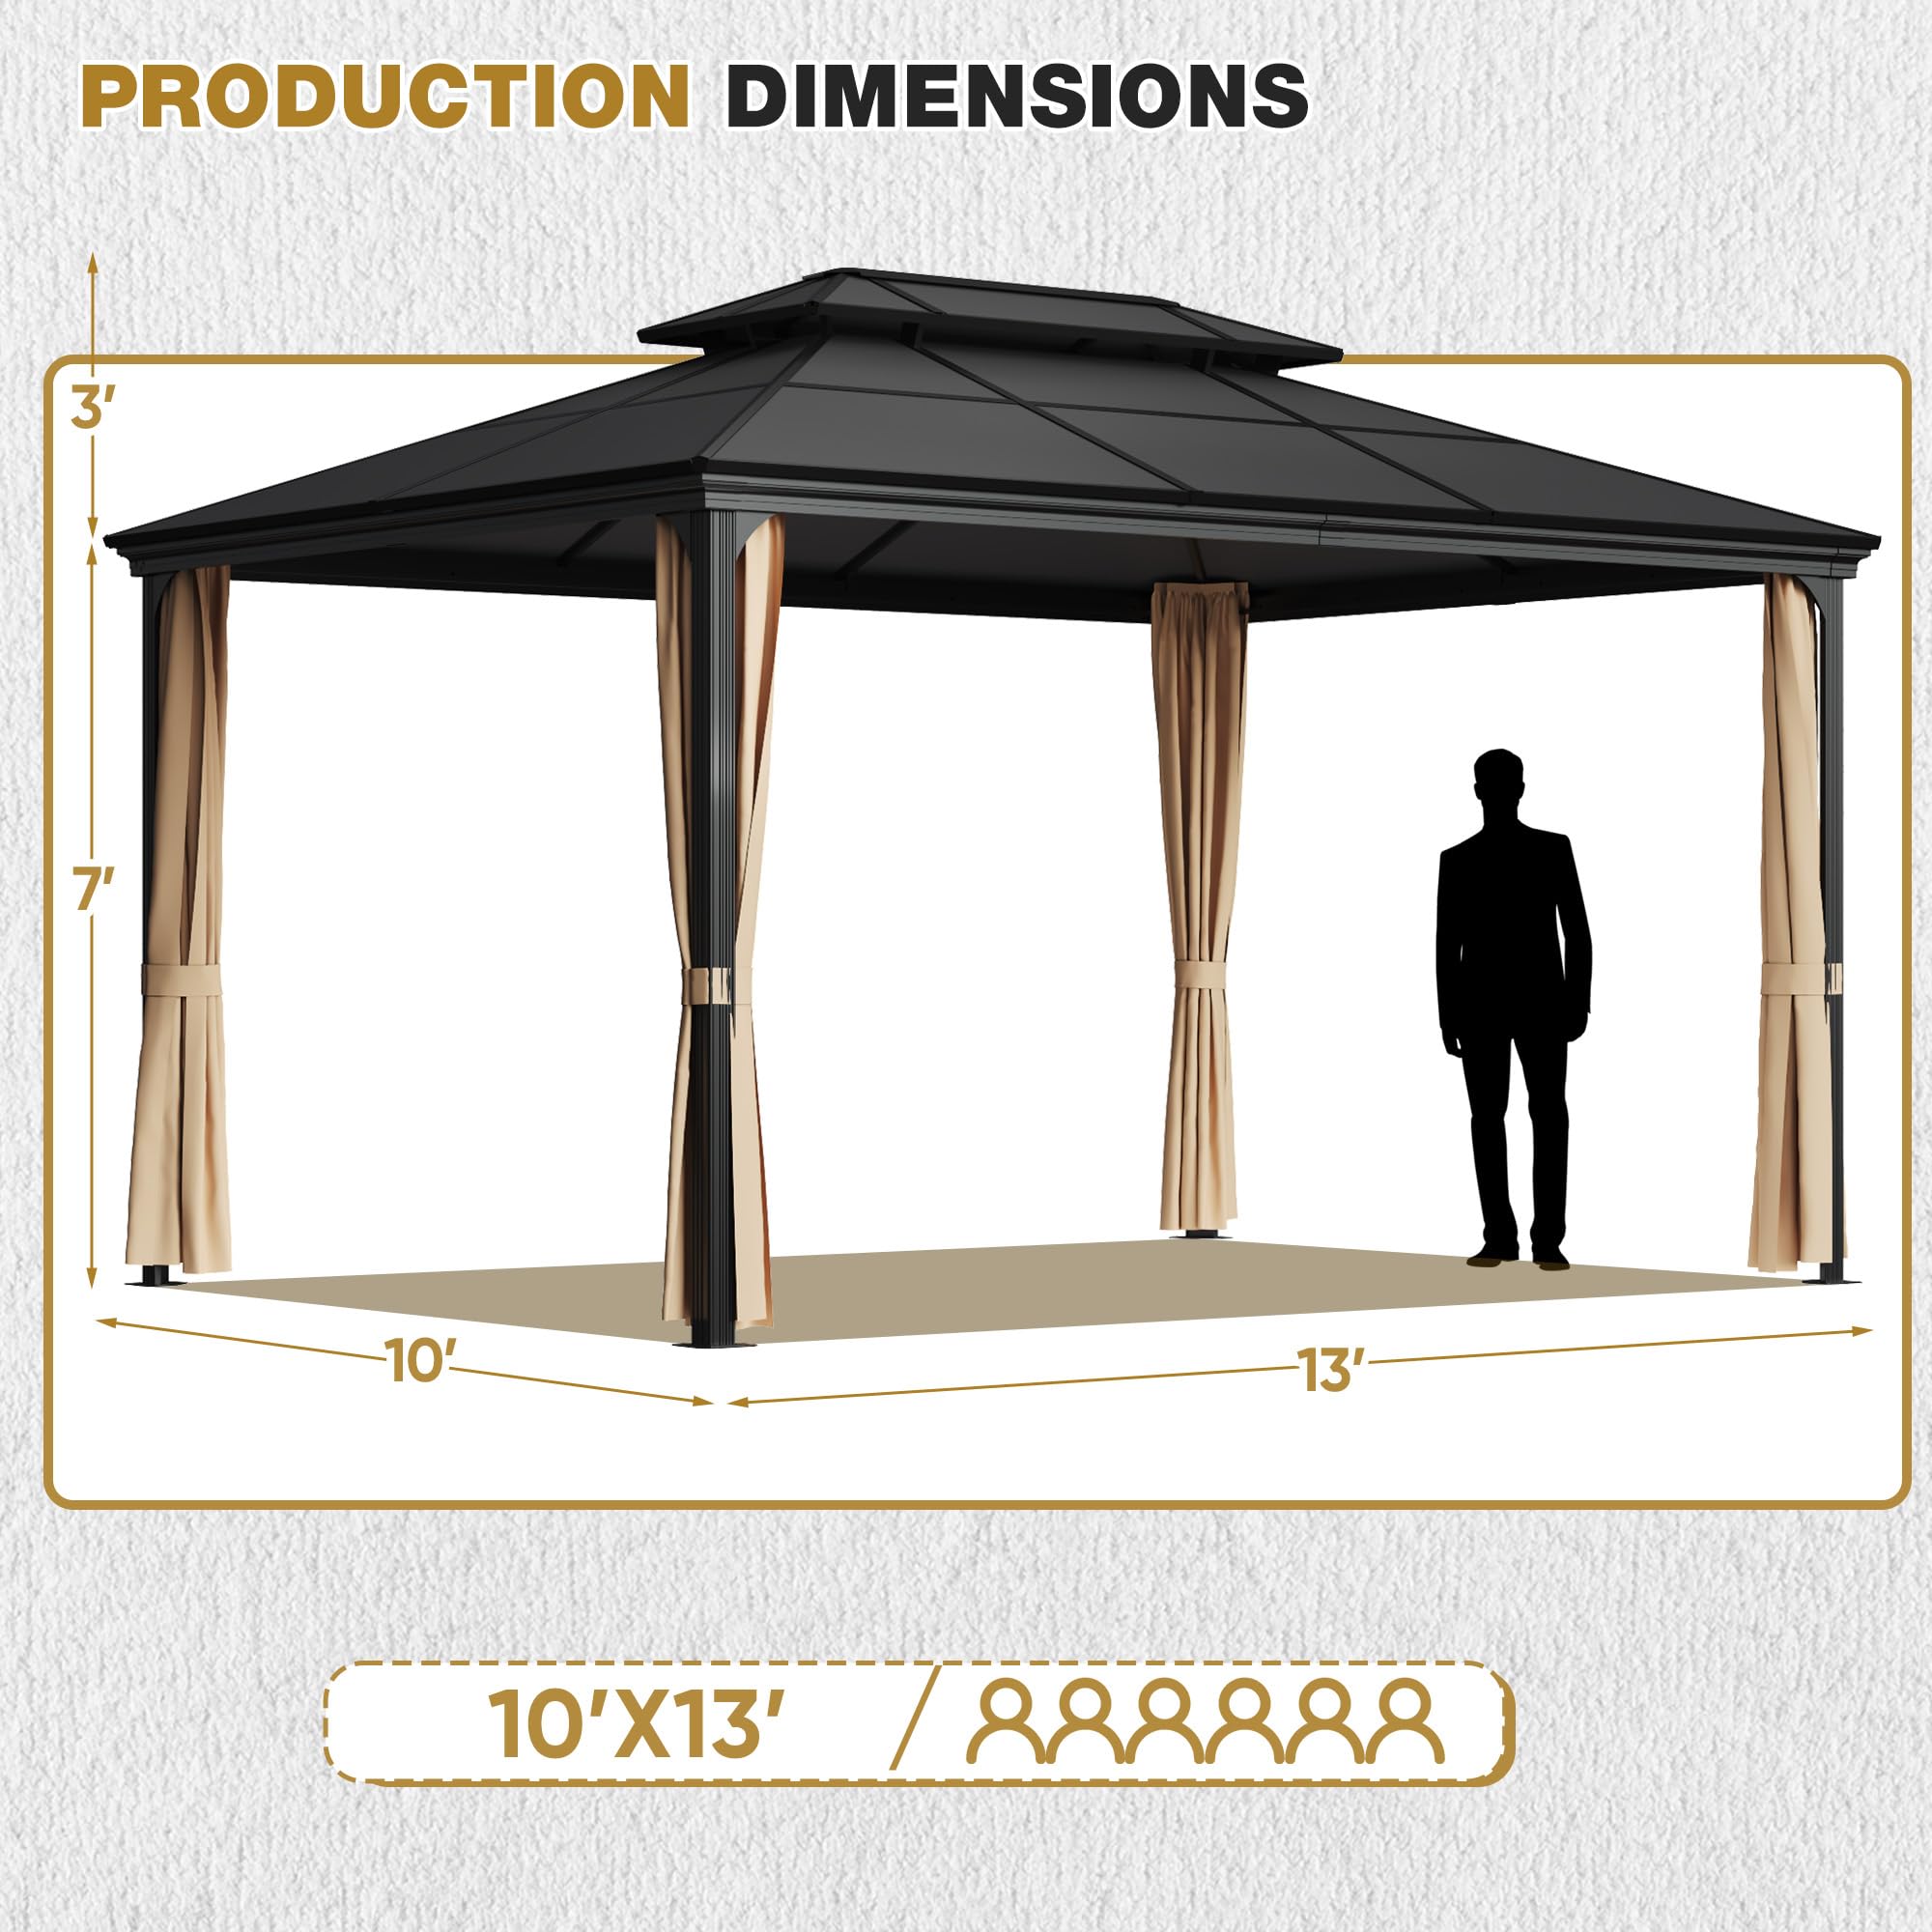
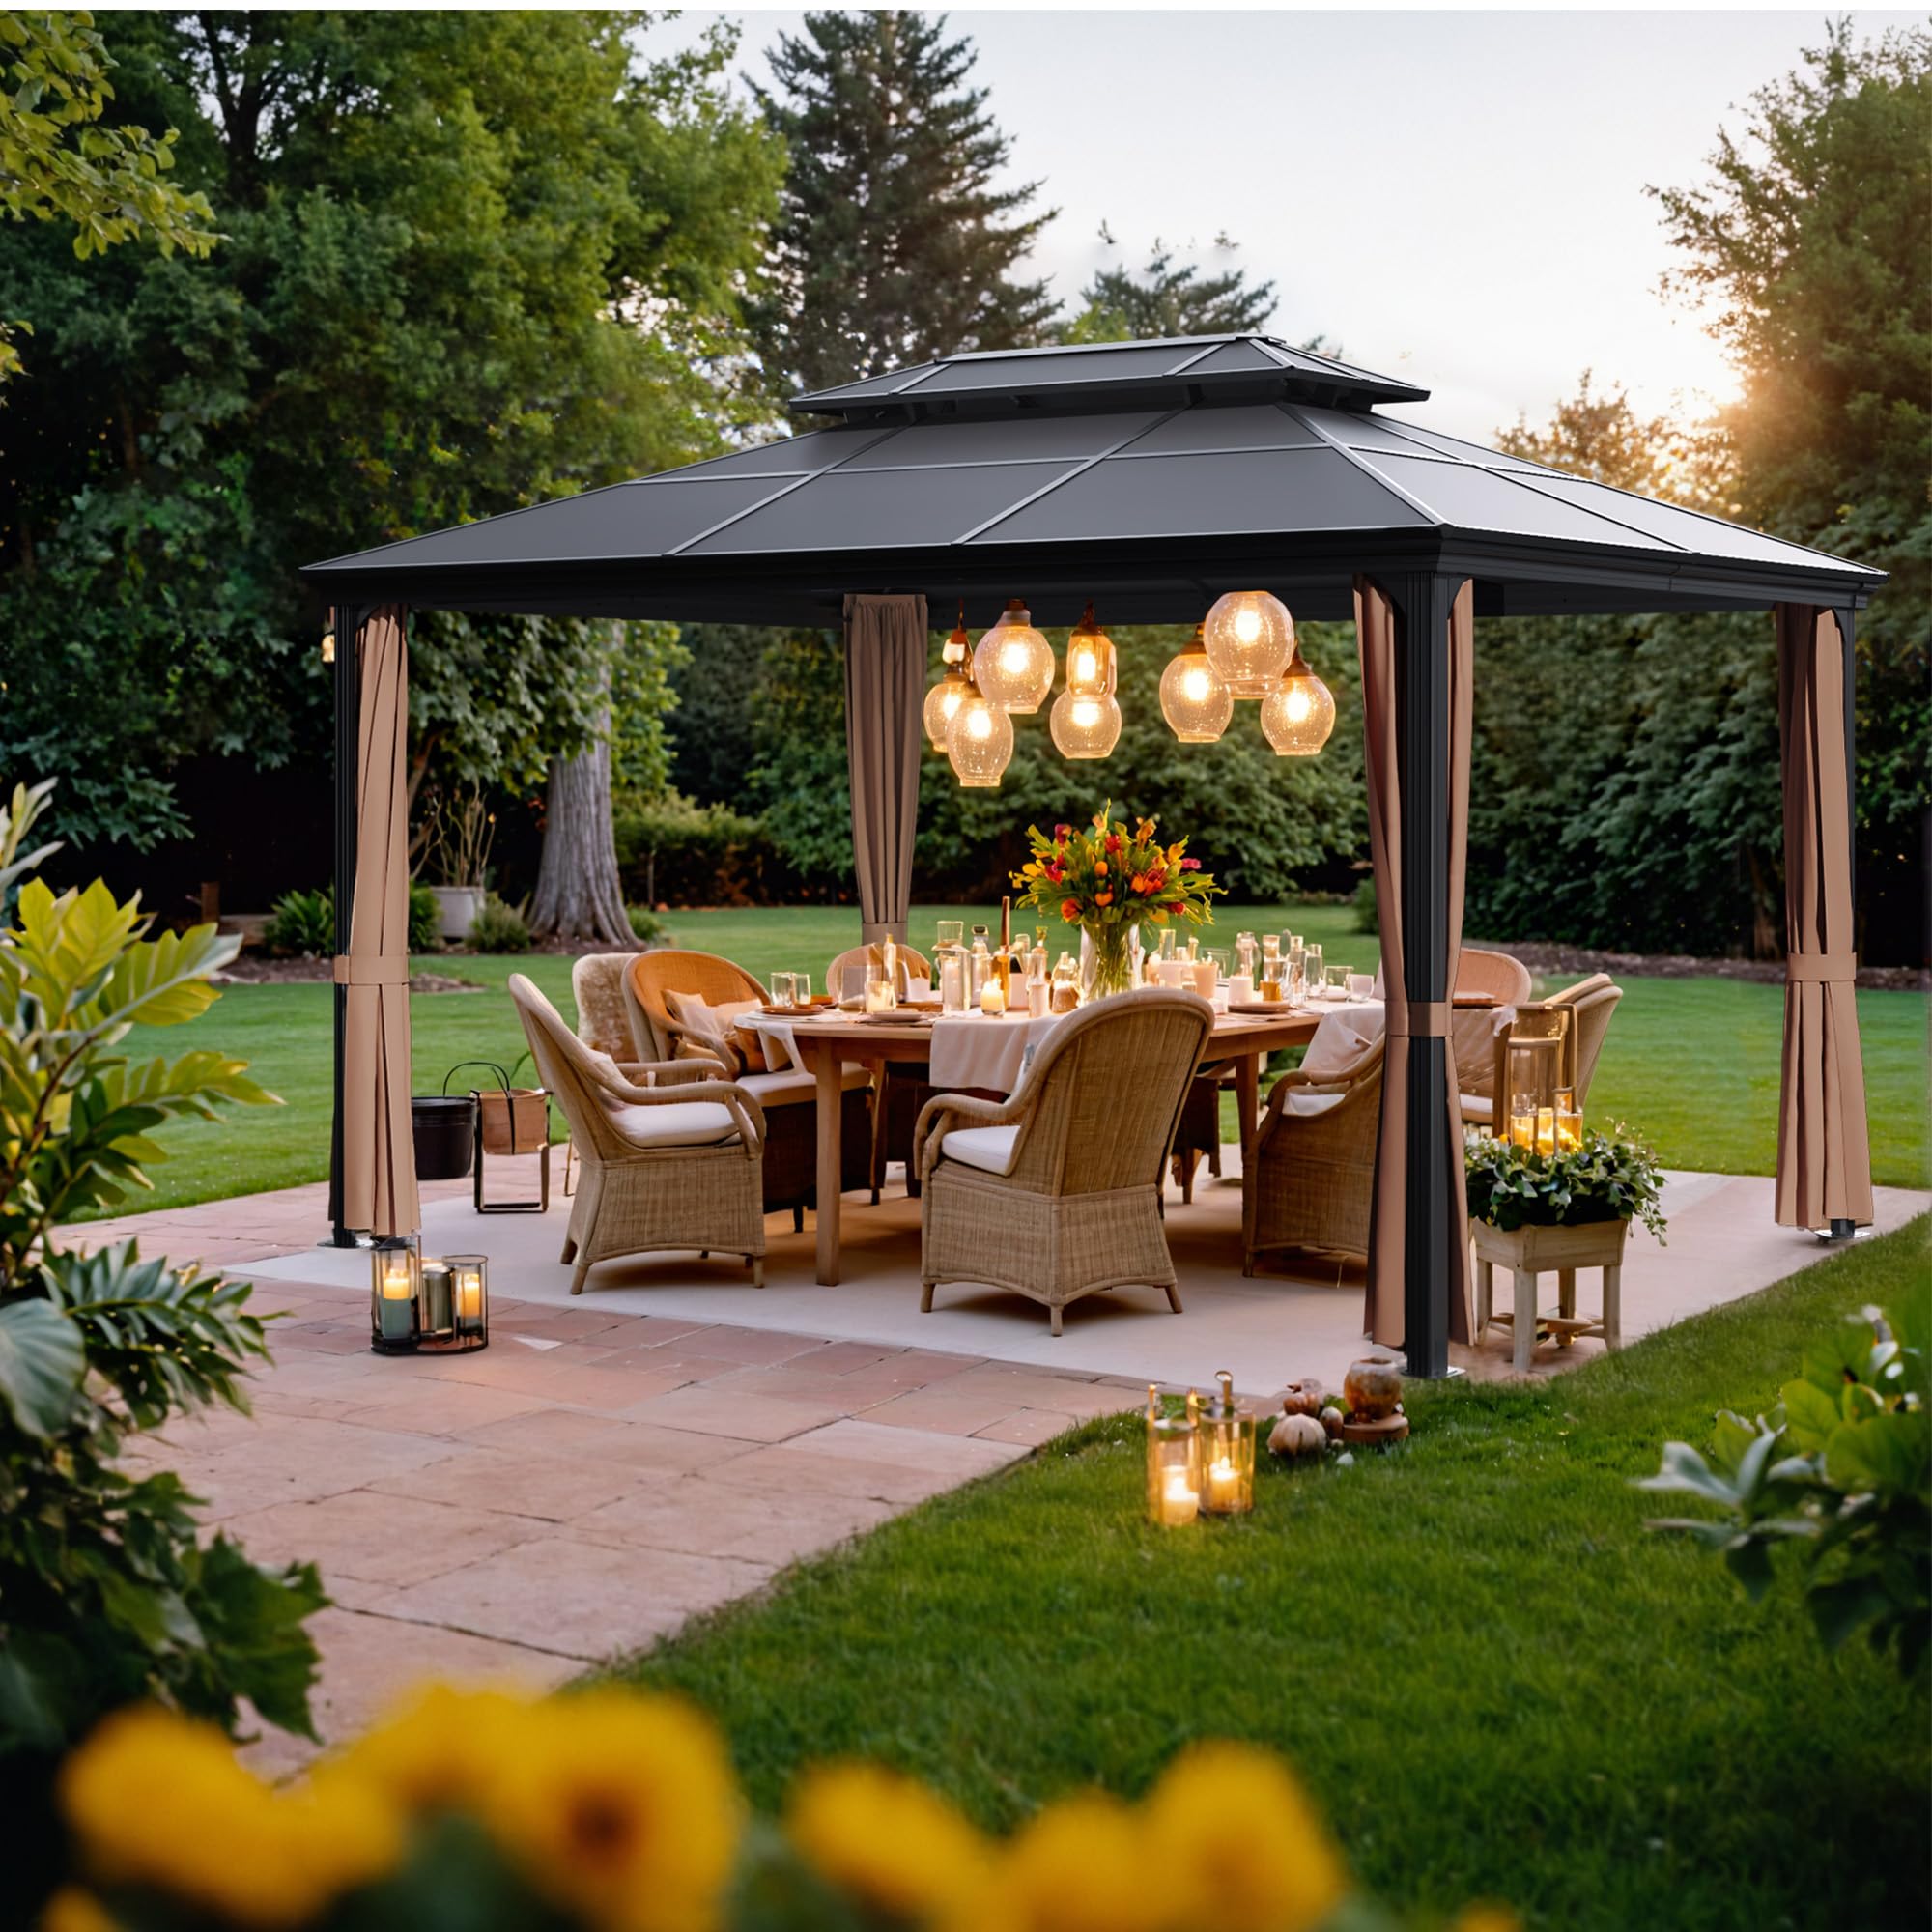
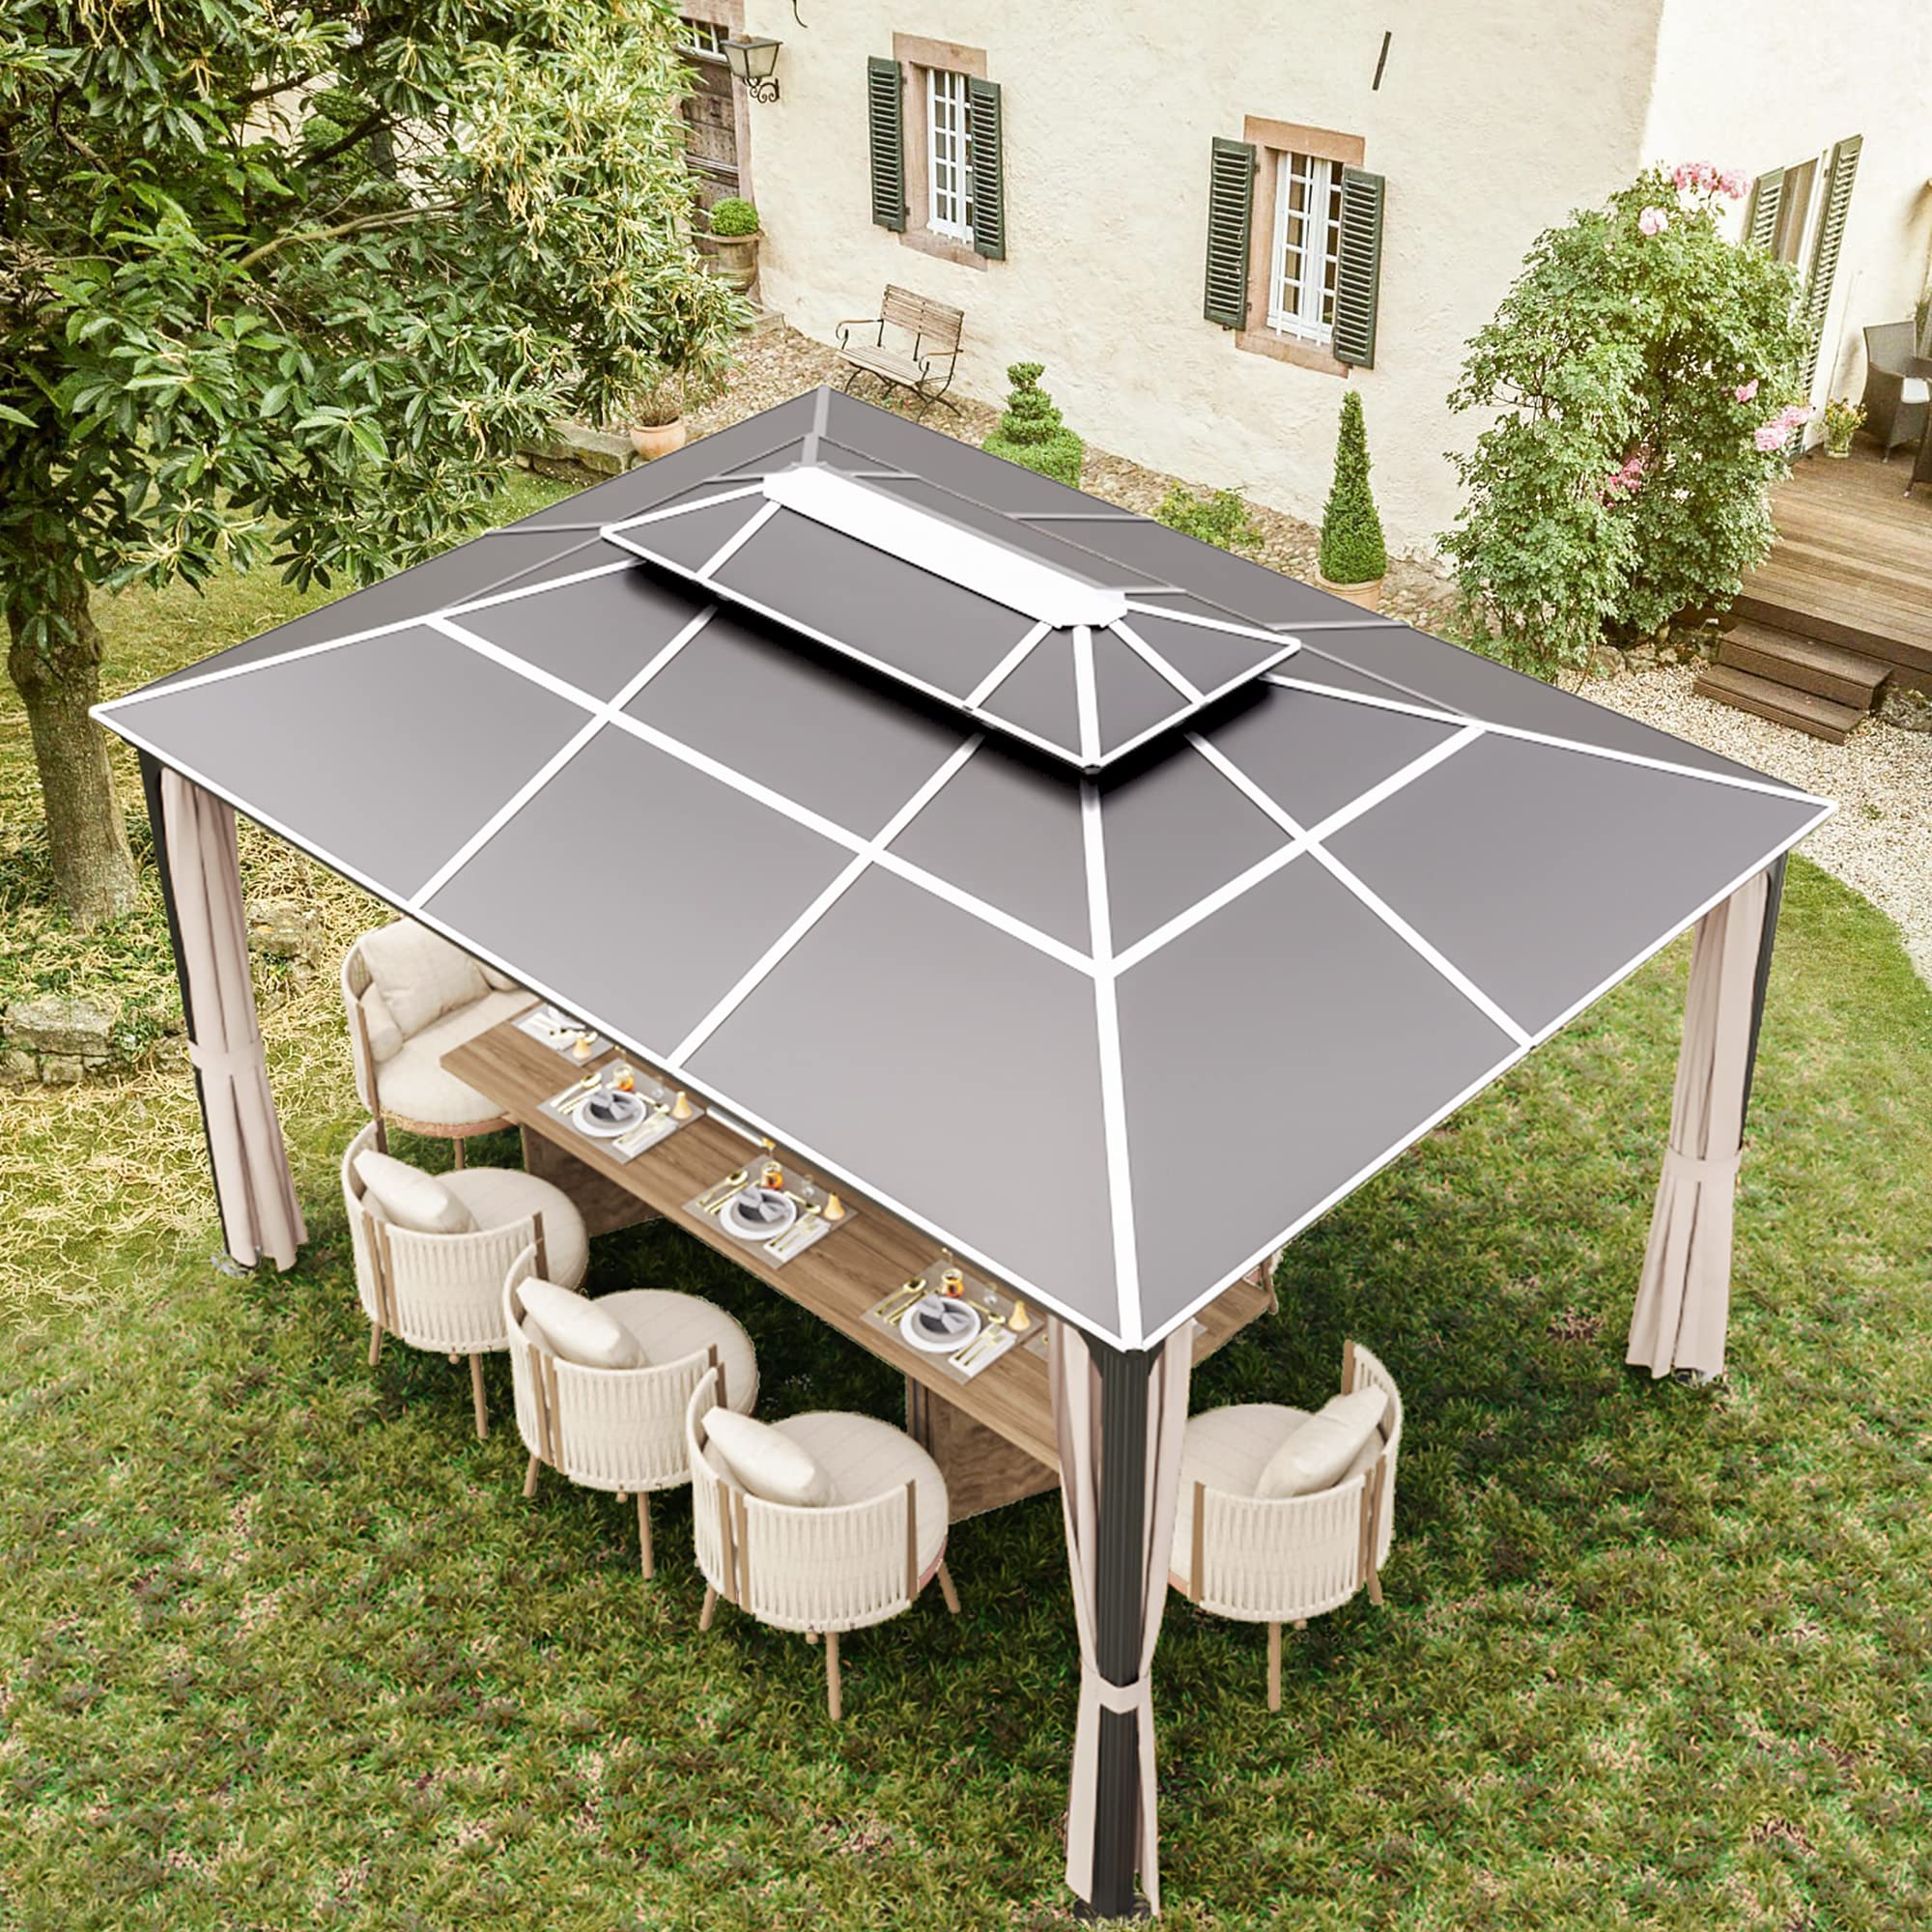
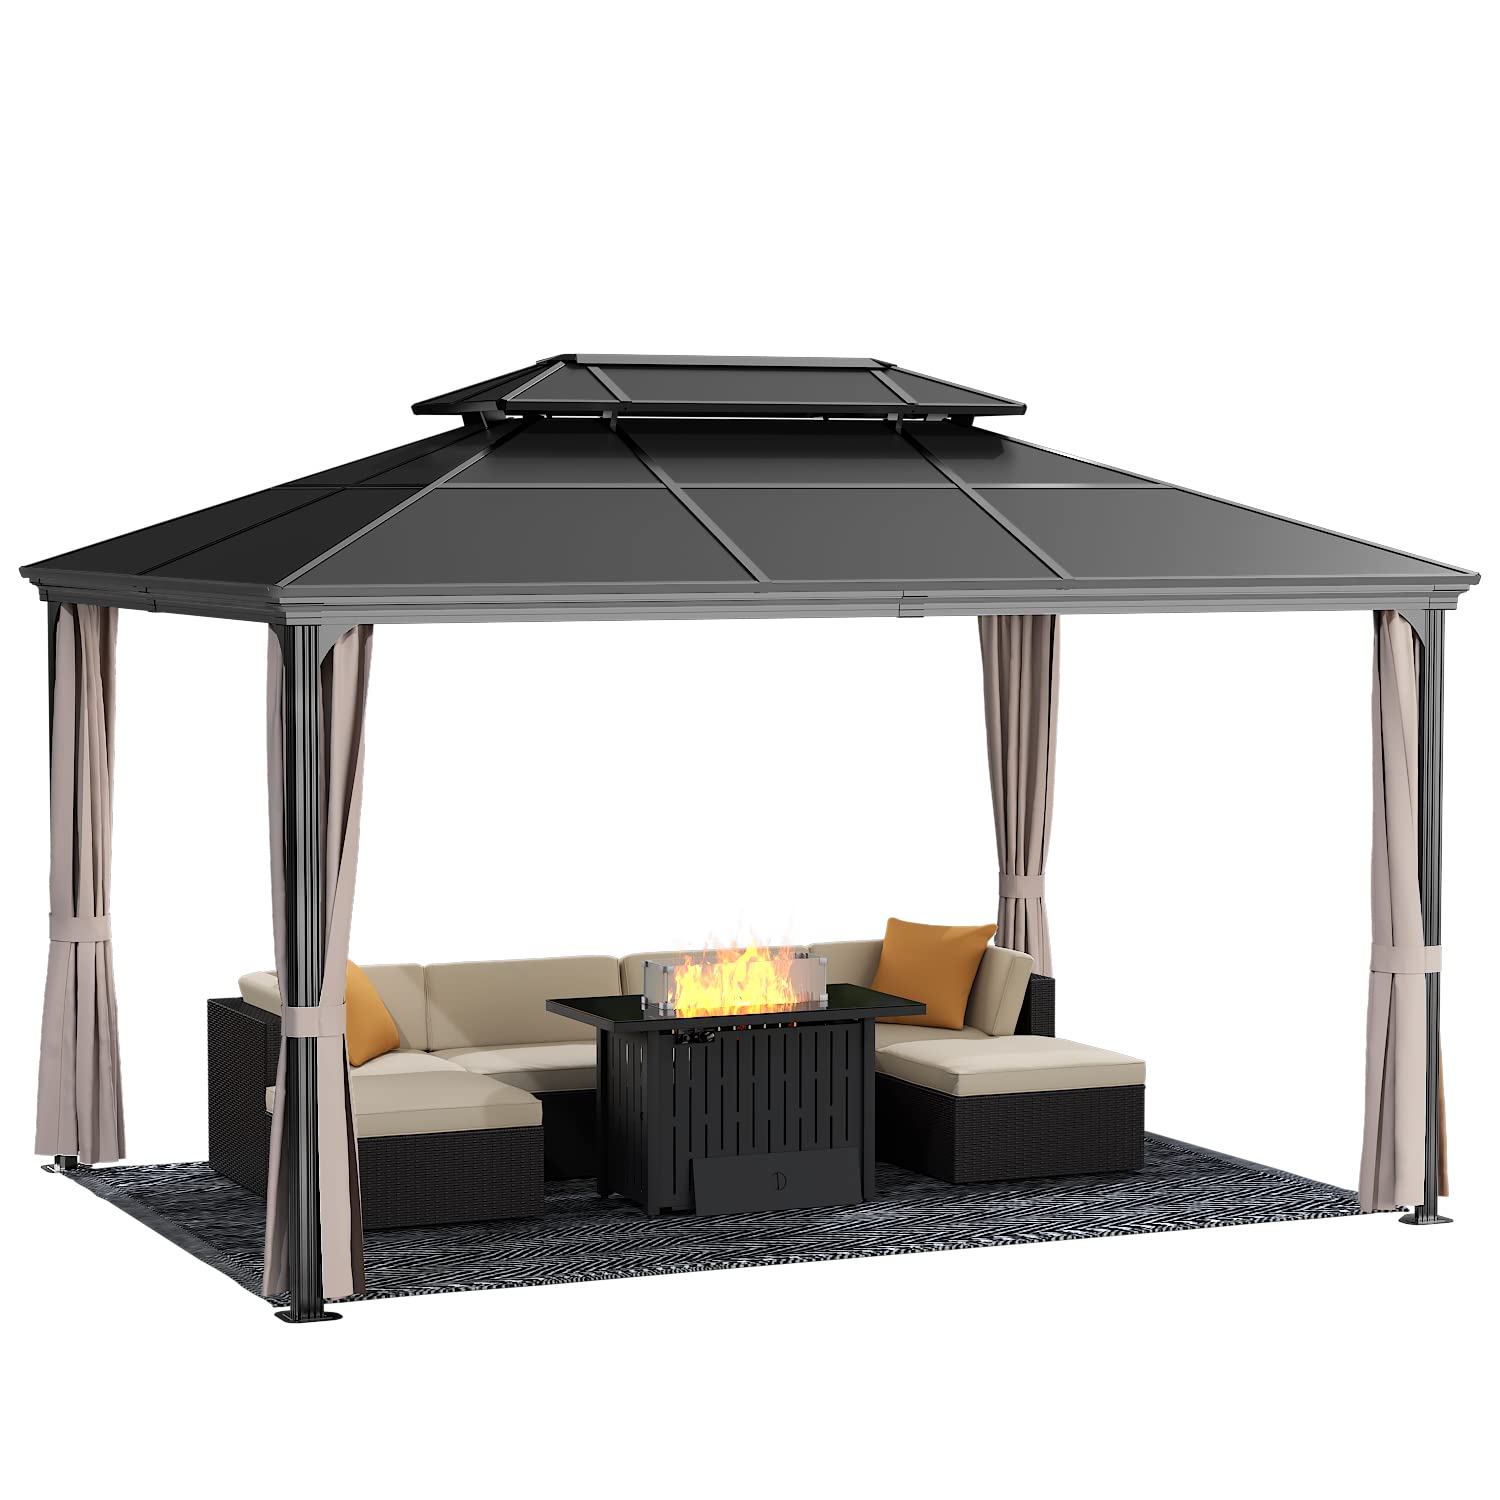
The Devoko 10x13 FT Hardtop Gazebo features a spacious 130 sq ft area, accommodating 7-9 people. Its robust aluminum frame and double polycarbonate roof ensure durability and comfort, while the all-around curtains and nets provide privacy. Designed for easy installation and made from waterproof materials, this gazebo is perfect for any weather, making it an ideal addition to your outdoor space.
L**E
Love the final product
Bear in mind when you purchase this gazebo to expect missing part(s). After being ignored, I reached out to Amazon and the missing part was delivered. I love the final product, my only concern is will it stand up in a storm and are there replacement parts available
R**N
Pretty decent item, challenging assembly
Item ships in 2 cartons. But Amazon only showed tracking for 1. So Amazon indicated item was delivered when there was still a second carton en-route. I contacted the seller who replied within a couple of hours with tracking for the second box. So props to the seller for quick response and customer service.Item was as described. Arrived 99% undamaged. There were a few metal pieces that were just slightly bent, but were tweaked back into place easily with pliers.This is NOT a one-person build. 2 people minimum, and an occasional 3rd would be helpful.The instructions are 16 pages, decent, although sometimes vague, and the pictures aren't always be enough to see correct orientation of parts. The instructions consist solely of drawings, arrows, and callouts indicating which parts are used. No explanatory text.Some suggestions:Angled brackets "M" that hold the roof struts to the horizontal beams. The pictures aren't clear enough to determine the exact orientation. The longer arm of the angle bracket attaches to the horizontal beams (the top of the "walls"). The shorter arm attaches to the roof strut. If you put them the other way, the roof strut will not be tight against that angle bracket.Attaching legs "A" to the horizontal beams - there are angled gussets at the corners, but with the slack in the metal pieces, it's hard to get everything attached at 90 degrees. I recommend putting in the screws and just barely snugging them up, then using a framing square or something similar to hold everything square and tighten the screws. You will probably need 4 arms for this part.Be careful when installing the curtain hooks "W" into parts E, E1, E2 and E3. There are 2 channels (inner and outer) and you have to make sure you get the right number of hooks in each channel or the curtains won't be able to move past the bug netting.A few trim pieces (O and P) are held partially with sheet metal screws instead of machine screws. The holes for these screws seem too big. The screws go in easily, but you can't really snug them up at all - the screws just spin. We'll see how these hold up.When constructing the roof, you have to attach 4 struts (C) to a top crown piece (H). I'm not sure how they expect it to be done. What I did was attach the 4 struts to the crown on the ground, then kind of "threaded" the whole roof up through the inside of the frame moving it back and forth to get each strut positioned correctly at the top of each leg. I was able to do this with 2 people. A 3rd of 4th person might have been helpful with this stage.The plastic roof panels were a challenge to install. The angled ones for the smaller roof area on top (S and S1) appeared to be slightly too large, and the metal trim (G5 and G6) could not be completely attached flush to the ends of the roof struts D. I took those roof pieces and trimmed them by about 1/4" with a miter saw.The plastic roof panels have a protective plastic film on both sides. They indicate which side faces the sun, and which faces down. They all look very similar. The stickers with the part "letters" are attached to the protective film. So as soon as you remove the film, you can't tell by looking at the part which one it was and which side faces "up". I used a sharpie to label those pieces in a discrete place so I could make sure I got all the pieces in the correct orientation and position. If you don't think ahead and just peel off all that film at the beginning, you'll be lost.The metal trim pieces at the top of the larger roof pieces (G3 and G4) were supposed to have a screw and a metal piece (R) go into one of the corner roof supports (C). I could not get the corner screws through all 3 pieces. The holes just do not line up enough. Some screws that are supposed to go through those pieces (G3 and G4) are not indicated on the instructions, but you can see where the holes are and the threaded parts on the ends of struts D where the screws go. Even with the screws that I couldn't get installed, it seems that there are enough other screws to hold everything together adequately. Although my ocd tendencies are going to have me looking at the missing screws forever. I may have to take those pieces down someday and re-drill a hole or two.The kit comes with a piece of cardboard with all the necessary screws shrink-wrapped to it. 2 allen wrenches and a small phillips screwdriver are included. So technically you don't need anything else. But if you don't have your own regular sized phillips screwdriver and larger allen wrenches, this kit might be a bit advanced for you - seek out a friend who you can bribe to assist.I used 1/4" concrete anchors to secure the feet (part J) to a concrete patio. I guess we'll see how well it holds up with the weather in northern Illinois. I would not feel comfortable having this item gazebo loose and unsecured. It's large and fairly heavy, but has large roof panels and strong winds might be able to take it.This took 2 adults maybe 10-12 hours to assemble over a 3-day weekend. Fit and finish were ok, other than the minor problems listed above. I saw some people indicating in reviews that threaded inserts were missing in some parts. Thankfully, in my kit, everything was where it should be.This is standard formed-sheet-metal parts with threaded inserts, assembled with (mostly) machine screws. There is going to be some "slop" in getting things lined up, so put in the screws, snug them up just a tiny bit, then align the parts and tighten the screws. It appears to be fairly well made. It arrived undamaged. I look forward to the shade in my yard and I'm curious to see how it will fare in the weather in my area.
D**S
Needs to be sturdier
Could be a lot stronger and sturdier and gutters for water to flow off of
N**A
Great product
I would recommend to anyone. The size was great, the instructions were clear. The appearance was sleek and stylish. It seemed sturdier than the previous one I had purchased for double the price.Edit: there is virtually no customer service. I had ordered two of these. One was perfect, the other had an issue. I don't think I'll ever get the piece I need to make the gazebo complete.
P**K
several issues
It's pictures only and you skipped a few steps. We figured it out so far. The frame seems to be sturdy. Got so frustrated that we are taking a break. If not for the fact that boxing it back up would be a pain the the ass we would send it back. I would ask for my money back if we could. You need to have a lot of patience to assemble this thing.It is definitely not easy to assemble. U need at least 4 people to assemble. Especially when u do the roof. It is also missing the screw docks from some of parts C and D. We contacted the company to try and get the missing parts and we only received the screws, it is 75% finished and we are at a stand still because this company will not send what we need. We are very disappointed.
D**K
Cheaply made
Terrible instructions that have you guessing 0 protection from sun with thin coragated plastic roof Allows rain in at the cross railsNot sturdy at allIf you want one to last over 1 season, don't buy this
J**G
Nive finish BUT Damaged Parts Not Offered To Be Replaced
Overall, this model appears to be designed a little cheaper than others on here but the basics are very similar. Which makes me think there is probably one factory that makes these. Not sure who Devoko is but the price was a steal. The finish and fit were excellent. Of course parts came damaged in shipping. The main cap on top had a bad dent. I contacted company and for some reason they had NO replacement parts! Ok, i'm not a metal worker, so i contacted them. They gave me a 100 dollars back. Not sure that logic but i used it to pay some one to straighten out the metal and it turned out ok. Other problem was in 2 places on the beam there were threaded nut inserts missing. Again, call the handy-man, got those installed with a kit he had. If this company wants to offer outstanding service and get 5 star reviews, they need to get some extra parts and send out when a customer has damage like the other companies that sell these on here. We will see in the upcoming months how it stands up to Colorado weather. For now i am a 4 star happy.
Trustpilot
4 days ago
2 weeks ago