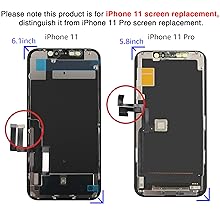
I bought this to replace my iPhone 11 screen that had started registering phantom touch events. This screen works, with caveats. My wife has the same phone, so I was able to compare my replacement side-by-side. The Good: - Screen is crisp, with no dead pixels. - Touch sensor is accurate and covers full screen. - Tolerances were correct for the front assembly. - Cheap. The Meh: - Peak brightness is a little lower than the original screen. - It would have been nice if the tools included a set of tweezers. - Build quality is lower than the OEM part. There was some wobble in the black screen backing that wasn't present in the original. Who knows if that'll impact anything down the road. - Screen seems a little thicker and there's a small lip now where it meets the metal part of the case. Does not seem to impact functionality. The Bad: - Color calibration is awful. The screen has a notably greenish tint compared to my wife's phone, or even just looking at it by itself. I turned on Apple's Color Filters (https://support.apple.com/en-us/HT207025) and was able to make it tolerable, but it's still not perfect. - Included tools are too cheap. One of the screw drivers started to break down mid-install (see below for details), and almost screwed the whole process up. The plastic spudger was really rough and had lots of thin bits of plastic dangling off it that I had to clean up lest they come off in my phone. Would I buy it again? Probably. While not perfect, it gave my old phone a little more useful life, and it's not worth investing much more than this costs. Detailed Install Experience: I am handy, do a lot of house projects, and have built multiple desktop computers. This was my first time disassembling a glued smart phone. I followed the guide from iFixit, and the process took me about an hour and a half. You could definitely do it faster, but I was being extra careful given the delicacy of the parts. Note: You'll need something to heat the phone and soften the adhesive for both removing the front glass and later removing the microphone and ambient light sensor from the old screen. You can buy dedicated tools, but I just used a (clean) old sock filled with uncooked rice. Pop it in the microwave for a minute, then stick it in a plastic bag so you don't steam the phone. You can then place it under or on top of the part of the phone you need to heat. Disassembly went smoothly until it came time to remove the tri-point 000 screws holding down the brackets covering the ribbons. On the fifth screw, I noticed the included screw driver seemed to be flaking. It was either stripping the screw, or the driver itself was coming apart. With finesse, I was able to get everything out, but I almost got stuck with a halfway disassembled phone. You might want to spend a few bucks on a better tool. Similarly, you might want to pick up some tweezers. I made due with fingernails, but it would definitely have been easier with tweezers. The rest of disassembly/reassembly went fine. While it doesn't list it anywhere in this listing, the kit does come with replacement adhesive. There's an important difference from the one in the iFixit kit – there's no secondary backing on the adhesive. Once you put one side down, you have to expose the glue. This means you can't test reassembly without committing once you put the adhesive down. So if you're following the iFixit guide, skip adding the glue until _after_ you test everything assembled. I was lucky that everything worked the first time, but would have been bummed if I had to re-order more adhesive because I didn't get a cable seated.