🔌 Power Up Your Projects with Style!
The Cluster Case for Raspberry Pi and other single-board computers offers a robust and stylish solution for tech enthusiasts. With eight bays for Raspberry Pi and 2.5" hard drives, modular design for easy expansion, and durable double thick acrylic construction, this case is perfect for creating powerful clusters. Proudly made in Tacoma, WA, it combines functionality with local craftsmanship.


| Brand | C4Labs |
| Item Weight | 3 pounds |
| Product Dimensions | 9.5 x 4.5 x 5.5 inches |
| Item Dimensions LxWxH | 9.5 x 4.5 x 5.5 inches |
| Color | Mist/Black |
| Manufacturer | C4Labs |
| ASIN | B089QXRD8L |
| Is Discontinued By Manufacturer | No |
| Date First Available | May 19, 2018 |
F**E
Superb quality and appeal. Minor improvements, but you can modify your design to fit the enclosure.
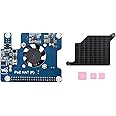
I needed a cluster enclosure for a low-wattage server farm and the Cloudlet enclosure by C4 Labs was perfect. I am using the enclosure to host my business website with 8 load-balanced raspberry pi zero v1.3s running nginx. A reverse proxy in the DMZ is used to load balance the raspberry pi cluster housed in this enclosure. The load balancer also maintains the TLS connection with clients. The proxy fetches the site from the cluster using http which is perfect for speed.What I like about the Cloudlet CASE:1.) nice aesthetics! Fluorescent green against black is a great combination.2.) sturdy outer chassis3.) Extra hardware provided in case you lose a bolt or nut.4.) Came with two extra acrylic fluorescent green mounting inserts in case two break. Be careful super-gluing broken inserts since you can easily cause permanent smears that look unattractive.What I think needs improvement:1.) There is a slot on the fluorescent green acrylic mounting inserts towards the front (just behind where the fans are to be mounted) that weakens the inserts. One insert already snapped at this weak point. The slot measures 1" x 0.05" and does not appear to serve a use case from the customer's perspective. It should be removed in future versions of the product for quality purposes.2.) Mounting insert slot placement inside the chassis could use improvement. I have attached pictures of the network adapter I am plugging into my raspberry pi zeroes. It's the ENC28J60 Geek PI Overlay Hat v1.02. Originally, I intended to use only one mounting insert per pi and use all 8 mounting inserts, but had to make modifications to my design since the mounting insert slots inside the black chassis are spaced too closely to accommodate the thickness of adding the network hat atop the raspberry pi zero. Therefore, I cannot use all 8 inserts and must mount two raspberry pi zero's on a single mounting insert and use only four of the 8 mounting inserts. I do understand this alteration to the design would require a bit wider chassis, but it would be a nice improvement to accommodate the entire Raspberry Pi model lineup with a wider range of hats and still have nice airflow.3.) I have attached a picture of the YwRobot® USB Power Supply Module Micro USB Interface 3.3V 5V 1117 Chip which would be a great add-in to the case for an alternate power supply for the fans. It's super cheap too and would not increase the price of the case that much. I got one from banggood for only $3. In fact, shipping costed more than this little guy. I am using the YwRobot right now to power the fans since all my GPIO pins are in use by the ENC28J60 overlay hat. The manufacturer C4 suggests using GPIO to power the pins, but this sacrifices functionality of the Pi that system builders may want to use. Therefore, the Ywrobot is the perfect solution, and I think a lot of people would love the addition.4.) People were complaining about the noise of the fans. I think the noise level is perfectly acceptable. An added bonus of the YwRobot (mentioned above) is that it has both a 3.3v and a 5v rail. Both rails have 8 pins allowing you to plug in all 4 fans effortlessly. If you want less noise, plug all of them into the 3.3v rail, but I think running them at 5v is a better idea since I am not using a heat sink on my pi zeroes.5.) The fluorescent green mounting inserts seem to have have plenty of room for more mounting holes to accommodate all raspberry pi models including the zero, but only two holes on one side of the pi zero can be mounted to the insert at a time. In fact, there are two places on the mounting insert where you can mount only two holes on one side of the pi zero. It would be nice to have all 4 holes of the raspberry pi zero mountable since the GPIO headers protrude from the bottom of the PCB and present a lateral strain on the pi zero when connecting cables or GPIO hats. If all 4 holes are mounted, the strain is equalized and you don't have to worry about a poor connection or risk of damage to the pcb (or mounting inserts) when disconnecting cables or hats. My solution was to use the included little gold-colored mounting nuts underneath each of the 4 mounting holes of the pi zero. Two had to be super-glued to the zero.Overall nice case and I believe that with these improvements the marketability of the product would appeal to a larger audience. Even still, a solid buy that I am happy with!
S**Y
You might need to get creative with mounting, but it's good value for the money.
This is a pretty cool little case for holding a number if pi's or hdd's, but it could stand to do for improvements.The good --Clear instructions, well packed, came with extra screws/sleds/nuts/etc. Very easy to assemble and I'm pretty happy with it. If you have a number of pi's this is a totally viable option -- I especially love that it has room for it's own POE switch. Very self contained. The fans are audible but not awful.The bad --• The sleds have an interference fit into the body based on the flexing of the acrylic plate. For several of the places I received they were very loose -- I could easily the see the act of unplugging a USB drive causing the sled to pop out and fall. This doesn't present a problem with my use case as I will be storing the entire assembly upside down (as opposed to shown in the product pictures), so that the sleds simply rest against what is now the bottom.• The bays could be just a hair wider -- the fan on the pi poe hat was actually touching the next sled. This leads to the picture in my review -- I solved the problem by only using four sleds (as I want each pi to have it's own HDD anyway), mounting the associated pi and hdd to the same sled. In addition, the official POE hat doesn't have a fan header of any kind so you need to use the pass through pins -- these pins are even longer so you may have to improvise. I cut off all but the 5v and GND pins, and then bent those pins upward.• The pi through holes (or the fans) could be positioned so that the fans blow straight over the pi circuitry. Right now it's offset a bit -- could be more efficient.Thoughts for improvement --• I'm pretty happy with my decision to mount it upside down, but I wanted to use the empty space on the (now) top still -- I took a few minutes to cut an acrylic shelf, but if this could be included (even optionally) I'd be pretty happy.All in all I'm fine using this and am happy with the result; I've gone a none-traditional route with this, but I'm certain anyone building a pi-cluster probably is a bit of a tinkerer and didn't do exactly what the creator had in mind. It's a solid base I'm not at all upset with it.
Trustpilot
2 weeks ago
2 months ago