🔄 Keep Your Cool with Confidence!
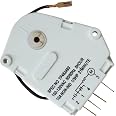
The PartsBroz W10822278 Defrost Timer is a high-quality replacement part designed for Whirlpool, Kenmore, Amana, and KitchenAid refrigerators. Weighing just 2.89 ounces and measuring 2.6 x 3.5 x 1.8 inches, this durable timer ensures effective defrost cycles, restoring your appliance's efficiency. With a limited 1-year warranty, it's the reliable choice for maintaining your kitchen's cool.


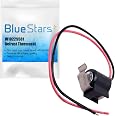
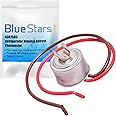
| Part Number | W10822278 |
| Item Weight | 2.89 ounces |
| Product Dimensions | 2.6 x 3.5 x 1.8 inches |
| Country of Origin | China |
| Item model number | W10822278 |
| Item Package Quantity | 1 |
| Number Of Pieces | 1 |
| Special Features | High-Quality Material, Easy to Install, Durable |
| Batteries Included? | No |
| Batteries Required? | No |
| Warranty Description | Limited 1-year Warranty |
E**E
Refrigerator was freezing up .
It’s a older model Roper that’s made by Whirlpool. Tried to buy part locally but they told me parts no longer available. I removed timer and got the specs off of it. Search Amazon and found this part that fits several Whirlpool models. I installed it and it works great.
A**M
IT did the job.
I had a refrigerator which the control boards and wiring died. I converted it to a kegerator, i used this to add the defrost function back into the refrigerator. IT works great.
P**O
Don’t move the black jumper wire!
I can’t speak to the long- or even short-term reliability of this defrost timer, since I just received it today, but I can tell you one thing: No matter what you read online, DO NOT move, or remove, the black jumper wire that’s slip-fit onto Terminal 1 (the common / neutral terminal). Your OEM timer probably doesn’t have such an external wire, but it’s the neutral lead for the timer motor. (An OEM timer motor’s neutral lead is usually connected internally to Terminal 1.)If you want to confirm this, use an ohmmeter to measure the resistance between Terminal 1 and 3—it should be around 8.2K (around 8,200 ohms). Now slip the black wire’s slotted lug off Terminal 1 and measure the resistance again—it should now be an open circuit. I’m guessing that completing this connection with an external wire was probably cheaper than doing it internally. (BTW, the crimp connection on the slotted lug was pretty flimsy—you might want to touch it up lightly with solder to keep it from failing.)There are a couple of other issues with this timer. The photo in the ad shows a 15-amp timer for a 1/2-HP compressor, but the one I received is rated only 10 amps for a 1/3-HP compressor—see my uploaded photo. Interestingly, both the timer in the ad and the one I received have the same spec number (TP482493) despite their different current ratings. (Go figure.) Since my OEM timer happened to be rated for 10 amps, this wasn’t a problem for me. But you wouldn’t want to use a 10-amp timer to replace a 15-amp timer.This timer also uses all plastic gears, compared to a combo of plastic and metal gears in my Maytag fridge’s OEM timer—compare my uploaded photos of the rear of both timers. But this isn’t a deal-breaker, especially since a factory replacement timer costs over TEN TIMES as much as this one. (And that factory timer is STILL made in China….)So how do you know if your new timer works properly before you install it? Because, after it’s buried inside your fridge’s control panel, you won’t have a clue.IF (and ONLY if) you have the necessary electrical-safety skills, you can bench-test the timer by applying 120 volts AC to Terminals 1 and 3. Connect the neutral lead of a re-purposed power cord to Terminal 1, and the hot lead of the cord to Terminal 3, preferably using spade lugs to avoid accidental shorts. Wrap electrical tape around all the terminals, then plug the cord into an outlet. You should see and hear the motor quietly spinning. This is a good start, since, like an old electric clock, most defrost timers fail because their motors stop running.Now unplug the power cord and rotate the timer shaft clockwise, using a screwdriver or your finger and thumb. Slow down when the edge of the one-way driver slot approaches the raised index line in the timer housing. As you rotate the shaft further, you should hear a distinct click. That’s the beginning of the timer’s 21-minute defrost cycle. Slowly rotate the shaft a little more, and you should hear a second click. That’s the end of the defrost cycle. (If you don’t hear two clicks in a row, rotate the shaft 180 degrees, and you will.)Now rotate the shaft almost one more full turn to just before the next defrost cycle, then plug the timer back into the electrical outlet. When the slot on the shaft passes the index line and you hear a click, activate a stopwatch and wait 21 minutes. When you hear the second click, check the stopwatch. My timer’s defrost cycle was consistently around 21-1/2 minutes, plus or minus 10 seconds. (It’s not a Swiss watch, but it doesn’t have to be, especially for only ten bucks!)Finally, use an ohmmeter or continuity tester to check for continuity between Terminals 1 and 2 during the defrost cycle (the short rotational angle between the two clicks), then between Terminals 1 and 4 during the compressor cycle (the long angle between the two clicks).BTW, if you have more patience than I do, you can use the bench-testing method to confirm the compressor cycle, which should be around 8 hours. But, again, a defrost timer is not a Swiss watch. You probably didn’t even know that your timer went south until a month or more after it failed, when the ice cream in your freezer was softer than normal. That was because a Titanic-sized chunk of ice had slowly built up around the evaporator coil in the freezer, choking off both airflow and heat exchange. And THAT probably happened because the defrost timer stopped energizing the heating element under the evaporator coil during every 8 hours of compressor run time to melt the ice. (Ask me how I know this….)
J**.
3 Different Ways to Wire Pigtail Wire
This part was easy to replace using the provided screws. It fit the orig plug perfectly. However the black pigtail wire needs to be on a specific terminal of the timer. I found a lo-res image on a parts website that explains this. This information was NOT easily found on the internet. There is a good video on You Tube that shows where the timer is located and how to access and replace it. Their explanation of where to connect the black pigtail will send you down rabbit holes. Do the following instead.Write down the wire colors going into the old Def Timer connector in your FridgeProcedure 1Did not list the specific wire colors but the black pigtail goes on Terminal 2 of the Timer. If your wire colors don’t match Proc 2 or 3 this might be the default. Do your own due diligence or call a repairman if you are unsure.Procedure 2Black, Pink, Red & Orange, the Blk Pigtail goes on the Terminal 2 of the Timer. This wire color combination matched my 1999 Kitchenaid FridgeProcedure 3Orange, Pink, White, Red, the Blk Pigtail goes on Terminal 1 of the timer.Once you replace the Timer, use a flat screwdriver and rotate the grey control wheel on the bottom of the timer until you hear it click. When the pointers align, you are in defrost mode. If your heater element comes on and the coil defrosts, your repair is finished if the Fridge kicks back on in about 20 minutes.Replace this device 1st but if your evap in the freezer compartment remains frozen solid, you need to replace the heating element & bi-metal switch in the back of the freezer compartment.
B**E
Works great
Works great
K**N
Terrible! have to jiggle it to keep it working
This is the 3rd or 4th aftermarket part I have bought and each of them has failed. They have gears that spin constantly and a timer for how long the defroster should turn on for, and then turn off. It is supposed to be on a timer of every 8 hours the cooling fan will turn off and the defroster in the freezer turns on for 21 minutes, and the cycle continues. However, when in the defroster portion, the timer has stopped turning, which has left the defroster ON to thaw out the freezer goods. When I have seen the gears not turning, I tap on the plastic shelf it sits on and then it starts turning again.These aftermarket parts are no good. The gears get hung up and it stops working!We had to leave our house for 3 days for a funeral and when we returned home there was a puddle of water on the floor, and a smell coming from the refrigerator section because it had not been running for who knows how long! Once I bumped the plastic shelf with my fist, the defrost timer started turning again and it started cooling. TERRIBLE! We had to throw away food. Don't depend on this part.
T**E
Stopped running. What happened to Lifetime Warranty?
I purchased this in July 2024. In March 2025, my food thawed out in my freezer. This timer had stopped running. If you tap the housing, it would start running again. I was refunded what I paid because there was a lifetime warranty listed at the time. I no longer see that warranty listed so I guess anyone who buys this timer is just taking a wild gamble after 30 days .
J**X
The product works perfectly!!
Pros: Price was good, it was easy to install works greatCons: It didn't include the screws like showed in the listing!
Trustpilot
1 month ago
2 days ago