✨ Keep your headlights flawless and your drive fearless! 🚘
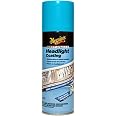
Meguiar's Keep Clear Headlight Coating is a 4-ounce aerosol formula designed to protect and restore automotive headlights. Featuring a proprietary UV-resistant layer, it prevents yellowing, hazing, and discoloration for up to one year. Easy to apply with a spray, it maintains factory-like clarity, enhancing nighttime visibility and vehicle appearance.
Brand | Meguiar's |
Color | Keep Clear |
Specific Uses For Product | Exterior |
Vehicle Service Type | Car |
Year | 2016 |
Wattage | 55 watts |
Auto Part Position | Right |
Lens Color | clear |
Lens Material | Polycarbonate |
Item dimensions L x W x H | 7.75 x 1.86 x 1.86 inches |
UPC | 070382012656 |
Assembly Required | No |
Manufacturer | Meguiar's |
OEM Part Number | G17804 |
Global Trade Identification Number | 00070382012656 |
Model | G17804 |
Item Weight | 6.2 ounces |
Product Dimensions | 7.75 x 1.86 x 1.86 inches |
Country of Origin | USA |
Item model number | G17804 |
Is Discontinued By Manufacturer | No |
Exterior | Polished |
Manufacturer Part Number | G17804 |
Mirror Lighting Type | automotive-exterior-headlight-bulbs |
A**8
Save your cash, get soapy water, sandpaper, and THIS
1) the picture at the car wash shows how yellow these headlights were in March 20242) the other two on the truck are after application of the Meguiar's clearcoat3) the picture on the box on the cart was before I installed it back on the truck after all the sanding and rinsingIf you're looking at buying a $20, $30, or $40 headlight restoration kit, STOP RIGHT NOW. You don't have to buy a fancy ceramic graphene ultraclear ultimate whatever kit to do this stuff. PROCESS is more important than PRODUCT. That said, get some sandpaper, I personally like to buy the assortments of 2 inch sanding pads that run from about 400 grit on up to 3500. For this headlight, which was pretty heavily cracked over and yellowed, I started at 600, then 1000, then 1500, then 2500, then 3500. I probably could have done an even better job by including the 800, 2000, and 3000 grits, but I didn't want to take three hours to do it.Then get yourself a spray bottle of soapy water, I used about 4 ounces of Dawn in 32 ounces of water because I had it handy. Clay bar lube might actually be better here, but I don't have any of that. You'll want to use this not only to lube the surface so you don't leave gouges in the headlight, but also to rinse off all the particles of yellowed oxidized headlight coating you're removing to expose the clear plastic under it.Sand in one direction first, say horizontal. When you rinse and change to the next grade of sandpaper, switch to vertical. If you have a heavily curved light, you might want to work in an X pattern instead. Do what works best for your shape of headlight and try to use even pressure especially on the earlier rougher grits.Once you have finished sanding and have a nice clear but cloudy headlight, make sure it's fully rinsed and dried and no powder or particles of coating remain. Then tape off the surrounding area (if you didn't remove the whole light assembly like I did) and begin spraying in light coats by starting to spray off to the left side of the headlight then spraying evenly across left to right, not letting go of the sprayer until you're aimed off the light to its right. Try to overlap a little bit as you spray lines across the headlight. Once the whole headlight has a coat on, wait a few minutes to let it get tacky. Your SECOND coat will be exactly the same way but a little bit heavier on the coating. If this looks good, you can stop. If you think it needs a third coat, go ahead, but make it a little bit heavier.It is March 2025 now and the lights look as good as the day I did them October 2024. That's five months of Oklahoma red dirt, gravel dust, high winds, snow and ice for a couple days which was weird, and all the crud getting kicked up off the road by the jacked up coal rolling diesel trucks that pepper every road around here. Still feels smooth to the touch as well.Now what did I say about saving money? Right, this may be $14 right now but it goes on sale enough. $9-$10 is an OK price for this. You'll get to use it multiple times or for multiple vehicles if stored properly. Between that and some sanding pads and a spray bottle of soapy water, you'll be saving quite a bit and won't have a bunch of garbage to get rid of when you're done for some sort of single use product that costs more anyhow. Does it take longer? Yes. Is it worth it? If you like keeping money in your wallet, yes. If you enjoy the satisfaction of a job well done, yes. If you don't want to pay Walmart $30 per headlight to do it for you and have it look terrible in two months again, tes.
M**R
Highly Effective UV Protectant for Various Surfaces
This UV protectant stands out with its dual types of UV protection, a fact I confirmed through thorough research on the material safety datasheet (MSDS) and insightful discussions with experts like Grok. One remarkable feature is its forgiving nature when it comes to application mishaps – unlike 1K or 2K products, fixing errors and reapplying is far from a nightmare. The application process itself was a breeze, supported by recommendations from YouTube specialists to opt for a single heavy coat, diverging from the instructions on the can. Personally, I tested this product on a Whelen light bar, where I solely used a cutting compound for preparation, and on 2015 Highlander headlights post-3M prep kit usage. While the experts may vary in their application advice, I believe you'll achieve satisfying results either way with this versatile protectant.
A**R
Probably good, but not for me...
Didn't work so well for me. It left my brand new headlights looking foggy. I'm guessing it's because I missed the recommendations regarding heat and humidity written in nano font on the side of the can. If you live in a hot humid region, you will need to wait for cooler /dryer temperatures. I live in Houston so those days can be few and far between. I suppose I could have removed the headlights and applied the spray indoors, but I had concerns about overspray and venting. Probably a good product based on reviews and youtube, but didn't work out for me.
J**C
This is the coating for your headlights
This has two types of UV protectant (I looked it up in the material safety datasheet, MSDS, and reviewed the chemicals with Grok). Also, if you make a mistake and want to remove and re-apply, it is not the nightmare a 1K or 2K might be. Was easy to apply. YouTube experts recommend a single heavy coat rather than what is stated on the can, but I suspect you will be happy either way. I have used it on a Whelen light bar (only used cutting compound to prep) and 2015 Highlander headlights (after using 3M prep kit).This does not last forever. But results are good. Definitely a brighter headlight.
G**K
Effective Headlight Restoration Kit with Outstanding Customer Service
I was pleasantly surprised by the quick delivery of my order and the easy-to-follow instructions. Despite a minor packaging mix-up between packets 1 and 3, the company's phenomenal customer service quickly resolved the issue. They even offered to send additional steps if needed, free of charge. The results were impressive - my headlights look brand new, saving me a significant amount compared to dealership prices. I highly recommend this cost-effective product for anyone looking to restore their headlights without breaking the bank.
J**S
Protect Your Headlights with Meguiar's Keep Clear Coating
Why did you pick this product vs others?:I absolutely love Meguiar's Keep Clear Headlight Coating! It offers durable, long-lasting protection that prevents oxidation and yellowing for up to a year. The easy application process is a huge plus, making it a must-have product for anyone looking to maintain their headlights effortlessly. Highly recommend!
D**L
Smears easily
I used this to clear coat headlights that I was restoring. When I was finished clear coating them they looked great. I then left them sitting in the vicinity of my workbench for a week, until I had time to install them. During that time, my son was working on something and splashed isopropyl alcohol on the headlights. this caused the clear coat to smear. I couldn’t believe it. So I wanted to see if it could withstand something else that it might come in contact with on the road. I took and splashed gasoline on one of the lights and it smeared the clear coat as well. I ultimately decided to sand off this product and redo the headlights with something else. I would not recommend using this product if what you are clear coating could possibly come in contact with any type of volatile liquid. Otherwise it looks really good on plastic restoration.
Trustpilot
3 days ago
3 weeks ago