Desert Online General Trading LLC
Dubai, United Arab Emirates
Desert Online General Trading LLC
Dubai, United Arab Emirates

🔥 Stay cool with precision – the pro’s choice for flawless temperature control!
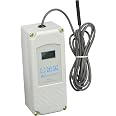
The Prtst RANCO ETC-111000-000 is a genuine OEM digital temperature controller designed for commercial foodservice equipment. Compact and lightweight, it ensures precise temperature regulation with reliable, manufacturer-approved safety standards, making it the go-to replacement part for professionals demanding consistent performance.
| Brand Name | Ranco |
| Model Info | ETC-111000-000 |
| Item Weight | 1 pounds |
| Product Dimensions | 5 x 5 x 9 inches |
| Item model number | ETC-111000-000 |
| Is Discontinued By Manufacturer | No |
| Part Number | ETC-111000 |
| Special Features | Digital |
| Color | White |
| Batteries Included? | No |
| Batteries Required? | No |
| National Stock Number | 6530-01-524-9884 |
B**R
WIRING THE RANCHO ETC FOR REFRIGERATOR
FOR OPERATING A REFRIGERATOR (or freezer ) ONLY..STEP BY STEP (complete directions)..UPDATE: 081511:MOUNTED ON THE FRIG:Added pictures of how I mounted it to the FRIG.. I did this as an after thought, and have a ton of regrets on the "mounting" design pictured (so I can tell you a whole bunch of ways to improve on this).. The mount is simple PVC plastic plumbing pipes (used one step spray paint made for plastic and metal, $4).. First, dont do the complicated "F" shape (shape of the assembled pipes) with all the "T" fittings and elbows I used (because you cant thread the thermostat thru the fittings, and they are unnecessary anyway).. If you look at the picture, note that I used T fittings to make it stand off the FRIG an inch or so.. This added a lot of complication for no reason whatsoever.. FOR YOURs simple make a F, or C shape with 1" PVC pipes, and the part that touches the frig will be nothing but a pipe (no fittings on it).. Drill hole thru pipes for mounting (drill pilot hole thru frig sheet metal, then use sheet metal screws..IMPORTANT NOTE:There is always the possability you could damage your FRIG drilling thru it.. You would be taking that chance.. I drilled away from the electrical stuff on the frig (and drilled thru insulation as I expected)..TIPS:USE 1" PVC: I used 3/4, and its way too wiggly.. 1" should work better.. PVC is strong, and 1" should be large enough to thread the thermostat thru.. You will need reducer to 1/2" at the end to mount the box with 1/2 nipple).. Dont mix the thermostat line with electrical wires (you can do it, but dont).. INSTEAD of saving $2 on the 3 hole box (down on the shopping list), get the box with more holes.. Try to use T fittings where the thermostat will get threaded thru (may not fit thru an elbow)..F SHAPE:Use (F upside down) if you have a short FRIG, and you want to mount the etc higher (mine is an F).. You can add a T fitting hear the top to have a place to run the thermostat wire (or drill a hole thru the pipe)..C SHAPE:On a tall FRIG, get two 1/2 plastic male thread fittings, and glue them to male two identical L shapes (of PVV pipes).. Assemble them to the box and you have a C shape (ready to mount to FRIG)..THERMOSTAT:Run it thru the PVC pipes.. It doesnt have to be concealed completely like a commercial application.. In the pic you can see mine hanging over the top then entering the pipes.. I used rubber hose (drilled out so the thermostat would fit).. Drilling out a rubber hose turned out to be a lot of work.. I am not sure what to tell you here for drilling a hole thru the FRIG to mount the thermostat inside FRIG.. But if you do not have some way to protect the thermostat wire from the sharp metal in the hole we will drill, it will probably eventually fail and short circuit).. Using a rubber hose was a pain.. You might try finding a plastic hose (so the inside would be bigger).. But the outside of the hose will be the size of the hole you need to drill.. Then simply slide the protective hose thru the hole (thermostat wire goes thru the hose).. My rubber hose is holding itself in place by luck.. You may need some kind of caulk or something to hold the protective hose in place (maybe a dash inside the hose too to help keep the cold air inside).. I would use silicone (not sure what is food safe.. probably none of the caulks are for food contact..~~~~~~~~~~~~ end UPDUPDATE: 080711:Plugged mine in and it works perfectly.. I remember getting hung up on the long wire to drape over both sides of the FRIG.. Silly me, LOL I have a freezer chest.. At least the long wires on both sides will give me the wire I need to put it somewhere convenient (so I still firmly believe longer wires are better than getting stuck too short).. I wish now I would have paid $2 more for a box with more holes, then I could have easily attached the box to the rear of the freezer and place it at eye level with 3 pieces of water pipe.. Hell, maybe I could use the same mounting pipe to conceal the thermostat probe (drill a hole into the freezer box that enters exactly where the pipe attaches)..end: RANCO ETC UPDATE: 080711:end: RANCO ETC UPDATE: 080711:I strongly suggest printing this out if you want to follow this procedure.. I tried to lay it out linear (do it from start to finish).. Take the printout with you for the shopping list..I was unable to add pictures directly to this review, but I was able to add pictures to the main page for the ranco ETC.. I will note in the text below when to look at a picture..I bought a "freezer" chest because when you open it the cold air stays in (condensation is reduced, and energy efficiency increased).. The disadvantage is if you are doing wine or beer and its too heavy for you to lift out.. Also, I got a freezer specifically, so I can use it as either a FRIG "or" freezer later using the ETC control if I choose..I am elated there exists such a device for people like me that want to optimize flavor fermenting sauerkraut and for winemaking / beer brewing.. So, here is detailed help for anyone intimidated about wiring their own.. I will monitor for questions or corrections that may need to be made (but amazon takes a day or two to post corrections).. Unfortunately this has become "very" verbose in an attempt to me more clear .. My goal was to give the ability to wire the ETC, to the complete electrical novice.. But people who already know how to wire should skim thru for the tips to wire it perfectly (the only thing I left off was a fuse; which if you want commercial quality, simply add a 15A fuse into the ckt).. These notes are on details that are not in the directions that came with the rancho etc, but someone who knows how to do wiring could figure it out.. I am an avid tinkerer of things, so I think I can take the mystery out of how to wire it, and set it up for actual commercial use instead of hoping it works.. There is a shopping list below, of things you already need to buy; so adding $10-20 to the total cost is money well spent to do a fantastic job over a mediocre job (so plan on buying $40 worth of electrical parts, instead of $20-25?).. When wired optimally, the heavier gauge wires will dissipate heat better which protects the sensitive electronics, and allows you to later hook the rancho etc up to a very large FRIG if you decide to, because you used higher capacity wiring.. And paying $18 instead of $12 for the extension cord sets you up so you dont need to use yet another extension cord later if the plug in is too far away, and gives you the slack you need to plug the FRIG in without pulling the ETC off the FRIG..I HOPE I DONT GET A LEMON:As some reviewers complained.. Perhaps they installed this wiring incorrectly (there are ways to screw it up).. Perhaps the probe was damaged (it is replaceable I believe).. Common sense says the probe should be near what you want to control,and not in a corner so it will be open to circulating air.. I do not know if we would be better off putting the probe right on the crock... Because I feel TEMP probes tend to be delicate.. Also, see the BULLETIN below about TEMP swings, and compressor protection (this could be another area where people may be having problems).. Yet another thing that can go wrong is if pieces of copper wire get into the box when wiring it up (you need to "know" where the little pieces went when clipping the wires)..COMPRESSOR PROTECTION ?ETC NOT WORKING PROPERLY ?READ THIS IF YOU WANT TO maximize the lifespan of your FRIG (or if the FRIG is not holding the TEMP range the ETC setting is calling for).. Some troubles may "not" be the fault of the ETC, rather the limited capability of the FRIG itself.. The ETC has no ability to control the compressor cycle time (protect the compressor from damage by turning on too soon after it just ran).. My first thought was that the FRIG controls would already have this protection function built into its own controls if needed.. But perhaps this is the reason for some of the negative reviews (and no one realized what is happening).. Few people are complaining, and I saw no complaints of a broken FRIG (although this sort of thing may shorten the life of the FRIG (or it may not; I am choosing to risk it myself).. I imagine (I dont really know), depending on the design of the refrigerator, the FRIG temp range swing might be part of that protection design (in this particular case, we would have a problem), because the ETC indeed does "force" onto the FRIG a new TEMP RANGE.. The ETC can be set to control within 1-DEGREE, which I doubt any FRIG will do on its own.. The ETC is an electrical relay that functions like kid plugging, then unplugging the FRIG frequently to keep the TEMP range setting.. If you are curious, or have a problem with the TEMP control, I suggest you put the ETC temp probe in the FRIG, but do not control the FRIG with the ETC.. Then simply watch the TEMP range (I "think" you can check the temp this way) to see how the FRIG was designed to operate (if not broken, which the ETC could not cure anyway).. Then add the ETC back to control the FRIG TEMP.. And tweak back the ETC setting a degree or two tighter (IE: control the TEMP range swing not to 1 or 2 degrees, but closer to the temp swings that the FRIG wants to do on its own), and then you will see if the problem goes away (if it does go away, you can tighten up the ETC temp range one more degree at a time and you will eventually know how far you can push your FRIG)..WHY 1 DEGREE TEMP RANGE ANYWAY:For SAUER KRAUT I plan to use 3 degrees range to keep the TEMP exactly in the TEMP range given by Harsch (minus 1 degree colder to account for the possible spontaneous heating of the crock caused by fermentation).. I feel there is no reason to keep the temp so tightly controlled, because TEMP swings are common in nature.. But, I am interested if anyone has any theories that the end result might taste better.. MY KRAUT: 2-3 days at 20-22C (68-72), then 15-18C (59-64 F.) for 4-6 weeks..Wiring the ETC according to these directions sets everything up to put the ETC control on tof of the frig (but alternately you can put it somewhere else because there will be a longish cord on either end..TOOLS:TOOLS:TOOLS:Screwdriver, electrical pliers, regular pliers too, knife or razor (and you can get by with a knife if you do not have electrical pliers, but you will still need wire cutters.. an old fingernail cutter will probably work to get a clean snip).. You will need a smaller than normal screwdriver, because a full size one will not fit the ETC..SHOPPING LIST:SHOPPING LIST:SHOPPING LIST:25 FOOT 14 GAGUE EXTENSION CORD:You are spending $6 more for this longer heavier cord.. A little too long is always better than too short.. I strongly suggest you buy an extension cord as close to this one as you can (because the compression connectors and finicky.. the round diameter of the cord is what is needed to make it work).. I bought a HUSKY, round medium duty indoor/outdoor 14 gauge extension cord.. 14 GAUGE is the same wire gauge a 15a house wiring uses, so it should easily handle any FRIG as a load (rather than overloading which leads to premature failure of electrical devices, or possibly fire)..DBL GANG (SQUARE) OUTDOOR ELECTRICAL BOX: (and cover):Costs $9-10.. Get 1/2 inch size (refers to holes in box).. Also get a plain square metal cover.. Get 3 hole (cheaper).. NOTE: if you are planning to install to frig, get the box with more holes..ELECTRICAL CONNECTORS:3 RED twist ties, and 2 YELLOW twist tie connectors.. The ones with the little wings are easier to use..COMPRESSION FITTINGS:Buy two of these (one for each cut end of the extension cord.. See the notes for the extension cord to buy (above).. I suggest you ask the store clerk for help with the connectors (because the compression fittings can be confusing, and there are so many to choose from, so it will save time to locate them).. The size .260-.375 worked perfectly on mine.. The compression connector looks more finished, and more importantly protects the extension cord from damage.. The type of compression fitting will be the one with a larger rubber chunk, rather than a little plastic or rubber ring only..FITTING TO CONNECT THE ETC TO THE DBL GANG BOX:You are going to have to piece things together here..~1~ Buy a 1/2 pipe nipple (that screws into the center hole on the DBL GANG BOX)..~2~ Buy a bag of 3 or more 1/2 - 3/4 reducing washers (in the electrical stuff)..~3~ Buy a standard lock washer..JUMPERS:BUY 14 GAUGE SOLID COPPER..YOU NEED: 1-green (or bare), 2 blacks 1-red and 1-white (a foot or a little less long.. I used about 8 inches).. These wires are to extend from the DBL GANG BOX to the ETC BOX (JUMPERS).. At home depot you can buy this wire by the foot.. First choice is to buy individual solid copper wires in all the colors you need.. Else buy a multi cable with several colors inside so all you need to do is cut it up (avoid buying stranded wires, unless you have a soldering iron needed to tin the ends.. because stranded and stranded dont do well together in the wire nut connectors)..IF YOU REALLY WANT TO SAVE $5-10 or so:Don't, LOL.. If you get extension and jumper wires both 14 gage, it will strong enough to handle "all" the current a 15A plugin can put out.. But, 20A fuses are sometimes found in kitchens too (and you would need 12 gage wire to handle a 20A ckt).. But, the ETC in this application is only going to operate a FRIG.. So 16 gauge probably OK if you really really want to save a few dollars, because 16 gauge should be able to handle 13-14 AMPS, which I feel sure would be ok for a normal FRIG.. But as mentioned before 14 gauge will give you handle a large FRIG Should you choose inthe future, and dissipate heat better (which may be cheaper if this saves your ETC, or FRIG from a break down).. Also, if you choose 16 gauge the compression fittings are finicky, and probably will not work, and these are a nice touch to doing a good job..FUSE:I did not add a fuse to mine.. You can add one if you want an additional layer of perfection and safety.. Typically commercial use things will have these fuses rather than home use things (I mean you would basically be putting a fuse on an extension cord, and who does that).. Home depot did not have this part, or I might have picked one up.. They said to try fries, but maybe radio shack would have some kind of fuse.. I wanted something on the outside of the box like a fuse button, rather than a fusible link that would end up hidden in the DBL GANG BOX.. Wire the fuse in series with the black power wire coming from the plug-in side (series means cut the black wire only and add the fuse)..FEET (and screws):FEET (and screws):The box will scratch the FRIG without these feet.. You will need 4-feet.. Get the rubber ones in the picture (you should be able to identify them at the store).. Here is the story here.. I forced the sheet metal screws that came with the feet, and they barely worked.. The rubber starts to curl up (with screw about to pop thru the rubber which means the rubber falls off, just as the screw goes in deep enough to do its job).. Since I already stripped the holes in mine, I will have to buy longer sheet metal screws, and then add the washers..DO THIS INSTEAD:DO NOT use the screws that come with the rubber feet.. Instead buy 4 screws (round head machine screw that fits in the DBL GANG BOX HOLE without stripping the threads).. I do not know the exact screw size because I did not use these (just carry the box over to the hardware section and get the right screw).. The length needs to be 3/4" or longer (can be deep as the box allows).. Also buy 4 washers (same size as the screw.. size #6 or #8.. I cant remember).. POP the washers into the rubber so the screw doesnt pull thru (if the washers you find are too small, you can probably find other styles of washers that will work).. Or, it may be easier to get sheet metal screws (and strip the threads out when you force them in), because these can be found with heads large enough to fit the rubber feet..NOTE: After all this screwing around with the feet, I ended up permanently mounting mine on the frig (so the feet are hanging in the air, LOL)..USEFUL INFO:USEFUL INFO:USEFUL INFO:BLACK: hot (smaller slot on plug in).WHITE: neutral (larger slot in plug-in)..GROUND (bare or green):CONNECTOR BLOCKS INSIDE THE ETC:THE UPPER RIGHT TERMINAL BLOCK: Gets power from the house plug (white and black 120v where white is the common)..THE LOWER LEFT TERMINAL BLOCK: Is a simple relay that actuates according to the temp control setting of the ETC (the common terminal here is a hot=black wire jumper).. When the relay actuates, the hot then gets connected to the NO (normally open) terminal which turns on the FRIG compressor (for this wiring setup).. We connect the RED wire to the FRIG to the NO (middle) terminal..ADD THE CONNECTORS TO THE ELEC BOXS:ADD THE CONNECTORS TO THE ELEC BOXS:ADD THE CONNECTORS TO THE ELEC BOXS:USE THIS TECHNIQUE FOR ALL ELEC CONN: Tighten by hand, then crank it with regular pliers until it is satisfyingly snug.. Generally the rule of thumb if to tighten it tight enough so that it is difficult if not impossible to remove by hand..CUT THE EXTENSION CORD:Cut 10 foot from the end where the FRIG will plug in (so it will drape from the top of the FRIG to the floor (the other end of the extension cord drapes off the other side so it helps hold the ETC in place rather than dragging it off onto the floor).. The remainder is 15 feet for the plug in end to hunt for an outlet (which really is not too long after it travels 5-8 feet down the side of the FRIG)..STRIP THE SHEATH:This is probably the trickiest part, because this is where you can screw up and "easily" cut to bare wire ("really" take your time here.. lightly score then pull and twist by hand to deepen the scores.. score a little more repeat).. You have to remove about 6" of the sheath from each end of the extension cord you cut (to break out the individual wires).. How to do this is to bend the whole cord sharply, then very carefully score with a razor blade/knife at the bend where there is stress on the casing (DO NOT CUT TOO DEEP (not even all the way thru the sheath covering) a simple score (think glass or diamond cutting) will make it so you can pull, and the casing should come off in your hand).. You can carefully grip near the score mark with pliers, and sometime the sheath comes off easier this way..CUT UP THE JUMPERS:Locate the 14-gauge wires you bought, and simply cut up 2-BLACK, 1-WHITE, 1-RED, 1-GREEN or bare (you can strip all the insulation off one of the other colors to get a bare wire) ~~~ 10" - 12" long each (I cut mine a little short, and sure enough it made considerable more work for me).. Strip the casing off only one end now (strip the 1/3 inch end only) to expose the copper wire (elec pliers make this part very easy; else this will be a little tedious with a razor blade.. if you dont have elec pliers, cut rather gently so you dont gouge the wire too bad (if you score and pull it somewhat works like removing the sheath above).. One end should be 5/8 - 3/4 inch (strip these later as you wire), the other end should be about 1/3 inch..TIGHTEN EXTENSION CORD INTO COMPRESSION FITTINGS:Open up the compression fitting (the parts get in the way so remove them now).. Note the direction of the rubber piece (the cone shaped part of the rubber needs to meet the same cone shape metal).. Screw the compression fittings into the already threaded holes 180 degrees apart on the DBL GANG BOX. Warning, I scratched my box with the pliers (easy to do because the grip is so small).. Crank with pliers until you can not budge them by hand.. Slide the pieces over the extension cord, and then insert the extension cord so the sheath extends into the DBL GANG BOX (MAKE SURE YOU PULL IN 8 INCHES LONG TOTAL INSIDE THE BOX, or it makes more work for you).. Tighten with pliers and monitor so you know when the compression starts grabbing the wire.. Then keep tightening until you cannot pull it out by hand (you may need to tighten these quite a bit)..IF YOU HAVE PROBLEMS WITH COMPRESSION FITTING:These can be a PITA (good luck, they can be finicky), so first make sure you have the right size compression fitting (there are at least two sizes).. If this fails too, I would try to insert a wire bet in a sharp V shape to take up more space inside the rubber compression part (but MAKE SURE THE COPPER IS OUTSIDE THE BOX.. in other words only the non conductive wire casing can be "inside" the elec box).. Worst case scenario is to replace these with simple romex connectors (that look bad, and can break the casing of the extension cord; if you use this option, monitor to know when the ext cord snugs up in the fitting, and tweak it only a little more tight)..THIS 180 DEGREE DESIGN WAS CHOSEN:To allow us to drape the extension cord over the FRIG 180 degree apart, so the wires hanging over both sides of the FRIG will help hold the ETC in place rather than dragging it off onto the floor..ATTACH ETC TO THE DBL GANG BOX:ATTACH ETC TO THE DBL GANG BOX:ATTACH ETC TO THE DBL GANG BOX:We need a little special care here for two reasons.. In the case of the plastic ETC box, if you get it too tight, it will weaken the plastic over time, and BAM, it may break apart later as the stress deteriorates the integrity of the plastic.. So tighten until its only a little snug and not wobbly (if a kid tried hard, they would be able to unscrew it by hand).. When I tightened mine to the directions below, I noticed I was able to turn (adjust) the etc box, without the lock washer unscrewing itself, which is what you hope for).. I think the washers made this lucky thing happen.. Second reason is we need a spacer BT the box's so that the casing of the ETC can be screwed back on without binding when done (and the etc can be adjusted to turn right or left without scraping the other box)..Screw the 1/2" nipple into the center threaded hole on the back of the DBL GANG BOX.. I found a paper towel folded a lot, was enough to protect the threads from the pliers (if you dont protect the threads, it may be much more difficult to to do the final tightening later).. Screw it in kind of tight (better to protrude more into the DBL GANG BOX)..HOW TO STACK THE WASHERS BETWEEN THE BOXES.. This is a little tricky, so find the picture I added to the main page of the ETC.. The caption in the PIC says the following: Copy this one exactly, so the lock washer will allow you to pivot the ETC without loosening the lock washer.. NOTE the 2 washers between the two boxes (the larger side of each washer is touching the other).. Then the larger part of the washer inside the ETC box is touching the plastic. The LOCK WASHER teeth point into the washer..The reducing washers go against the plastic to protect the plastic from the lock washer teeth.. I am not sure which is best way to face these washers, but the exact way it was done in the picture works great.. The two washers between the BOXES separate them slightly (so the screws will not bind when attaching the ETC cover later)..IT MAY BE DIFFICULT TO TIGHTEN THE LOCK WASHER.. I felt lucky I was able to get my pliers on it.. If you cant tighten it with pliers, you can get a hammer and screwdriver (or punch) and tap on the lock washer to tighten it..I was able to turn my ETC to adjust which way I wanted it to face.. I did tighten it enough so it was kind of hard to turn.. It would be possible for a kid to keep twisting it in the same direction until it breaks the wires inside (kids can break anything though).. With the larger DBL GANG BOX, and the combination of stranded wires used, you should be able to twist this thing back and fourth 180-360 degrees all you want with no damage to the wires (as the stranded are flexible).. The only concern is that the metal lock washer might someday lose its lock and then the whole box would start to become lose and wobbly (no deal breaker, just open it up and tighten it.. or not)..WIRING THE ETC : informational:WIRING THE ETC : informational:WIRING THE ETC : informational:Dont do this part yet (informational). You need a small screwdriver to tighten the ETC screws.. We used a separate box (to make a base for the ETC to stand on) and because it will be much easier to slide wires to adjust the needed length into the ETC box (and have a much better feel when the wire is actually in the connector).. Notice the length of the bare copper into the ETC BOX terminals.. Snip the copper all the same length so no more than 1/4" of bare copper is visible, yet the copper is visible so you know the metal is clamping down on the wire.. Tighten these down (same technique; when wire is snug, tighten a little more than test that you cannot pull out the wires easily).. This procedure helps you not break the etc terminal, which would kill your day until you could get a new ETC unit..TERMINAL SCREW NOTE:The screws that tighten the wires in the ETC terminals are tricky.. You still turn the screwdriver clockwise to tighten, but expect the metal clamp to move "up" to clamp onto the wire.. What is tricky is that when you turn the screw counter clock wise to open up the hole, it appears above where you think it should be..IMPORTANT !!!IMPORTANT !!!IMPORTANT !!!Be careful when snipping wires (thorough this entire procedure) so that pieces of conductive copper do not end inside the electrical box's (this happens all the time, and this is very bad for obvious reasons).. Little pieces of copper can short the main power.. And even the smallest little shard of a strand can easily burn out the $60 ETC electronics..HOW TO CONNECT THE WIRES:HOW TO CONNECT THE WIRES:HOW TO CONNECT THE WIRES:Wait until you are installing the twist connector to strip the ends off the wires (because you typically snip the wires to the length you want at this point anyway)..If any of the wires go to the ETC box then install the JUMPERS into the ETC terminal first (then gather the wires to install the twist connector).. Strip the ends 1/3 inch, then stick the wire thru the hole into the ETC terminal and tighten down the screw..Find all the wires that will be wire tied together and cut to the same length (whatever length you feel is convenient to add the wire tie).. Strip the wires and install the twist connector..ALL SOLID COPPER JUMPERS TRAVEL FROM THE DBL GANG BOX INTO THE ETC BOX..USE YELLOW TWIST CONNECTORS: for 2 wires..USE ~ RED ~ TWIST CONNECTORS: for 3 wires..EVERY TIME YOU CONNECT A WIRE,into a connector or terminal, "monitor" when the wires snug up by pulling lightly on the wire (or "ALL" the wires if a twist connector).. When you find the wire (wires) are starting too hold together, then twist a few more times, then verify that the wires cannot be pulled out by hand.. This may sound tedious, but its easy, and if you dont, there will probably be a bad connection that will haunt you and make the equipment act flakey down the road.. I hate to suggest this, because tightening these twist connectors with your fingers is should be adequate.. But I cheat and "gently" hold all the wires with the pliers to get the last turn.. IF YOU DO THIS, MAKE SURE YOU DO NOT DAMAGE THE WIRE CASINGS (I guess you could add electrical tape if you need to)..HOW TO STRIP THE ENDS OF THE EXTENSION CORD WIRES:The solid wires are easy to strip (so here is how to do the stranded ones).. Strip to 3/4 inch (or a pinch longer because stranded wires pull up slightly when you tighten them).. The elec pliers most people have are for solid copper, not stranded, so use one gauge larger to strip the ends (or you "will" shave off the copper strands of the wires).. The plastic is usually soft on these, so you can swirl the wire in a circular shape (in the larger gauge hole of the pliers) to strip the ends.. If you only have a knife be extra careful stripping the ends because the thin strands are very easy to cut when you score.. Fortunately, the casing on these is usually easier to remove (so lightly score and pull with fingers usually works)..INSTALL CONNECTOR on :::::: SOLID:Hold solid copper together with the ends even and twist the connector on..INSTALL CONNECTOR on :::::: SOLID TO STRANDED:These are a little trickier.. Twist each individual stranded wire tip to make it act more like a solid wire.. When you hold the ends together to attach the twist connector, the ends of the stranded should be slightly longer than the copper, slightly overlapping (longer than the solid) but we are only talking 1/16 inch (or less).. Solid to stranded is trickier, so if it fails (you find you can pull it out with your fingers), try again (until you can not pull the wires out by hand).. There is extra length in the wires, so it it fails twice, then cut off the frayed ends (1 inch), and try again..BEGIN ACTUAL WIRING CONNECTIONS:BEGIN ACTUAL WIRING CONNECTIONS:BEGIN ACTUAL WIRING CONNECTIONS:-1- CONNECT GROUND WIRE IN DBL GANG BOX:Locate the green screw that came with the box (you can find the screw hole location in the pictures for this item).. This screw will cut its own threads when you screw it into the hole (which makes a sure electrical connection).. Wrap the copper wire around the screw in a semi circle around the screw (bend circle in the direction so that tightening the screw will tend to close the circle rather than open it).. Tighten down the screw.. Install twist connector..GROUND IS VERY IMPORTANT BECAUSE:we have wires in a metal box, and so it must be grounded for electrical safety.. Likewise, this ground wire will transfer thru the extension cord to also ground the metal cabinet of the FRIG (to prevent the metal FRIG casing from becoming 120 VOLTS if an electrical fault develops someday)..-2- CONNECT WHITE WIRES.. White jumper to UPPER RIGHT TERMINAL BLOCK (C terminal on the right)..-3- CONNECT THE BLACK WIRE FROM THE SIDE THAT PLUGS INTO THE WALL: This one has 2-BLACK jumper wires into the ETC box (to provide 120 V power to two places)..Black jumper to UPPER RIGHT TERMINAL BLOCK (120, middle terminal).Black jumper to LOWER LEFT TERMINAL BLOCK (C terminal on the right)..-4- CONNECT THGE BLACK WIRE THAT WILL GO TO THE FRIG (RED JUMPER).. Red jumper goes to LOWER LEFT TERMINAL BLOCK Normally Open (NO) terminal in the middle..ADD RUBBER FEET TO THE BOX:See the SHOPPING LIST SECTION for details.. Locate the screws and washers you bought and attach the feet thru the same holes that hold the BOX cover in place.. I did not do this part, so you may have to improvise.. There are several options..If the screws I asked for in the SHOP LIST dont work well (and the feet still are not very secure).. You can simply go back and buy the exact same size screw that came with the feet (sheet metal screw), but at least 1/2 inch longer.. This will probably work without washers, because with a longer screw you will not need to over tighten (which then pops the rubber feet off the screws) to secure the cover, and the head will be larger too.. But try to use washers anyway here..VERIFY ALL WIRING WAS DONE CORRECTLY:VERIFY ALL WIRING WAS DONE CORRECTLY:VERIFY ALL WIRING WAS DONE CORRECTLY:It's stupid to leave anything to chance when it comes to electricity.. There are usually layers of safety built into the system, but believe me one or more layers are frequently already compromised due to shoddy workmanship and defective materials (and you never know what might happen if you spill some frig liquid, or a kid pulls on the wires.. Make sure the wiring was done correctly here so this safety layer remains intact..OPTIONS:There are several ways to test this.. You can use an OHM METER, VOLT METER, or if you have no way to test, then either st
M**E
Requires wiring installation
I want to contrast this Ranco ETC-111000 with the Lux WIN100 Heating & Cooling Programmable Outlet Thermostat.WIRING PROJECTThis Ranco can only be installed by someone familiar with electrical wiring.It does not come with any power input cord or any plug socket to get power out.I cut an extension cord in two and wired the two cut ends through a cable clamp to the Ranco. So I had a plug to plug into the wall and a socket to plug my heater into. But if you're not familiar with the hot, neutral, and ground wires of a power cord, you should not attempt it. Also, it took me an hour to connect the cords. If you are familiar with electrical wiring, the wiring diagram is clear.I found the ETC-111000-000W on the internet that is prewired with a plug and socket.The Lux is ready to plug into the wall right out of the box.TEMPERATURE RANGEThe Ranco's temperature set point range is -30ºF to 220ºF.Settable differential range 1ºF to 30ºF.The Lux temperature set point range is 45ºF to 90ºF.Differential/swing default is 1ºF. Can be set from 1ºF to 9ºF.TIME FUNCTIONSThe Ranco has no time functions. I tested for a delay in cool mode between turn off and turn on so the pressure on the AC compressor can go down. After the Ranco turned off, I got it to turn on again in 13 seconds by warming the probe in my hand.The Lux can have 4 different temperature settings each day, and the weekends can be different than the weekdays. Or, it can be set to one temperature all the time.The Lux waits 2 minutes on cool between turn off and turn on so the pressure on the AC compressor can go down.REMOTE TEMPERATURE PROBEThe Ranco comes with an 8ft cable on the probe which can be lengthened to 400ft by splicing in more cable.The Lux comes with a 1 inch cable on the probe.VOLTAGEThe Ranco works on 120 or 208/240 volts.The Lux works on 120 volts with a max load of 15 amps.IN CASE OF ERRORI want to illustrate the danger if a mistake is made in setting the heat/cool mode or if someone plays with the settings.I put 2 100w light bulbs in the lower oven drawer of my oven.I set the Ranco to 75ºF. Then I made one error: I set the Ranco to cool.It heated up to 175ºF. I wanted to see what happens at the Ranco limit of 220ºF, so I boosted the heat with the oven's heater. When the temperature passed 220ºF, the Ranco turned off and displayed "EP". As the temperature dropped, the Ranco displayed 220 and turned on again.The power strip that I plugged the two 100w lights into was warped by the heat and can't be used anymore.Ranco has addressed this problem by providing a keypad lockout switch inside the enclosure. When in locked position, the keypad is disabled.Also, Ranco warns:"All ETC series controls are designed as operating controls only. If an operating control failure could result in personal injury or loss of property, a separate safety control and/or alarm should be installed."I did the same test with the Lux using the Ranco probe to read the temperature because the entire Lux device was in the oven. I stopped the test at 115ºF. The Lux displayed "HI" but was still supplying power to the light bulbs.I have no children or anyone in my house who would touch these thermostats. If I connect them to a heater, I use the low power range and use the thermostat on the heater as a backup to prevent over heating. When I connect a thermostat, I watch it go through one on-off cycle to see if it is operating correctly.
J**E
This is a very good unit. Don't be put off by the Cold ...
This is a very good unit. Don't be put off by the Cold Temperature label. It only means you can control whether is will come on if the temp gets too low or too high. Part of the set up is to choose H for hot or C for cold. You can also choose Fahrenheit or Celsius as part of the set up. To wire it, just go to several of the You Tube instructional videos, watch at least 3 and you will not have a problem. You don't have to be an electrician, just watch a video. I chose to use a black cord instead of an orange one, as it looks better. The temperature cord is quite long and the thermometer end part seems to be put on the wire with epoxy or some glue. It seems to be waterproof for me. I am thinking about drilling a hole in the lid of the crock pot and putting in a rubber grommet and putting the probe through the grommet so the lid can sit flat and keep the heat in. (Bought the crock pot at thrift store). Have used if for 48 hour sous vide and I love that you can change the temp on the fly. Does the job
B**T
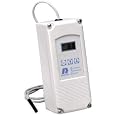
Outdoor boiler aqua stat
Easy to read aqua stat. I will use this again.
Trustpilot
2 months ago
1 month ago
2 months ago
3 weeks ago